Paul and I got together a couple weeks back for another installment in our 40k narrative campaign set on Caluphel Prime. We recently updated our ongoing meta-plot in an effort to bring the campaign into the current setting of Warhammer 40,000 8th edition. We used the galaxy-wide warp storm known as the Cicatrix Maledictum to effectively relocate Caluphel across the galaxy and reboot our storyline to allow players to bring in new and exciting reinforcements. Read all about it here!
By pure chance, we had an opportunity with this game to actually play out one of the frantic struggles that took place on the planet during those dark, terrible days on Caluphel, when the warp storm raged and the heavens were rent asunder.
How did we get here? Well, Paul had acquired a deck of the Open War cards for Warhammer 40k. These are essentially a series of random events and objectives that you can combine at random to create custom scenarios.
We opted to go this route for our game, and we ended up drawing up a scenario featuring a supply raid with — you guessed it — a warp storm raging in the skies above the battlefield. It was a perfect fit for our narrative. Two hard-bitten warbands, squaring off for much-needed supplies while the Cicatrix Maledictum crackles in the firmament above … almost too perfect, actually, and it served as the perfect bridge game to bring our campaign into the current 40k storyline.

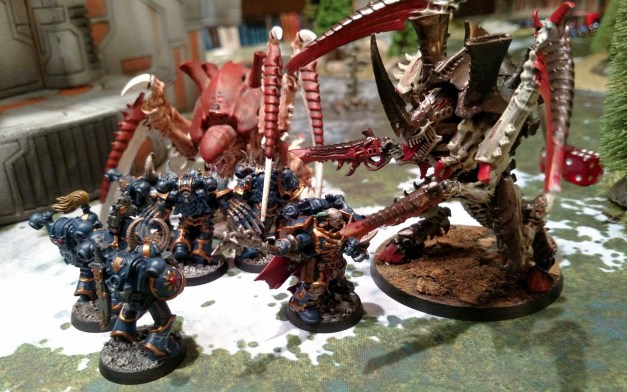
Paul brought his Tyranids and I mustered my Chaos Night Lords. We played at 60 Power Level, so not a huge game, but bigger than a typical skirmish. We added one extra victory parameter: If the Chaos marines won the game, they would be able to reactivate the astropathic beacons to triangulate the planet’s new position in the galaxy, thereby revealing its presence to nearby allies (and enemies, presumably). Basically, this would open up Caluphel to much-needed reinforcements. If Paul won, the beacons would remain dark and the armies on the planet’s surface would be on their own and at the mercy of the ravening Tyranid hordes.

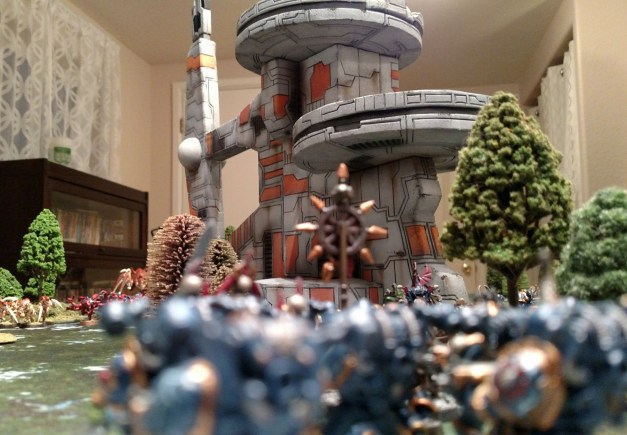
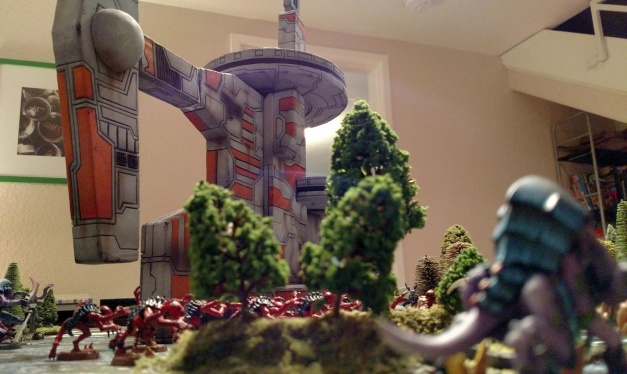
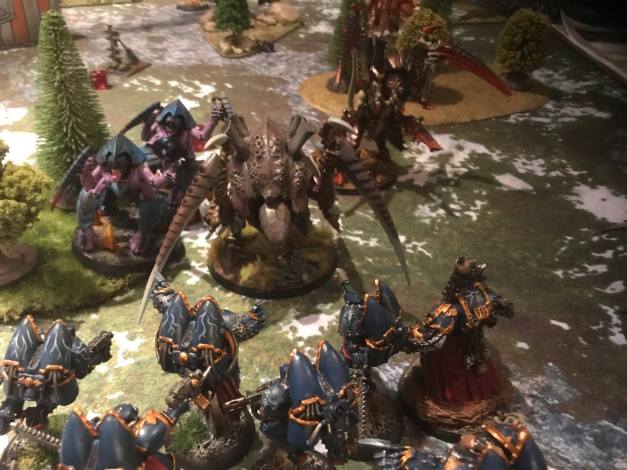
We set up a visually stunning table using two new scenic items from Paul: a new tundra-themed FAT mat, and an epic terrain piece that he originally commissioned for his Tau army, used here to represent an abandoned astropathic broadcast station located high up on the slopes of the Upper Norse Ring Mountains.

With that, we got underway. This was Paul’s second major outing with his Tyranids, and his first time piloting the faction solo. His army was well balanced: a brood of termagants, a brood of hormagaunts, a brood of genestealers, a brood of gargoyles, a few Tyrant Guard, a couple Carnifexes, and a Hive Tyrant.
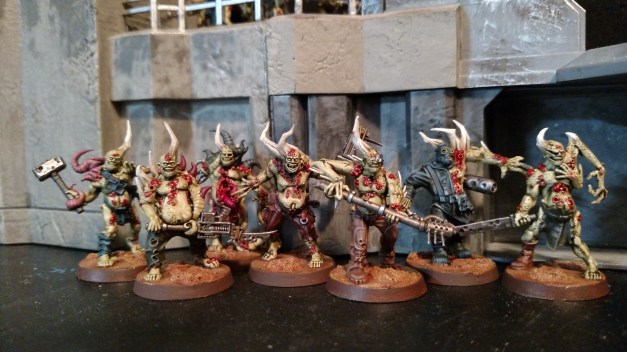
For my Night Lords, I was really looking forward to fielding my newly painted 10-man squad of Chaos Raptors. Oh, and I was using the brand-new Codex: Heretic Astartes, which meant I had access to a ton of nifty new rules to try out.
We placed 6 supply cache markers on the battlefield as objectives, then started playing. The massive terrain piece in the center of the table proved to be an interesting tactical element. The fighting platforms in its upper reaches promised superior fields of fire and cover, but its sheer bulk caused both of our armies to split as we maneuvered around it. We both spent considerable time agonizing over our opening moves, since a unit committed to one side of the massive facility was likely going to be there for the duration of the game.
On the left flank, I sent a squad of cultists and a 10-man squad of Chaos Space Marines toward an undefended supply cache marker. Paul anticipated this move and sent hormagaunts, genestealers and Tyrant Guard to deal with the situation.


Unfortunately, he didn’t count on my flamethrowers! Neither did I, actually — I didn’t make a conscious effort to bring them. I just played my guys as WYSIWYG, and there happened to be a few flamers mixed in there.
In 8th edition, flamers are absolutely brutal against melee troops — particularly when firing on overwatch, as they cause d6 auto hits, with no to-hit rolls required! And we quickly learned that my dice were on fire (pun intended), as I rolled no fewer than 3 sixes on various auto-hit rolls from flamers over the course of the game.

So my flamers set fire to Paul’s ambitions on the left flank, but his Tyrant Guard proved harder to crack. My Chaos Space Marines ended up in an epic, slogging combat with the Tyrant Guard on the flank that lasted for most of the game. Here’s a peek at the action.

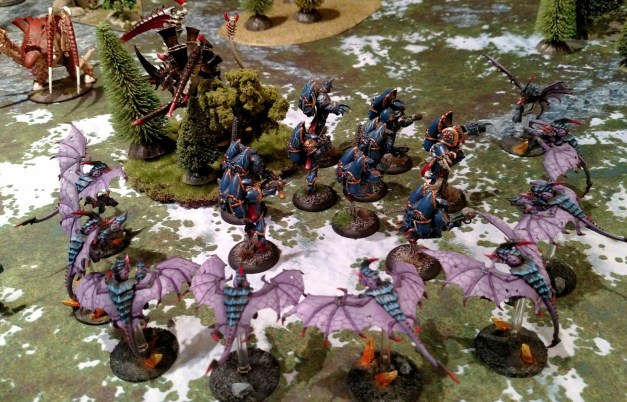
The other flank saw the bulk of the battle, as my Chaos Sorcerer, Night Lord infantry squad and Helbrute squared off against a brood of termagants, a brood of gargoyles, more Tyrant Guard, two Carnifexes and a Hive Tyrant!

The odds were not in my favor until my Chaos Raptors screamed in from above, dealing massive damage to the Hive Tyrant and generally wreaking havoc in the backfield.
From this point, the battle swung wildly back and forth as both Paul and I enjoyed setbacks and advantages. More than once I was able to use In Midnight Clad, my Night Lords custom strategem from the new codex, to survive a particularly brutal ranged combat attack.
And the warp storm raging in the skies meant that psyker powers were more difficult to manifest, and failure was more devastating for all involved. This came into focus for me when I rolled a 1 on my psyker check. This would have meant Perils of the Warp, likely dooming my sorcerer to a shrieking death, with additional gruesome effects for my nearby guys due to the warp storm penalties. Thankfully I had a spare command point and was able to re-roll the check!
My sorcerer was safe … until the Hive Tyrant charged in and pulped him into a fine pate, perfect for spreading on a cracker as hors d’ouevre. Gulp.
Nearby the Raptors squared off against a Carnifex and a few Tyrant Guard. My Chaos Lord had teleported into battle alongside the Raptors, and I was pretty excited to get him into combat. Unfortunately I got a little over-zealous and strayed too close to a Carnifex. A few hacks and slashes later, and my Chaos Lord was toast. Mistakes were made!
The tide turned when my Helbrute stampeded through a small copse of trees, emerging to engage the Hive Tyrant in single combat. This was the Helbrute’s moment, as he walloped the Hive Tyrant with his power fist, destroying the foul xeno and breaking its psychic hold on the rest of the army.

The Hive Tyrant was Paul’s only HQ unit, which meant that the rest of his army was now operating on pure instinct, unable to do much in the way of tactical maneuvering. Combined with my fairly solid hold on the primary supply cache marker, that pretty much put a bow on this game for me.
I had emerged victorious! As a result, the Chaos forces eagerly reactivated the astropathic beacon, hoping to send a signal to the blighted armies of Nurgle that were mustering at the nearby Scourge Stars for the invasion of Ultramar. Of course, the side effect was that the Imperials could also use the astropath beacons to call for reinforcements, but whatever.
Paul’s Tyranids, presumably, scattered into the alpine wilderness.
We agreed that this was arguably our best game of Warhammer 40k yet. The Open War cards were a total hit…we loved the randomness and flavor they added to the game.
This was also the first game where I finally felt like I “got” the flow of a Chaos Space Marine army. I did a much better job using my aura effects and supporting my units. The new Chaos codex added a huge variety of options for me to try out. As I told Paul, none of the new rules seemed particularly game-breaking, but they all seemed extraordinarily flavorful, which is just about the best possible outcome for narrative gamers like us.
So the stage is set for new battles, counterattacks, maneuvers, sabotages, intrigues and grand plans on Caluphel. The astropathic beacons are once again active … who will answer the call?