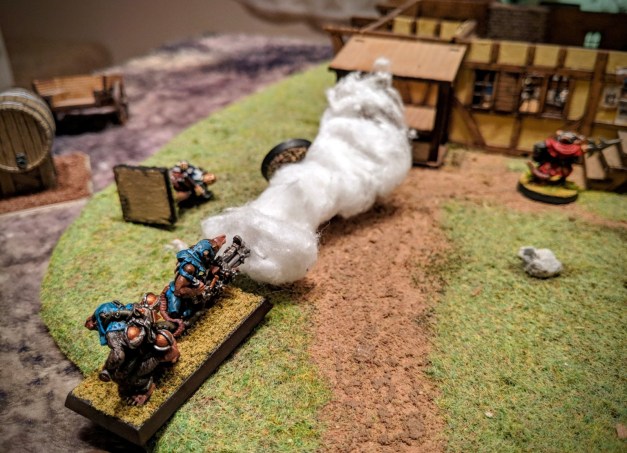
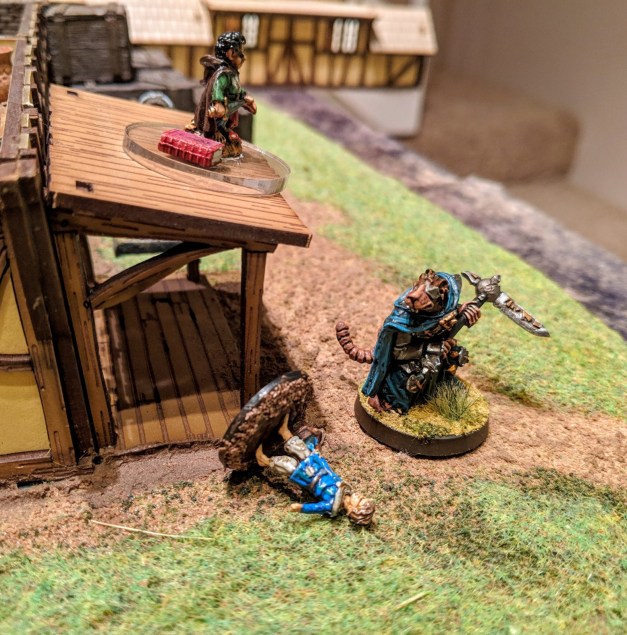
Nightfall on Caluphel Prime. But it was not true night, as the darkening sky was scored by thousands of beam weapons and missile trails. A mighty naval clash was taking place in low orbit, pitting the Imperial Navy’s ships of the line against a Death Guard battlegroup commanded by Typhus himself from the bridge of his fearsome battleship Terminus Est.
The Imperial ships were struggling to land men and materiel to Outpost Omicron — a frontier settlement currently held by the Maggot Magnates. The venerable Chaos Space Marines had been hand-picked by Mortarion to implement the final endgame on Caluphel Prime. Opposing them at the Outpost were the advance elements of the Bareaga 402nd and a contingent of Adeptus Astartes from the Salamanders chapter.
After days of constant, grinding combat at Outpost Omicron, both opposing factions were caught off guard by the arrival of Hive Fleet Tiamat. The sudden appearance of the Tyranids opened up a new front in the desperate battle to save Caluphel and prevent the Death Guard’s diabolical machinations from coming to pass.
The Imperium’s defenders were stretched thin as they were forced to pivot and respond to a new Tyranid threat surging up from the subterranean spawning pits outside the Outpost. The dormant xenos under the planet’s surface were on the move, evidently drawn to the sudden arrival of Hive Fleet Tiamat in orbit. A two-front war was developing in the grim, waning days of the campaign on Caluphel Prime…
So that’s the setup for “Cloudburst,” the final chapter in our
Caluphel Awakenings campaign. Paul, our stalwart GM for this campaign, really pulled out all the stops for this game. As before, we structured it as an Apoc-Luck game day, where we rented out a local rec center, brought food to share, and played out a massive 40k apocalypse-sized game to determine the narrative outcome of our campaign.

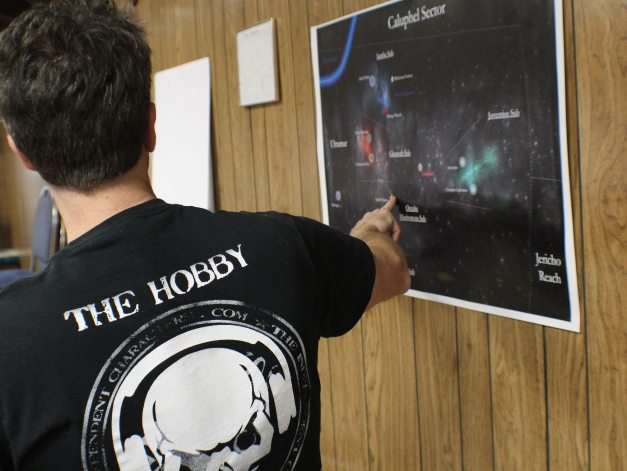
At the outset of our apocalypse game, Paul walked us through some of the major plot points that had developed over the course of the 6-month campaign. He even brought visual aids — what fun!
If you’ve not caught up on
Caluphel Awakenings, please do check out everything we’ve been up to since July. The goal of the campaign had been for us to further develop the lore, factions, backstories, and maps for the entire Caluphel sector. This we achieved with great aplomb — check out the
sub-sector writeups that were contributed by the campaign players!
Paul had set up a massive two-front game. The Imperial defenders would deploy on a central hilltop dominated by a landing zone and some basic fortifications. They would be tasked with holding the Tyranids within their cavern strongholds, lest their feeding pits link up with the Hive Fleet in orbit (the large stone archway denotes the entrance to the subterranean battlefield).
In addition, the Imperial players must also duel with the Death Guard in the narrow streets of Outpost Omicron, in a desperate attempt to prevent the Chaos Space Marines from releasing the Chaos God Malice from his prison. So you know, just another day in the office, no big deal.
This game (like all of our games) used only painted models. As always, we were floored by the visual spectacle of beautifully painted armies clashing on a battlefield of gorgeous terrain.
Here’s a look at the battlefield at the outset of the game.


We had a third game set up — a covert operation by the Adeptes Astartes Forgotten Suns chapter to thwart a Genestealer Cult who strive to birth an evil almost as dangerous as Malice. We’d planned to run it as a Kill Team game concurrent with the main apocalypse game, with subsequent impacts on the narrative outcome. Alas, Vincent wasn’t able to join us to Paul reconfigured the game to focus solely on the apocalypse game.

With that settled, we began unpacking our armies and munching on some of the snacks scattered around the room. Here’s a look at the “armies on parade” at the outset of the game.
Hive Fleet Tiamat – Paul’s Tyranids


42nd Auxiliary Relief Battalion – Jim’s Imperial Guard (plus Bif’s Juventius Free Regiment, not pictured)


Paul’s battlefield was intended to represent the battle after it had been raging for several straight days. As a result, the deployment zones were immediately adjacent to each other, literally touching, which meant all of the armies began the game toe-to-toe with their enemies. The Death Guard were knocking on the Salamanders’ front door on turn 1…

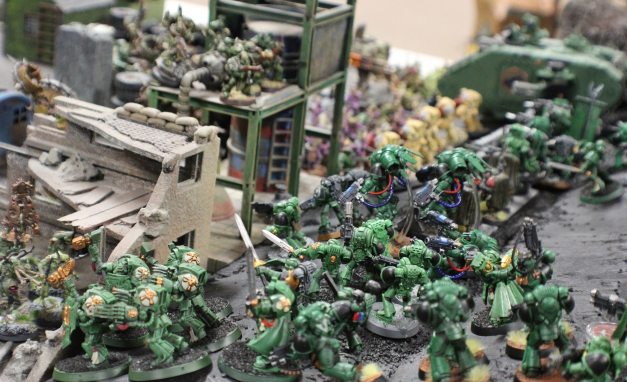

And likewise, on turn 1 the massed infantry and armor of the Imperial Guard were facing a purple horde of Tyranids charging out of the cave entrance directly into their ranks!


This really added to the playability of our game … armies didn’t have to waste hours of time crossing empty fields to engage. The meatgrinder got underway almost immediately!
Each side of the battlefield featured 3 minor objectives and 1 major objective. Each was scored at the end of each turn. We used a whiteboard to keep a running tally of the score as each faction racked up the points. Having lots of objectives that scored often created a very dynamic battlefield where individual maneuvers and key command decisions carried a lot of weight.
Just like last year, we used a timer to keep our turns short and sweet. Turn 1 was limited to 30 minutes each. Each subsequent turn was limited to 20 minutes! We learned to pre-plan our moves, play fast, and prioritize unit selection to make sure we got the most out of our time “on the clock.” With such brief turns, everybody was bound to forget or overlook something. It just added to the overall chaos of the battle!

With such a massive battle, I wasn’t able to capture the turn-by-turn action, but I got the overall narrative flow. As such, I’ll divide up this report into “early turns” and “later turns” for both sides of the battle.
Tyranids vs. Imperial Guard – Early Turns
On the left flank of the Imperials’ deployment area, the Imperium’s greatest asset — its endless waves of human soldiers and sturdy armored vehicles — were deployed at the cave entrance. Success for both the Tyranids and the Imperials was dependent on pushing into the opposing deployment zones. Jim’s 42nd Auxiliary Armored Fist battalion staged three Chimeras right at the front line, each packed with infantry squads.
Buoying them at the front line was Jim’s newly painted Knight Warden — a truly monumental “miniature” (if the term could even be applied to such a behemoth) that Jim had completed just a few days prior to the game. Behind the front line was a “wall of steel” — Leman Russ tanks, more Chimeras, two Basilisks, and a mighty Baneblade, supported by Imperial Guard heavy weapon squads emplaced behind barricades and sandbags.

Facing the defenders of the Imperium was the boiling horde of xenos from Hive Fleet Tiamat. Paul put two units of 15 Genestealers all along the front line to soak up wounds. But behind them were the monsters — two Carnifexes, a Tervigon birthing Termagaunts, and a massive Barbed Hierodule with twin barbed strangler guns and massive scything talons. What force could stand against such inhuman savagery?!

The Imperials took the initiative in the first round, firing salvo after salvo from their emplaced tanks and guns into the swarm of Genestealers. The massive onslaught had predictable results, wiping out entire squads and leaving a hole in the Tyranid front line.
However, these losses were inconsequential to the Hive Mind. Paul’s genestealers fell back, then he moved up his big monsters and fired their gruesome bioweapons directly into the Chimeras that were guarding the central objective. The Chimeras withstood the long range venom cannons of the Tyranid warriors, but withered under the crackling energy of the Hierodule’s guns.
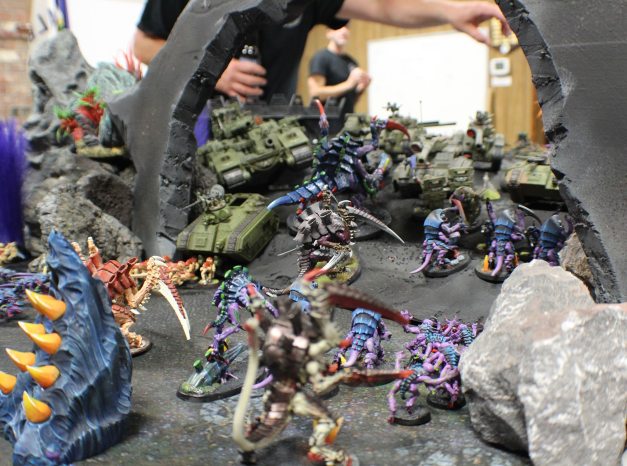
With a hole now blasted in the Guard’s flank, Paul sent his Tyranids charging in. The remaining Chimeras were cut down by the Carnifexes (Carnifices?) and at the bottom of the round the Tyranids had successfully exited the caverns and were beginning to rampage into the Imperials’ landing zone.

As the xenos approached, the Guard held firm. Jim’s Knight and Baneblade focused their attention on the Carnifex holding the center objective and their combined fire brought it down, chittering its rage as it fell apart. The two remaining frontline Chimeras continued a grinding melee against the Termagaunts and the remaining Genestealers. But there were simply too many bioforms for the vehicles to overcome. For every Tyranid crushed under tire tread and track, two more emerged from the caverns to throw themselves against the tanks.
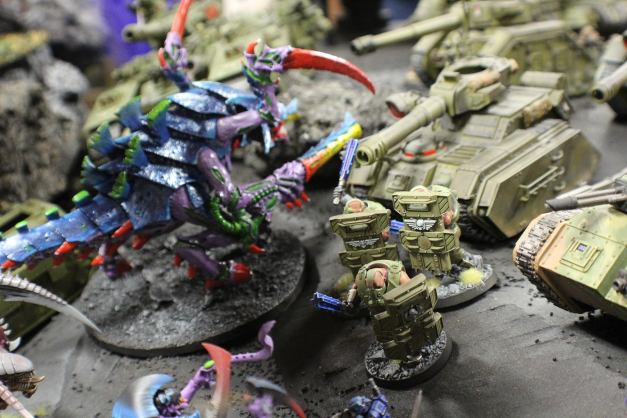
When the Tyranids counterattacked, the next wave of vehicles exploded under the crackling energy of the biofire. Jim’s Knight fell apart, kneecapped and billowing smoke. A Leman Russ melted into the earth and a third Chimera was sliced open. Jim desperately hoped for one of his vehicles to explode and take down Tyranids with a death-blast of fire, but roll after roll gave him no relief. All the vehicles went down in defeat with no explosion. So, too, the mighty Knight.
Death Guard vs. Salamanders – Early Turns
Across table, in the ruined streets of Outpost Omicron, the other sector of the battle began with a sustained barrage of firepower from the Salamanders Space Marines. The Maggot Magnates absolutely choked the street, giving the Astartes an embarrassment of targets to choose from — moaning hordes of Poxwalkers, trudging squads of Plague Marines, ghastly biomechanical daemon engines, and even a few tanks.
The salvos fell among the Death Guard and immediately began doing damage. But the front lines pushed relentlessly forward, engaging with the advance squads of Salamanders even as fast-moving assault units fell among the Astartes’ backfield support.

At this point, I began a series of rather spectacular dice rolls related to the Death Guard’s
Disgustingly Resilient keyword trait. Time and time again in this game,
Disgustingly Resilient would save my bacon in the face of almost certain annihilation.
And so the Maggot Magnates mobilized, trudging forward in the face of deadly fire from the Astartes. On the front lines, Typhus hefted his manreaper scythe and urged on the hordes of poxwalkers. Spewing smoke and trailing a stream of foul ichor, a Helbrute stomped to the head of the pack and paused to unleash the full force of its lascannons into an Astartes Land Raider that was mere meters away, such was the devastating proximity of the two armies.


Even as I advanced, I tried to mess with Alex’s backfield as much as I could. He had several concentric lines of Salamanders behind defensive formations; these I targeted with my flying daemon prince and with my hovering bloat-drone.
After a couple turns of combat, we agreed that Alex’s Salamanders were incredibly resilient! They benefited from re-rolls and special rules that made it possible to resurrect slain characters! Plus, Alex had lots and lots of guns pointed at my Death Guard, which is basically where you want to be in a game like this.


Elsewhere, my bloat-drone armed with a fleshmower plowed into a squad of terminators, beginning an epic melee that would last for most of the game (though the bloat-drone fleshmower would fall early on in the clash).

As the first two turns drew to a close, it became clear that, in my haste to advance out of Outpost Omicron and crush the Salamanders, I had left my three backfield objectives dangerously unprotected. Oops! It was just sheer luck that Alex hadn’t been able to capitalize on my goof. The next two turns would show just how important these objectives would become…
Tyranids vs. Imperial Guard – Later Turns
As turn 3 began, the battle in the skies above took a desperate turn. Tentacled Tyranid hive ships began to grapple with the battleships and cruisers of the Bareaga 402nd, and debris began raining down on the battlefield below. In the chaos, a mortally wounded bio-vessel plummeted out of the sky, roaring over the battlefield to crash into the mountain across from Omicron Outpost, earth and rock fountaining up into the sky.
From the smoking crater came an unholy roar, and the defenders of the Imperium were utterly stricken to see a massive Hierophant Bio-Titan lurch to its feet and emerge from the crater.
This was Paul’s big reveal — he had acquired and painted up a Heirophant model especially for this game. He had played his cards close, not telling anyone about the big twist until the moment when he unpacked his brand new toy from its foam carrying case.

There was much chuckling from Jim and Bif, as they had both discussed — and summarily discarded — the possibility of Paul bringing a Bio-Titan. Hah, the joke’s on them!
Paul wasted no time in putting his shiny new toy to work. The Heirophant instantly became Public Enemy #1 as it pulped squads of Guardsmen and ripped into the Baneblade.
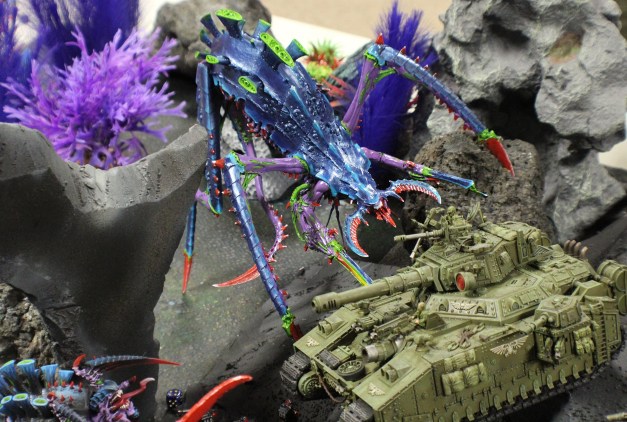
Of course, Paul was a benevolent GM for this campaign finale. He wasn’t just going to spring a surprise like that on the Imperial players without giving them something in return. That “something” was a heavy lifter blasting down from orbit to deliver another Knight to face off against the gargantuan titan rising from the earth. Huzzah!
I don’t have a picture of the moment the knight arrived, so how about another pic of the Heirophant looming over a battlefield full of soon-to-be scrap metal?
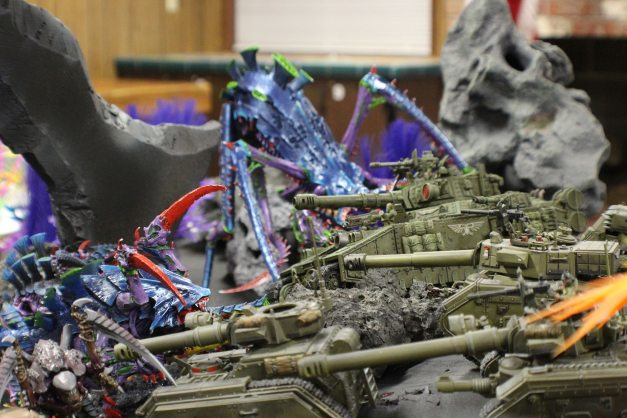
The arrival of the Bio-Titan seemed to signal a turning point in the battle versus the Tyranids. Jim’s Baneblade and Knight lashed their combined firepower at the Heirophant, while his last Guardsmen and Sentinels held the final positions at the summit of the landing field. However, the Bio-Titan seems to just shrug off their fire and in one turn hollowed out both the Baneblade and Knight. Jim returned fire on the next turn killing the two Carnifex’s and the birthing machine Tervigon. From their furious death cries, the earth rose up and a burrowing Trygon took their place on the slopes leading up to the landing pad.

At this point, the battle on the west front had decisively turned in the Tyranids favor. The remaining guardsmen and their vehicles staged a retreat, falling back to their landing zone and turning their guns to the east in support of the Salamanders trying to stem the push from the Death Guard…
Death Guard vs. Salamanders – Later Turns
Alex surprised everyone by resurrecting his slain company commander with his veteran apothecary’s nifty ability, returning the potent leader to the battlefield as the game entered its critical final turns. At this point, most of my best units had been shot to pieces, leaving just a core of infantry — namely, those nigh-unkillable poxwalkers! We took a look at the points tally on our side of the board and found that this was going to be a very, very close game. It would almost certainly come down to one or two victory points. With that in mind, Alex and I both made our final moves to seize the objectives scattered around Outpost Omicron.
For this task, I had my ace in the hole —
the Hideous Bloom, my squad of Blightlord Terminators that arrived via deep strike and began an implacable advance directly into the heart of the Imperial lines, shrugging off small arms fire as they went.
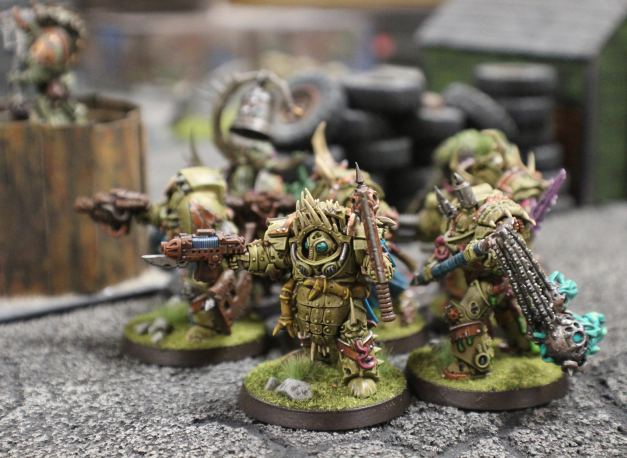
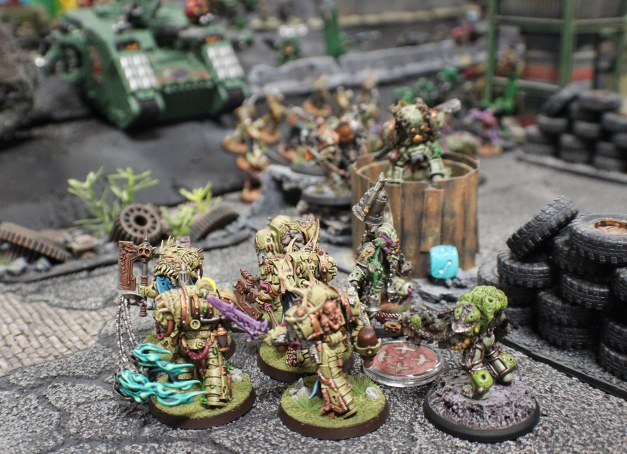
These guys were the newest miniatures I had completed for my Death Guard army, and we made many jokes about how their fate was sealed — like all newly painted minis, they would certainly be killed before they had a chance to do anything of note on the battlefield.
It is known.
But! The gods had a sense of humor this day, and it came to pass that my Blightlords were able to play a pivotal role in the final endgame.
In one extraordinarily brutal round of combat, they brought the Land Raider to the brink of destruction. It was summarily destroyed by a piece of flaming debris that crashed down from orbit. (We were using the “Orbital Debris” twist from the Open War deck to model the massive naval battle raging overhead, and I got a lucky dice roll in the final turn of the game to finish off the Land Raider. Great stuff!)

After that, they swept up the hill and into an Imperial Guard heavy weapon squad, killing as they went. Blood, pus, and ichor flowed like water as the Hideous Bloom marched onward. At the end of the game, one Blightlord remained alive to contest a crucial minor objective. Defiant to the last.

But the battle would be decided elsewhere, by none other than the Herald of the Plague God himself. Typhus, who had been leading more or less from the back for the entirety of the game, finally strode forth on the final turn to slaughter the remnants of a squad of Terminators and (with the help of some Poxwalkers) seize the major objective.
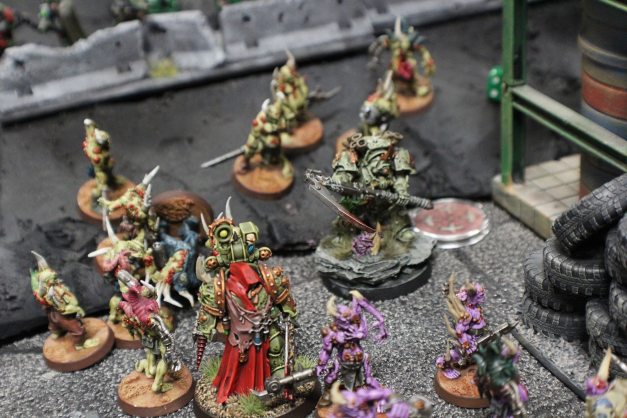
We all agreed that it was incredibly fitting that a final, pivotal play of the game came down to Typhus. It’s always nice when your awesome named characters get to steer the narrative outcome. Anyway, that sealed the deal for the battle in Outpost Omicron. And with the Heirophant Bio-Titan rampaging virtually unchecked on the other side of the table, it seemed that doom had come for the forces of the Imperium.
In one of final actions of the game, the Bio-Titan directed its full firepower at the Alex’s Knight standing in the middle of Outpost Omicron. Paul rolled dice for what felt like 10 straight minutes as the beast unleashed stupendous punishment on the gallant Knight. Incredibly, the Knight made its saves — withstanding the firepower that had killed everything else in its path!
But it was a pyrrhic victory, as the Imperial lines were collapsing and utter annihilation was imminent. With that, the game came to an end.
Conclusion
At battle’s end, the combined victory points of the Tyranids and Death Guard clinched a
Total Victory over the forces of the Imperium. Paul had mapped out a variety of scenarios for each possible combination of outcomes for the game. This outcome was certainly the most dire — the Death Guard were able to detonate the control mechanism and release the Chaos God Malice from his prison where he had slumbered for untold millennia.
So violent was his reentry into the material plane that the planet Caluphel literally cracked into pieces, atmosphere aflame and millions of inhabitant dying in the emptiness of space. Here’s Paul graphically describing what happened to the planet as Malice roared to life.

In addition, the Total Victory outcome meant that Hive Fleet Tiamat crashed headlong into the Caluphel Sector, sending three tendrils of its army snaking through the various sub-sectors that we had mapped out earlier. The three tendrils represented the Tyranids’ overwhelming momentum coming off the victory on Caluphel Prime, and they also spelled certain doom for the beleaguered Imperial defenders elsewhere in the sector. Here’s a look at the map showing the Tyranids’ gains.

Amid the chaos and confusion, another terrifying creature made itself known. From the bio-pools of Caluphel’s caverns, the deadly Hive Queen of Tiamat rose up and then transcended to the Fleet above, annihilating hundreds of unfortunate Guardsmen in the psychic scream that accompanied her birth.
This marked the arrival of Paul’s Hive Queen, a new model he had commissioned by Colin Ward to lead his Tyranid army. Here she is in all her sensual glory.

But wait! There’s more. Paul had drawn up an entire postgame show for us to commemorate the Caluphel Awakenings campaign. Each of us got a special award for our contributions to the campaign, and Paul surprised us by unveiling a custom plaque for the campaign winner. As you can see, it’s got blank spots so it can be used repeatedly for future campaigns. The idea is that each year’s winner gets to hold onto the plaque until the next campaign, kind of like a Warhammer 40k Stanley Cup.

Now is the part where I tell you that this year’s campaign winner was actually yours truly! All of the monthly contributions — painting, writing lore, making maps — had points attached to them, and I managed to sneak out a win for the overall five-month campaign.
So the plaque goes home with me!

Actually, it’s already on display in my workshop. Doubtless I’ll have some stiff competition next year — these guys will be coming for my title!

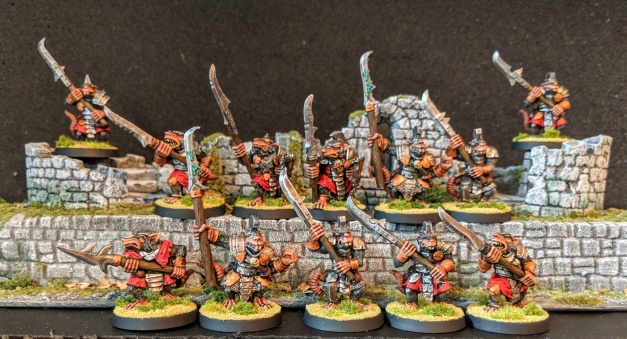
Thus ends another incredible satisfying Warhammer 40k campaign. This one really pushed our small game group to new heights of painting, modeling, and narrative gaming. Paul masterminded this thing from start to finish, and we all gave him a hearty round of applause at the end. Follow along on Comrade’s Wargames to see where we’ll go from here!






 If you’ve not caught up on

 With that settled, we began unpacking our armies and munching on some of the snacks scattered around the room. Here’s a look at the “armies on parade” at the outset of the game.


 And likewise, on turn 1 the massed infantry and armor of the Imperial Guard were facing a purple horde of Tyranids charging out of the cave entrance directly into their ranks!

 This really added to the playability of our game … armies didn’t have to waste hours of time crossing empty fields to engage. The meatgrinder got underway almost immediately!
Each side of the battlefield featured 3 minor objectives and 1 major objective. Each was scored at the end of each turn. We used a whiteboard to keep a running tally of the score as each faction racked up the points. Having lots of objectives that scored often created a very dynamic battlefield where individual maneuvers and key command decisions carried a lot of weight.
Just like last year, we used a timer to keep our turns short and sweet. Turn 1 was limited to 30 minutes each. Each subsequent turn was limited to 20 minutes! We learned to pre-plan our moves, play fast, and prioritize unit selection to make sure we got the most out of our time “on the clock.” With such brief turns, everybody was bound to forget or overlook something. It just added to the overall chaos of the battle!
 With such a massive battle, I wasn’t able to capture the turn-by-turn action, but I got the overall narrative flow. As such, I’ll divide up this report into “early turns” and “later turns” for both sides of the battle.
 Facing the defenders of the Imperium was the boiling horde of xenos from Hive Fleet Tiamat. Paul put two units of 15 Genestealers all along the front line to soak up wounds. But behind them were the monsters — two Carnifexes, a Tervigon birthing Termagaunts, and a massive Barbed Hierodule with twin barbed strangler guns and massive scything talons. What force could stand against such inhuman savagery?!
 The Imperials took the initiative in the first round, firing salvo after salvo from their emplaced tanks and guns into the swarm of Genestealers. The massive onslaught had predictable results, wiping out entire squads and leaving a hole in the Tyranid front line.
However, these losses were inconsequential to the Hive Mind. Paul’s genestealers fell back, then he moved up his big monsters and fired their gruesome bioweapons directly into the Chimeras that were guarding the central objective. The Chimeras withstood the long range venom cannons of the Tyranid warriors, but withered under the crackling energy of the Hierodule’s guns.
 With a hole now blasted in the Guard’s flank, Paul sent his Tyranids charging in. The remaining Chimeras were cut down by the Carnifexes (Carnifices?) and at the bottom of the round the Tyranids had successfully exited the caverns and were beginning to rampage into the Imperials’ landing zone.
 As the xenos approached, the Guard held firm. Jim’s Knight and Baneblade focused their attention on the Carnifex holding the center objective and their combined fire brought it down, chittering its rage as it fell apart. The two remaining frontline Chimeras continued a grinding melee against the Termagaunts and the remaining Genestealers. But there were simply too many bioforms for the vehicles to overcome. For every Tyranid crushed under tire tread and track, two more emerged from the caverns to throw themselves against the tanks.
 When the Tyranids counterattacked, the next wave of vehicles exploded under the crackling energy of the biofire. Jim’s Knight fell apart, kneecapped and billowing smoke. A Leman Russ melted into the earth and a third Chimera was sliced open. Jim desperately hoped for one of his vehicles to explode and take down Tyranids with a death-blast of fire, but roll after roll gave him no relief. All the vehicles went down in defeat with no explosion. So, too, the mighty Knight.
 At this point, I began a series of rather spectacular dice rolls related to the Death Guard’s Disgustingly Resilient keyword trait. Time and time again in this game, Disgustingly Resilient would save my bacon in the face of almost certain annihilation.
And so the Maggot Magnates mobilized, trudging forward in the face of deadly fire from the Astartes. On the front lines, Typhus hefted his manreaper scythe and urged on the hordes of poxwalkers. Spewing smoke and trailing a stream of foul ichor, a Helbrute stomped to the head of the pack and paused to unleash the full force of its lascannons into an Astartes Land Raider that was mere meters away, such was the devastating proximity of the two armies.

 Even as I advanced, I tried to mess with Alex’s backfield as much as I could. He had several concentric lines of Salamanders behind defensive formations; these I targeted with my flying daemon prince and with my hovering bloat-drone.
After a couple turns of combat, we agreed that Alex’s Salamanders were incredibly resilient! They benefited from re-rolls and special rules that made it possible to resurrect slain characters! Plus, Alex had lots and lots of guns pointed at my Death Guard, which is basically where you want to be in a game like this.

 Elsewhere, my bloat-drone armed with a fleshmower plowed into a squad of terminators, beginning an epic melee that would last for most of the game (though the bloat-drone fleshmower would fall early on in the clash).
 As the first two turns drew to a close, it became clear that, in my haste to advance out of Outpost Omicron and crush the Salamanders, I had left my three backfield objectives dangerously unprotected. Oops! It was just sheer luck that Alex hadn’t been able to capitalize on my goof. The next two turns would show just how important these objectives would become…
 There was much chuckling from Jim and Bif, as they had both discussed — and summarily discarded — the possibility of Paul bringing a Bio-Titan. Hah, the joke’s on them!
Paul wasted no time in putting his shiny new toy to work. The Heirophant instantly became Public Enemy #1 as it pulped squads of Guardsmen and ripped into the Baneblade.
 Of course, Paul was a benevolent GM for this campaign finale. He wasn’t just going to spring a surprise like that on the Imperial players without giving them something in return. That “something” was a heavy lifter blasting down from orbit to deliver another Knight to face off against the gargantuan titan rising from the earth. Huzzah!
I don’t have a picture of the moment the knight arrived, so how about another pic of the Heirophant looming over a battlefield full of soon-to-be scrap metal?
 The arrival of the Bio-Titan seemed to signal a turning point in the battle versus the Tyranids. Jim’s Baneblade and Knight lashed their combined firepower at the Heirophant, while his last Guardsmen and Sentinels held the final positions at the summit of the landing field. However, the Bio-Titan seems to just shrug off their fire and in one turn hollowed out both the Baneblade and Knight. Jim returned fire on the next turn killing the two Carnifex’s and the birthing machine Tervigon. From their furious death cries, the earth rose up and a burrowing Trygon took their place on the slopes leading up to the landing pad.
 At this point, the battle on the west front had decisively turned in the Tyranids favor. The remaining guardsmen and their vehicles staged a retreat, falling back to their landing zone and turning their guns to the east in support of the Salamanders trying to stem the push from the Death Guard…

 These guys were the newest miniatures I had completed for my Death Guard army, and we made many jokes about how their fate was sealed — like all newly painted minis, they would certainly be killed before they had a chance to do anything of note on the battlefield. It is known.
But! The gods had a sense of humor this day, and it came to pass that my Blightlords were able to play a pivotal role in the final endgame.
In one extraordinarily brutal round of combat, they brought the Land Raider to the brink of destruction. It was summarily destroyed by a piece of flaming debris that crashed down from orbit. (We were using the “Orbital Debris” twist from the Open War deck to model the massive naval battle raging overhead, and I got a lucky dice roll in the final turn of the game to finish off the Land Raider. Great stuff!)
 After that, they swept up the hill and into an Imperial Guard heavy weapon squad, killing as they went. Blood, pus, and ichor flowed like water as the Hideous Bloom marched onward. At the end of the game, one Blightlord remained alive to contest a crucial minor objective. Defiant to the last.
 But the battle would be decided elsewhere, by none other than the Herald of the Plague God himself. Typhus, who had been leading more or less from the back for the entirety of the game, finally strode forth on the final turn to slaughter the remnants of a squad of Terminators and (with the help of some Poxwalkers) seize the major objective.
 We all agreed that it was incredibly fitting that a final, pivotal play of the game came down to Typhus. It’s always nice when your awesome named characters get to steer the narrative outcome. Anyway, that sealed the deal for the battle in Outpost Omicron. And with the Heirophant Bio-Titan rampaging virtually unchecked on the other side of the table, it seemed that doom had come for the forces of the Imperium.
In one of final actions of the game, the Bio-Titan directed its full firepower at the Alex’s Knight standing in the middle of Outpost Omicron. Paul rolled dice for what felt like 10 straight minutes as the beast unleashed stupendous punishment on the gallant Knight. Incredibly, the Knight made its saves — withstanding the firepower that had killed everything else in its path!
But it was a pyrrhic victory, as the Imperial lines were collapsing and utter annihilation was imminent. With that, the game came to an end.
 In addition, the Total Victory outcome meant that Hive Fleet Tiamat crashed headlong into the Caluphel Sector, sending three tendrils of its army snaking through the various sub-sectors that we had mapped out earlier. The three tendrils represented the Tyranids’ overwhelming momentum coming off the victory on Caluphel Prime, and they also spelled certain doom for the beleaguered Imperial defenders elsewhere in the sector. Here’s a look at the map showing the Tyranids’ gains.
 Amid the chaos and confusion, another terrifying creature made itself known. From the bio-pools of Caluphel’s caverns, the deadly Hive Queen of Tiamat rose up and then transcended to the Fleet above, annihilating hundreds of unfortunate Guardsmen in the psychic scream that accompanied her birth.
This marked the arrival of Paul’s Hive Queen, a new model he had commissioned by Colin Ward to lead his Tyranid army. Here she is in all her sensual glory.
 But wait! There’s more. Paul had drawn up an entire postgame show for us to commemorate the Caluphel Awakenings campaign. Each of us got a special award for our contributions to the campaign, and Paul surprised us by unveiling a custom plaque for the campaign winner. As you can see, it’s got blank spots so it can be used repeatedly for future campaigns. The idea is that each year’s winner gets to hold onto the plaque until the next campaign, kind of like a Warhammer 40k Stanley Cup.
 Now is the part where I tell you that this year’s campaign winner was actually yours truly! All of the monthly contributions — painting, writing lore, making maps — had points attached to them, and I managed to sneak out a win for the overall five-month campaign.
So the plaque goes home with me!
 Actually, it’s already on display in my workshop. Doubtless I’ll have some stiff competition next year — these guys will be coming for my title!
 Thus ends another incredible satisfying Warhammer 40k campaign. This one really pushed our small game group to new heights of painting, modeling, and narrative gaming. Paul masterminded this thing from start to finish, and we all gave him a hearty round of applause at the end. Follow along on Comrade’s Wargames to see where we’ll go from here!

