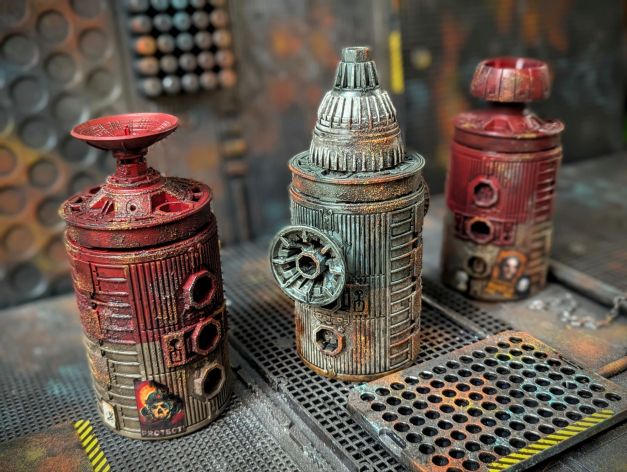
I’m having a great time lately exploring textures and weathering techniques, particularly on terrain since larger pieces offer a more expansive surface to play around with. Earlier this month I knocked out some simple terrain pieces for my grimdark battle board: a few cylindrical shapes that could work as silos, tanks, or other types of industrial ephemera.
The pieces themselves are from the Robotix toy line. These were modular building kits from the 1980s that could be used to make interesting spaceship-type creations. They even had some motorized gears and other accessories for making your stuff move!
Anyway, my buddy Karl hooked me up with a pile of leftover Robotix pieces a while back. As you can see, the plastic pieces have wonderful surface designs, with lots of valves, hatches, ladders, and other interesting details sculpted on.
I set to work grimdark-ifying them for use on my Inq28 battlefield. That entailed some heavy texturing, first with Vallejo pumice paste, followed by some haphazard sprinkles of sanded grout. I just wanted some variable textures on the large flat surfaces to create a little visual interest and pick up a drybrush.
I started by basecoating these silos with gray Rustoleum primer, then sprayed on couple muted colors … a light sage blue in the photo above, and red/white for the other two. The sage blue ended up a little too subtle, but that’s OK, it was a good starting point for all of the painting to come.
After that, I splashed on a heavy coat of my homemade black wash. I keep a bottle of this stuff close at hand whenever I’m working on grimdark terrain. It’s my personal recipe, rarely replicated precisely each time, but mostly involves Future Floor Wax, a dollop of black craft paint, a couple squirts of brown sepia ink, and water to achieve the desired consistency. It dries really fast and adds a protective coating, too!
From there, I broke out the sponges and dabbed on various browns, oranges, and yellows to achieve the rust effect. I also used some good old fashioned Dirty Down Rust in a few places, but that stuff is really too expensive to use at scale for terrain.
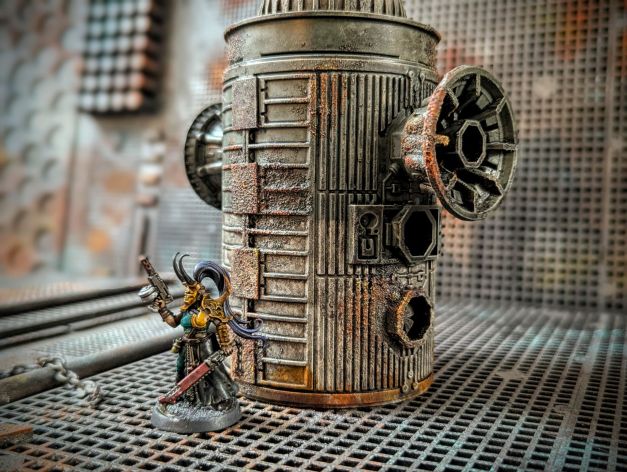
I was particular pleased with those recessed socket holes … I found some perfectly sized little ventilation fan bits to place inside the recessed areas. A perfect union of random junk I’ve been carrying around with me for 10+ years!
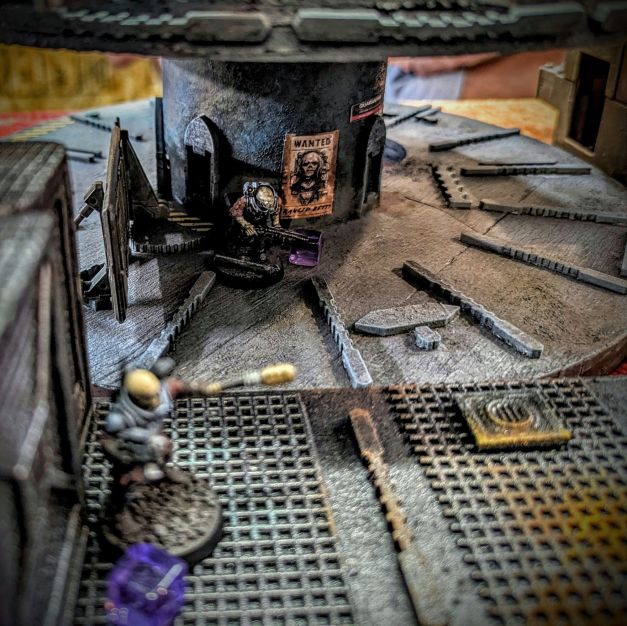
For the final touch, I affixed some Necromunda-inspired propaganda posters on the silos, toward the bottom at eye level for 28mm figures.
All in all I’m very pleased with these little scatter pieces. They’ll work great as objectives and tall blocking terrain on my grimdark battle board. I was particularly pleased with the creative process … I don’t think I used any paintbrushes smaller than a fat craft brush on these pieces. Most of the work was done with a spray can and a ripped up piece of sponge!
I’ll try to get these pieces on the battlefield ASAP, maybe for the next session in our Seditious Whispers Inq28 campaign. Stay tuned!
Last month John and I kicked off a mini-campaign that we have been working towards for several months.
Seditious Whispers is John’s baby: a short, Inq28-style narrative campaign set in our homebrew Warhammer 40,000 setting and focused on the shadowy efforts of Inquisitor Zoltav Throckswain as his warband attempts to outmaneuver The Quorum of the Deep, a nascent Genestealer Cult uprising on Hive Sacrament on the planet Gamma Euphorion Prime.
From a timeline perspective, the events of Seditious Whispers take place before the widespread conflict in The Cauldron, our previous narrative 40k campaign.
We’re using Shadow War: Armageddon to play out the campaign. If you’re a regular reader of Comrade’s Wargames, you’ll no doubt recall that we’ve been exploring this particular ruleset for the last 12 months or so. After probing the edges of SW:A, we’ve concluded that it’s a serviceable option for Inq28 grimdark skirmish games of all sorts.
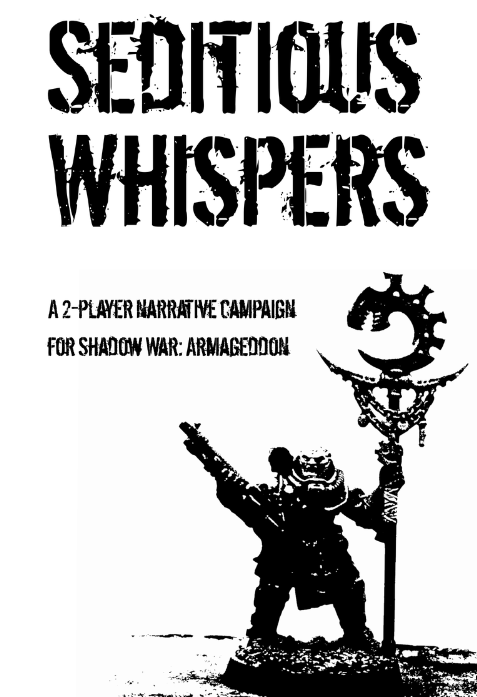
Oh, and the best part about Seditious Whispers? John made it into a zine. Check this out!
He did the layout & illustrations himself! Absolutely cracking.
Getting Started
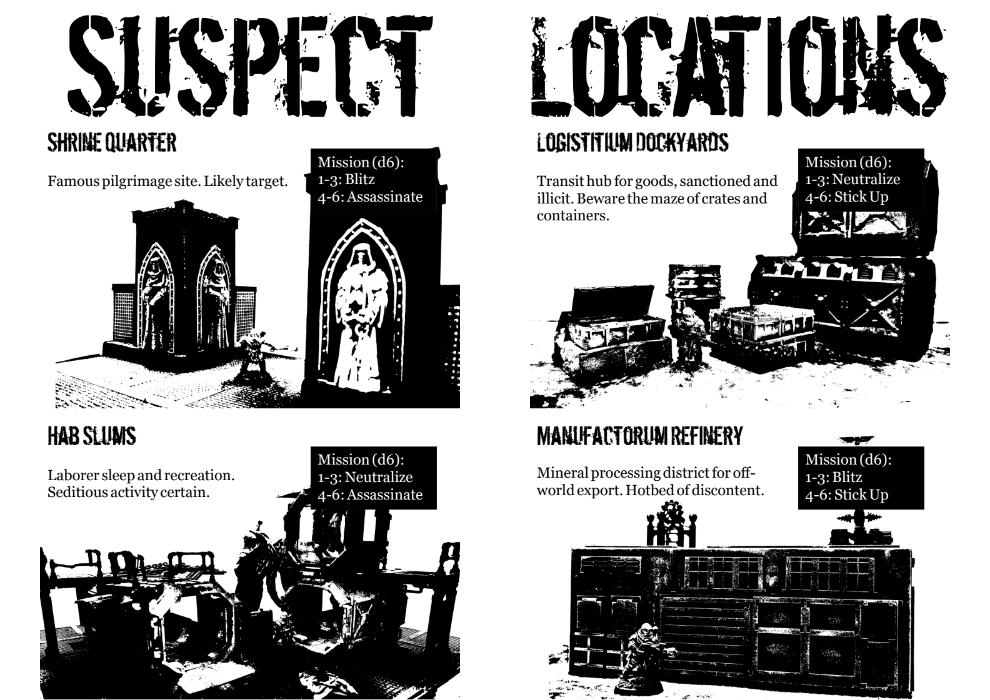
The zine lays it all out: Seditious Whispers is designed as a short, tight, focused narrative campaign for two players. Per the campaign guidelines, we’ll play 4 sessions (approximately) followed by a campaign finale.
Inquisitor Throckswain builds a 1,200 point list to start the campaign and may not buy any additional reinforcements. He’s got what he’s got, for as long as it takes.
The Quorum of the Deep player (John in this case) assigns warbands of varying point values to each of the four locations. Throckswain and his cadre investigate these locations, never knowing exactly what they might uncover. Along the way, Throckswain gathers Intelligence points, which accumulate toward the inevitable endgame showdown.
For our first session, I randomly selected the Logistitium Dockyards to investigate. It was defended by a Minor Cell – a small warband, not quite as potent as my team. The campaign instructed us to set up and play through a Hit & Run scenario, which further limited the number of figures each side could bring.
So both John and I had some important pre-game decisions to make…which of members of our warband do we bring along to explore the Logistitium Dockyards?
Into the Grimdark
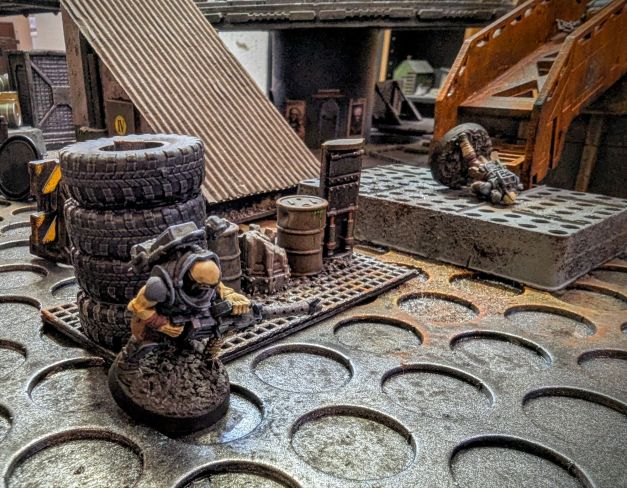
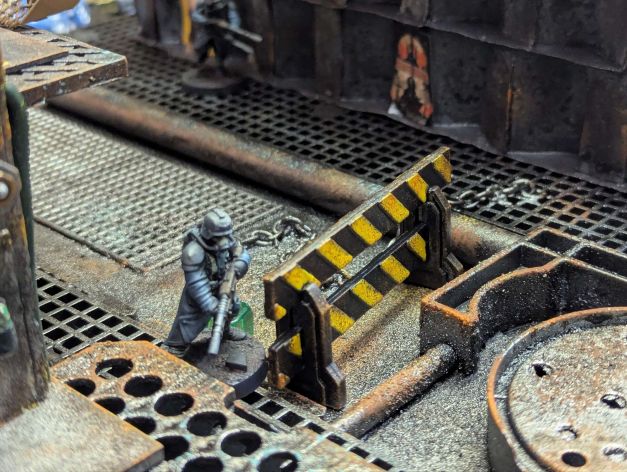
We set up a lovely table with some industrial terrain to suggest a dockyard on the periphery of the hive quarter. It was the perfect location for some rookie cult members to choose for a meetup! They were gun runners, delivering a batch of illicit weaponry to be carried down into the depths of the underhive – no doubt intended to arm the seditious rebels down below!
Most of the cultisits deployed in the center of the board. I had rolled randomly to determine which of three possible victory conditions I was pursuing. In this case, Throckswain needed to overpower and capture a particular henchman, to be dragged back to a holding cell for gruesome interrogation. In game terms, I had to incapacitate one specific figure in hand-to-hand combat. John had to merely survive and defend against my probing attacks.
John made great use of the “hidden” ability, which is a fairly generous rule in Shadow War: Armageddon that lets any model stay largely out of sight as long as it skulks near a piece of obscuring terrain. Since our table was choked with scenery, and since skulking is very flavorful for Inq28 gaming, we took a liberal approach to the hidden rule and encouraged models to make use of it throughout the game.
It was fun and effective, and it encouraged players to get in close for frantic firefights and/or melee combat.
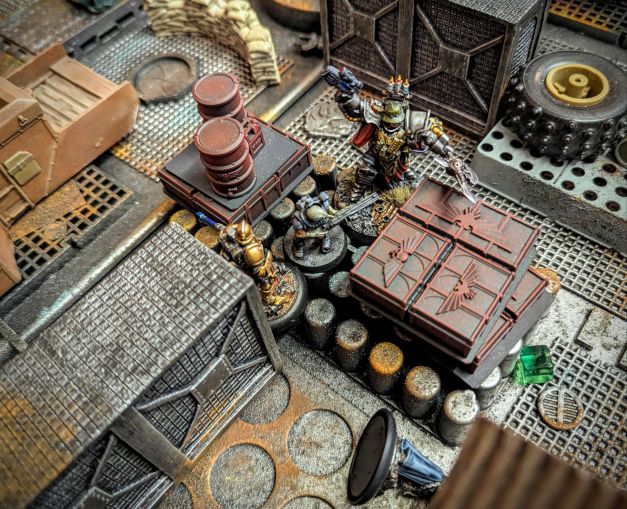
And so Throckswain and his warband arrived to witness the spectacle of the illegal weaponry changing hands between the fervent cultists. They were desperate the conclude the deal and slink back into the shadows. The Holy Inquisition would not stand for such trespass!
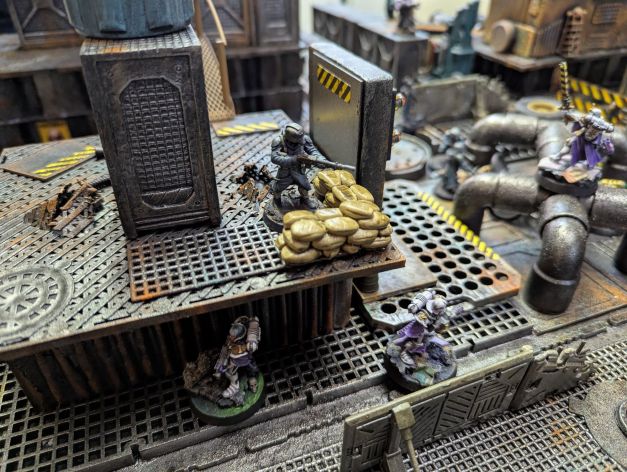
At the Inquisitor’s signal, his warband revealed themselves and advanced upon the cultists. Laser fire cracked and sparked off the rusted bulkheads of the dockyards. Half-human genestealer mutants craned their necks, trying to spot their attackers. By all accounts, they were surrounded by half-glimpsed assailants.
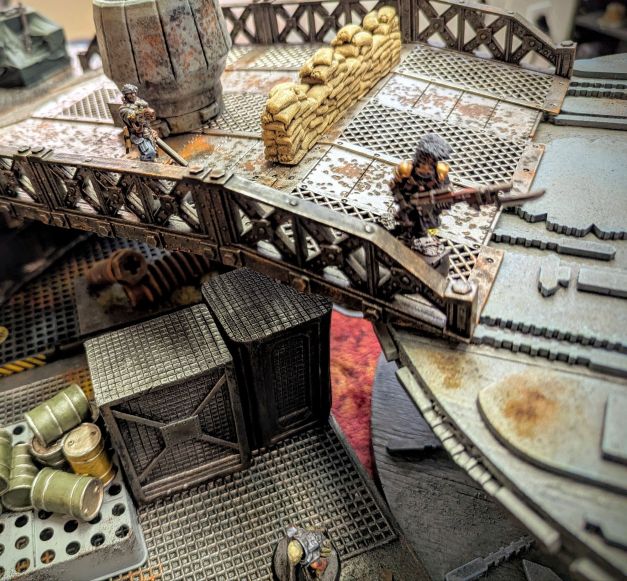
As the Inquisitorial warband closed in, the cultists rallied and began maneuvering to oppose them. Return fire dropped Ishmael Koronis, a promising acolyte renowned for his ardent faith. He was last glimpsed crawling on his hands and knees up a rusted staircase.
The cultists split their fire as Throckswain and his fighters closed in. With so many targets, it was no surprise that a close combat zealot – the ruthless Acolyte Eustace Erepatian – managed to close the distance and charge into combat with his heavy chainsword.
Erepatian hewed left and right with his sword, rending flesh and bone, before ultimately falling in combat with the dreaded foes of the Imperium.
And still the acolytes closed in, an inexorable tide bringing the Emperor’s light to the darkest corners of Hive Sacrament. Truly, they lived up to their name: The Last Lighthouse
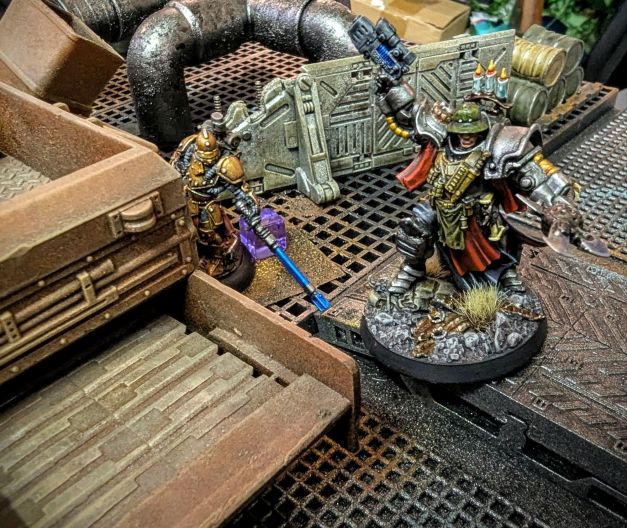
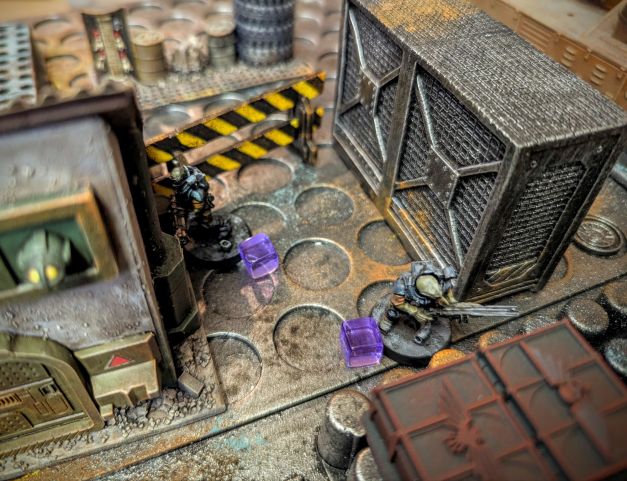
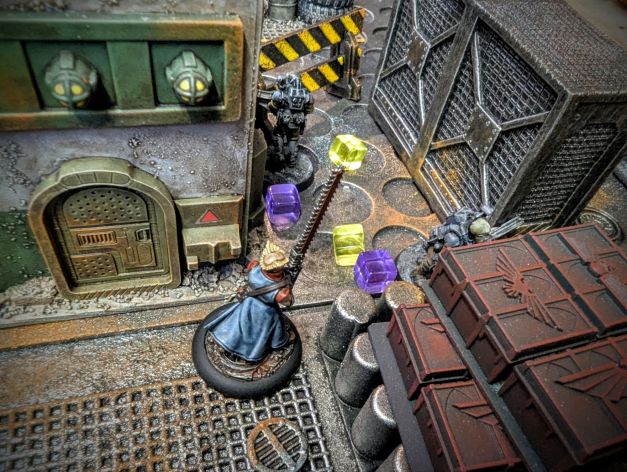
As the cultists tried to gain the upper hand, Inquisitor Throckswain spotted his quarry. A shotgun-wielding cultist with a lumpen, inhuman countenance bore a clutch of data cubes in his shoulder bag – the very intelligence that Throckswain was sworn to retrieve! Quickly, before the wretch could flee, Throckswain made his move. Together with his trusted lieutenant, Interrogator Lysander Frost, the Inquisitor closed in and placed the vile alien under arrest.
In a stroke, Throckswain had secured the victory and denied the cultists’ their prize. We continued the game to see if the cultists would quit the field and flee – indeed, they did so within a turn or two.
Conclusion
Three cheers for the defenders of the Imperium! Throckswain and his cadre had carved through the minor cultist cell, leaving hewn bodies and brutalized survivors in their wake. The two acolytes who had fallen in combat – Erepatian and Koronis – recovered from their wounds, more or less intact.
So that’s a wrap on our first session of Seditious Whispers! I’m liking the narrow scope and clearly defined endgame that John has come up with. Stay tuned for the next session!
There is a time for subtleties, and there is a time for passing judgment upon the sinful. The Ordo Hereticus gives these more unsavory tasks to the Ashes of the Penitent.
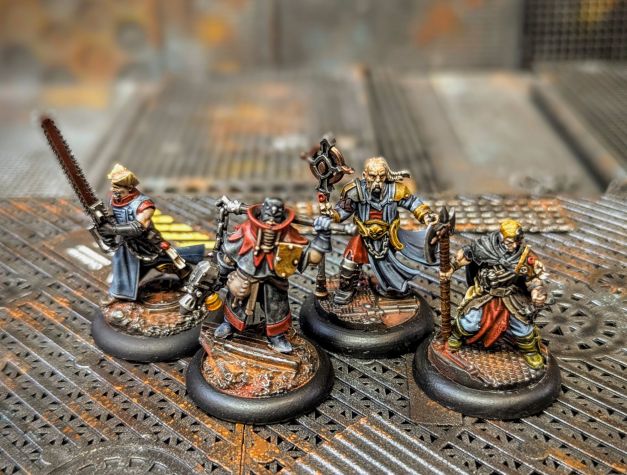
Led by Inquisitor Eustace Erepatian, the Ashes of the Penitent is an Ordo Hereticus warband composed of the most zealous acolytes in the Glouroth Sub-Sector.
When they are tasked with rooting out a recidivist cell, their work begins at the bottom of the proverbial food chain. The acolytes of the Penitents cloak themselves in shadow and infiltrate the myriad cults that would threaten the foundations of the Emperor’s domain. Gaining the trust of the low-level serfs, the acolytes slowly move up the chain of command, capturing lieutenants, shift bosses, cartel strongmen, and other mid-level henchmen.
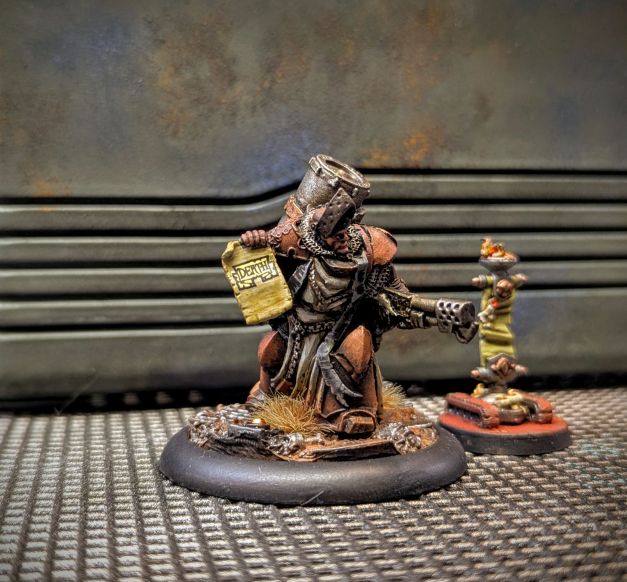
These wretched souls are tortured until they give up their secrets, usually amid fire and blood. Only then does Inquisitor Erepatian take the field, clad in rusted battle armor and wielding his holy flamethrower. Among his many accolades, Erepatian is remembered for speaking the Catechism of Ending, which finally stopped the dreaded Pluvial Pilgrimage on Palus Secundus. At the height of the Plague Circus on Endymion Prime, Erepatian drained the Necromarsh and recovered the hilt of St. Theodosia’s longsword from the teeming muck. His current work has taken him to the Gulf of Bittenbrach, in pursuit of the shadowy faction known as the Sanethe Enclave…
The Ashes of the Penitent is another cool warband I painted up over the last year. Inquisitor Erepatian is a special character … he was my first zealot character in the Darktide video game, and I enjoyed playing him so much that I decided to add him to the lore of my little corner of the Inq28 universe.
I imagined that Erepatian survived his trials on the hive world Atoma and eventually ascended to the rank of inquisitor. Now he commands a warband composed of the same willful zealots that he served with on Atoma. It is thankless work, to be sure, but Erepatian and his followers seek no reward and no recognition.
These grim warriors will see the tabletop in some upcoming games of Shadow War: Armageddon, as well as other games that we’ve explored for Inq28, including The Doomed, Space Weirdos, and maybe Rogue Hammer.
I shared my Ordo Xenos warband last month. And gosh, that just leaves one of the main Inquisitorial Orodos remaining. What do I have up my sleeve for the venerable Ordo Malleus? Check back soon to find out!
I’ve spent the last year or so slowly building out my Inquisitorial warband(s) for various Inq28 gaming opportunities. I’ve always wanted to be able to field a few distinct, flavorful warbands of Imperial agents, and I think I’m just about there.
In addition to painting minis, I’ve also been noodling on lore, trying to tie everything together in a way that 1) pleases me and 2) suits the games we play here at Comrade’s Wargames.
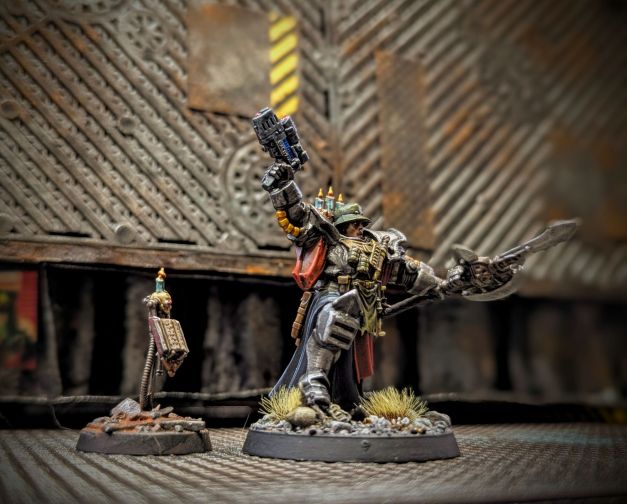
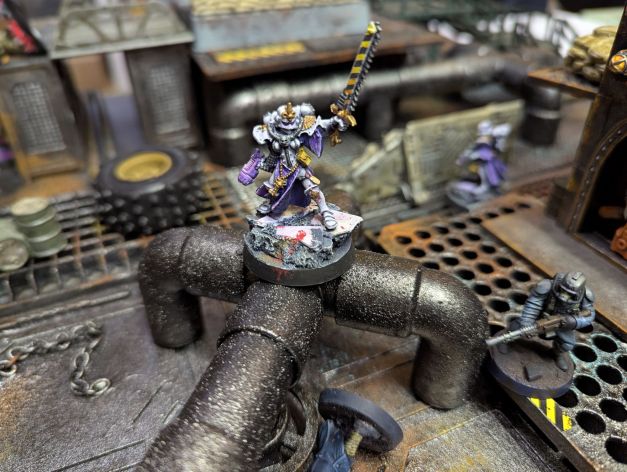
For this post, I’ll be showing off my Ordo Xenos warband, led by Inquisitor Zoltav Throckswain.
Throckswain has built his career pressing deep into xenos territory, operating far outside the influence (and protection) of the Imperium. For most missions, his retinue knows they are on their own, their backs to the wall, as they bring the Emperor’s light to the darkest corners of the galaxy.
For this reason, Throckwain and his disciples are known collectively as The Last Lighthouse.
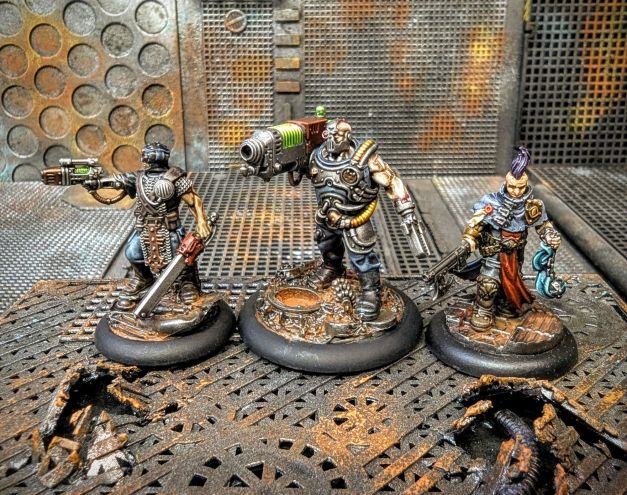
From left: Sterilizer Dante Blackthorn, Inquisitor Zoltav Throckswain, and Interrogator Lysander Frost
Lately, Throckswain and his trusted followers have been operating in the Juventius sub-sector, a region of the Caluphel sector renowned for its resplendent shrine worlds. Troubling activity from a network of purported xenos cults has drawn the Inquisitor’s attention. The insidious whispers point to Gamma Euphorion, a shining beacon to the Emperor’s grace … which may harbor a dark underbelly of corruption.
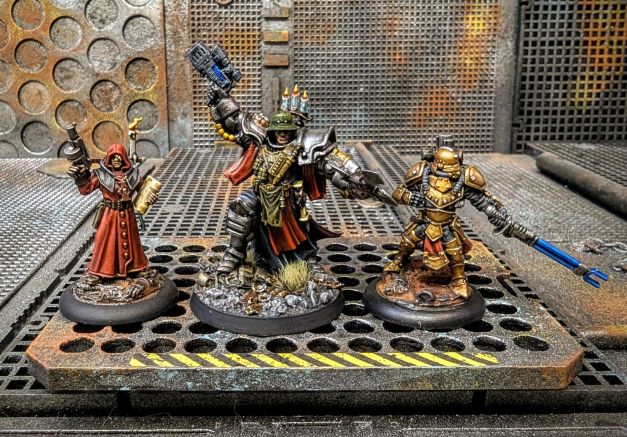
From left: Caelum Drake, H4R-T, Jezza Marchstone
Joining Throckswain on this venture are a pair of hired guns recruited from the soot-blackened slums of Palus Secundus. Their scrappy approach is backed up by the immense, mute bulk of H4R-T, an indentured servitor sporting a modular weapons harness.
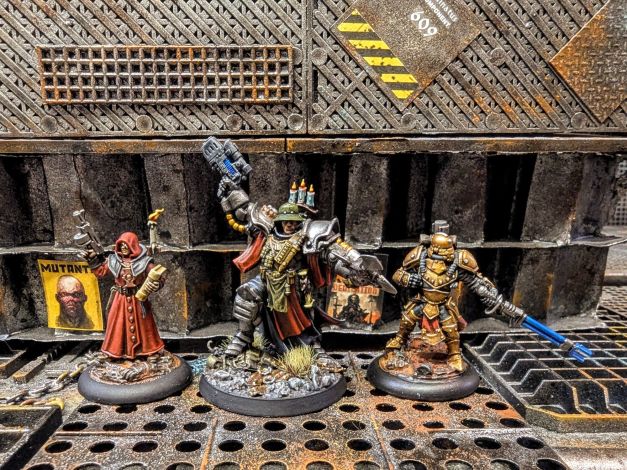
From left: Vojchek Sparr, Scribe Lobcock, and Rossyncloff the Ombudsman
Even as Throckswain plunges into the depths of Hive Sacrament, the largest hive city on Gamma Euphorion, he will need adepts close at hand to process evidence, research new leads, and disentangle the spiderweb of intrigue. A trio of lettered savants accompanies him to perform these vital tasks. Their workload will only increase as Juventius Prime gives up its secrets.
And so Zoltav Throckswain sallies forth into the cauldron of secrets that bubbles just beneath the shining veneer of Hive Sacrament. The taint of xenos is all around them. Insidious whispers echo through the underhive as the agents of The Last Lighthouse are pulled deeper into a web of alien corruption.
Editor’s note: In case you can’t tell, we have a campaign brewing here at Comrade’s Wargames! Authored and gamemastered by Bif over at Orcs Illustrated, this campaign will use Shadow War: Armageddon to play out a series of linked narrative games. The games will be set in Hive Sacrament on Gamma Euphorion Prime and will feature Throckswain’s Last Lighthouse versus Bif’s cunning Genestealer Cult!
I’m tickled pink to have some lore down on paper about my warband as we head into this campaign. More to come soon, so stay tuned!
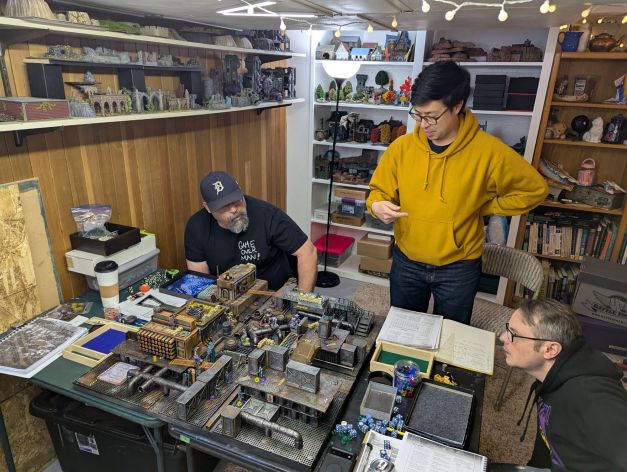
The gang got together last month for another game of Shadow War: Armageddon in my basement game room. I was excited to try out my new grimdark battle board, which I had whipped together in a creative frenzy a few weeks back. The board was a bit small for a typical game of Shadow War: Armageddon, but I was confident I could solve that with a few slight modifications to initial deployment — and plenty of terrain, of course!
We were putting Shadow War: Armageddon through its paces with an eye toward embarking on a small mini-campaign using this ruleset. With that in mind, we dredged up a multiplayer scenario that was published specifically for Shadow War: Armageddon. It’s long gone from the official Games Workshop site, but you can snag the PDF at the link below.
The scenario attempts to add some balance to a game mode (multiplayer) that is innately imbalanced. We had four players, which was the ideal number for this published scenario. Let’s see how the game shook out.
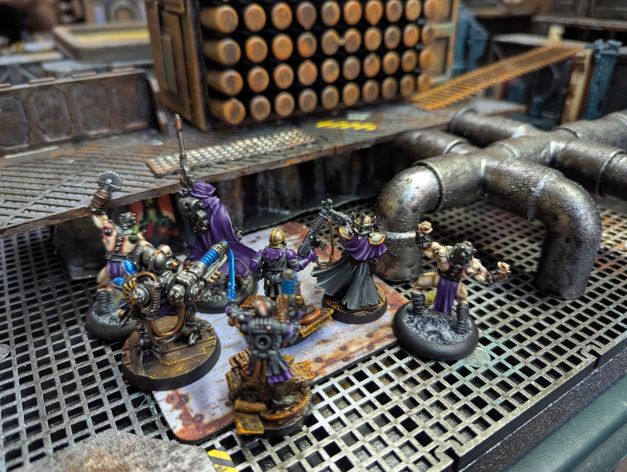
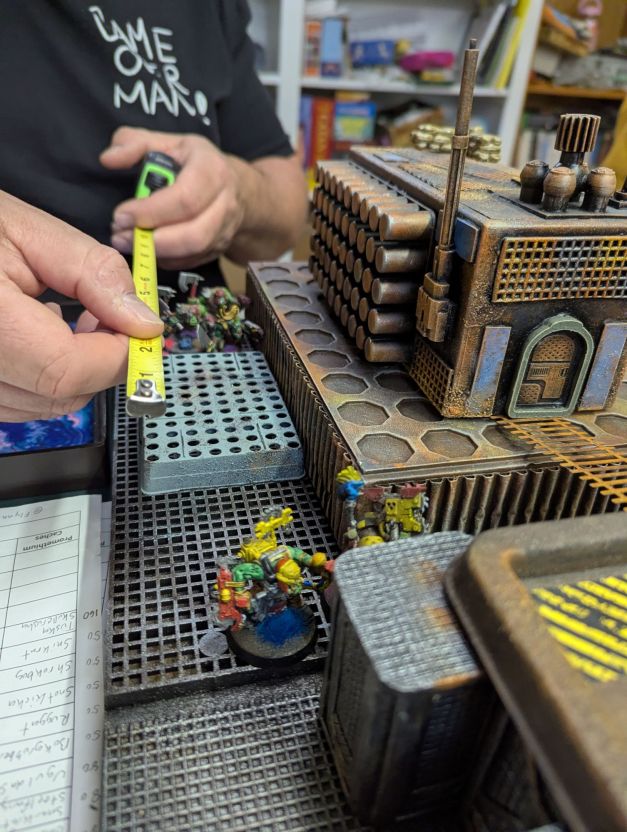
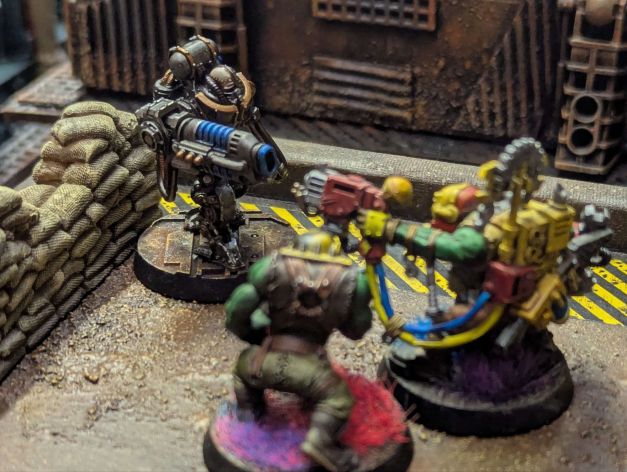
Each player chose a corner and deployed their warband. I was running my Dark Mechanicus (kitted out using the Adeptus Mechanicus warband), Rian was running his gorgeous Sisters of Battle, Jim was fielding his Orks, and John brought his eponymous Imperial Guard. Here’s a peek at the warbands in their initial deployment areas.
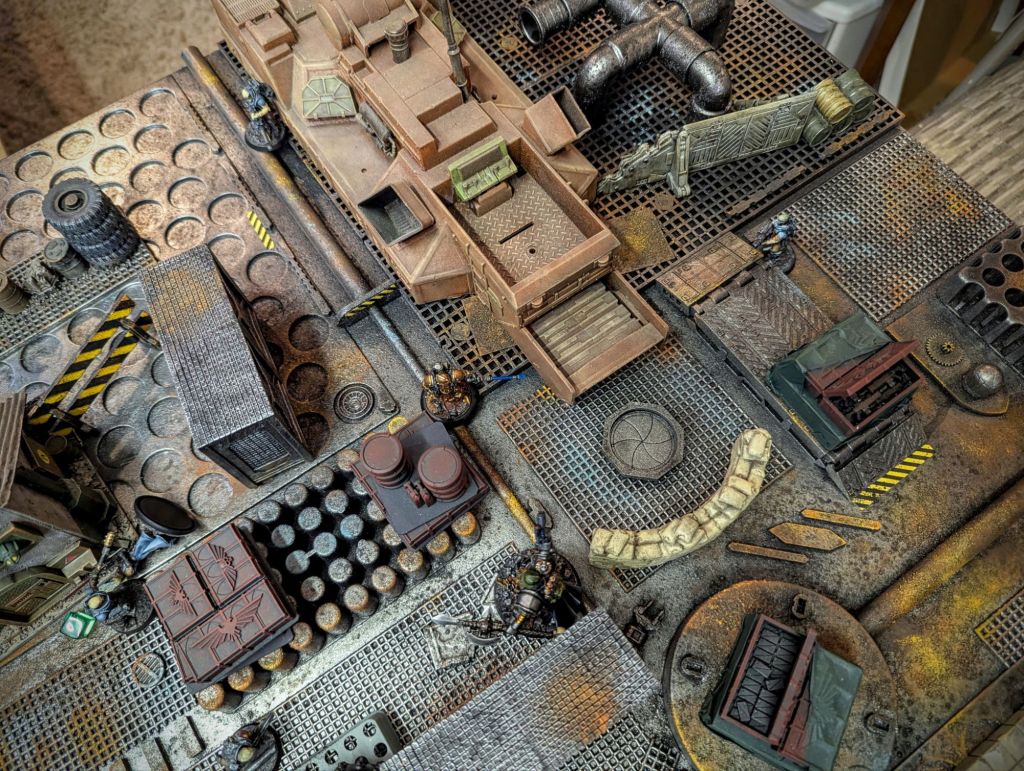
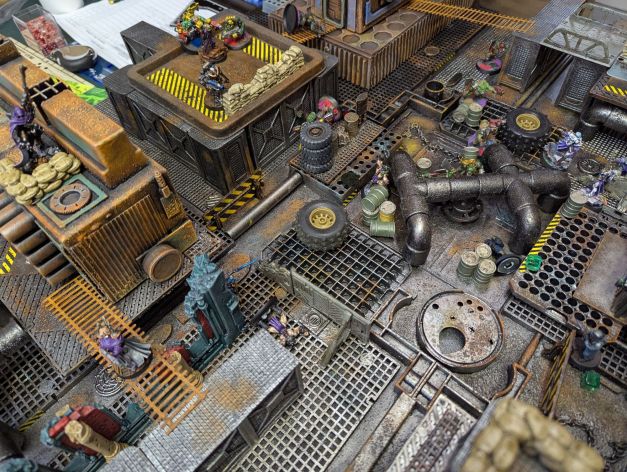
The battlefield was absolutely choked with terrain: platforms, pipes, walls, barricades, and all sorts of debris. Nobody had a good shot on the first turn, so we spent our time advancing cautiously.
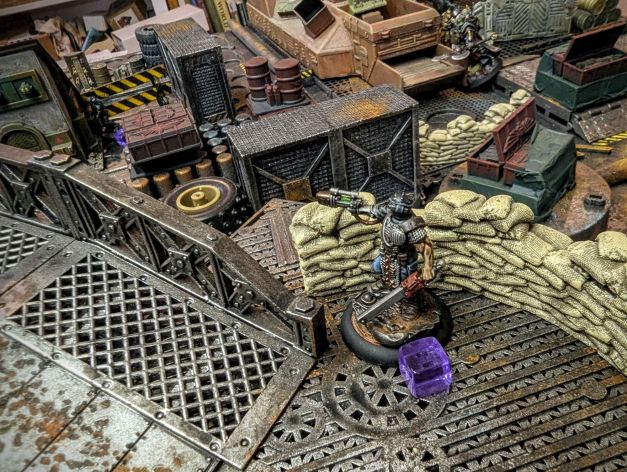
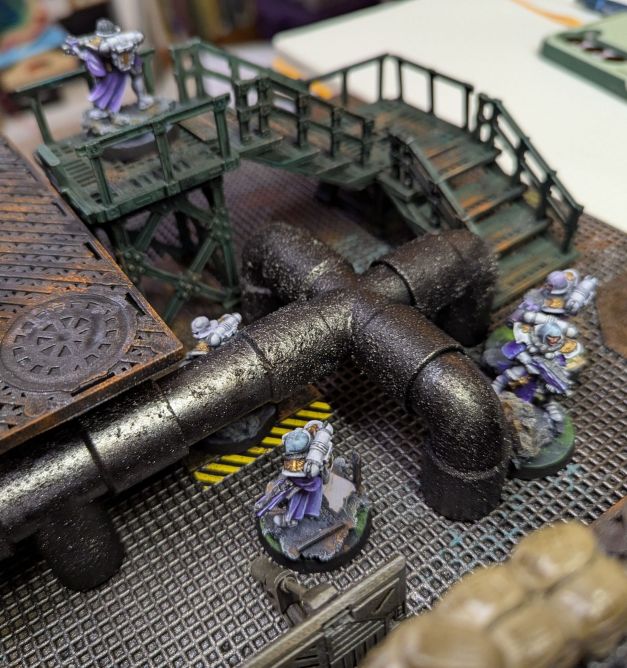
The objective was a promethium valve in the center of the battlefield, surrounded by empty fuel canisters. If the warbands could reach the valve, they could fill a tank and carry off some valuable promethium. We were destined for a mighty clash in the center of the battlefield!
You can see the valve underneath the pipe interchange in the photo above.
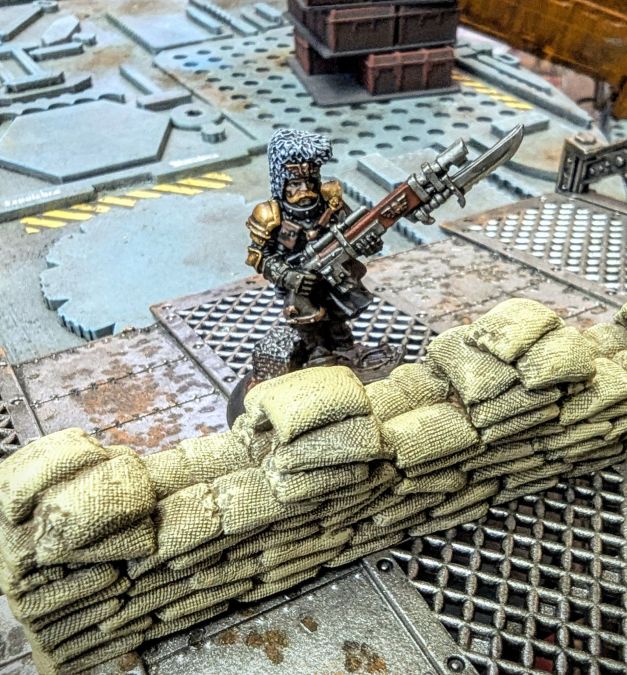
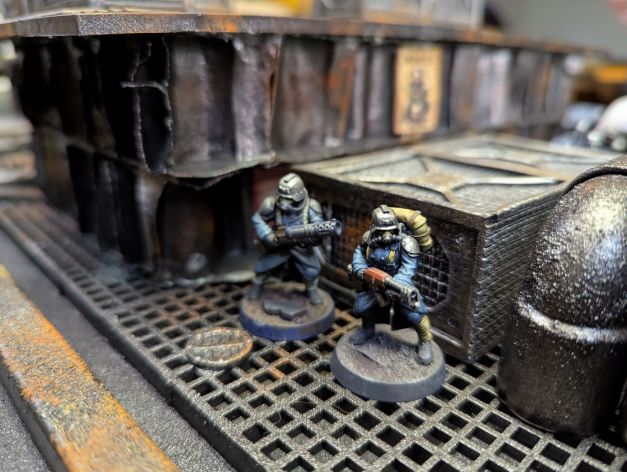
It was a wild game. John, to our amazement, employed actual infantry techniques (bounding advance with troopers moving up into overwatch to cover their buddies) and found them to be very effective.
Jim’s Orks had no need for such subtleties — they mostly charged forward, blasting with pistols before charging into close combat with various choppy implements. The victim in the photo below is Ajax 07/4 Ascendant, one of my Dark Mechanicus warriors.
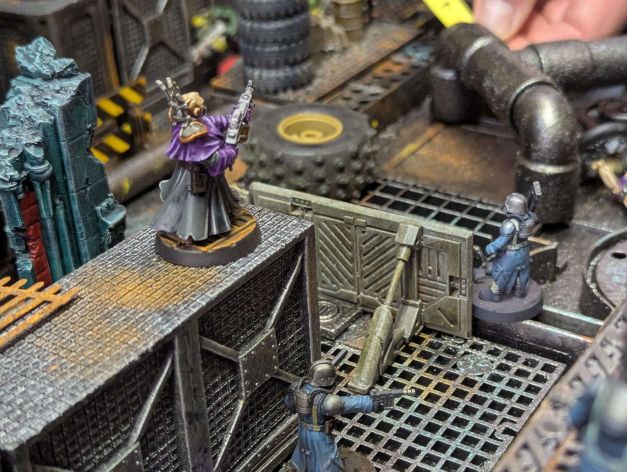
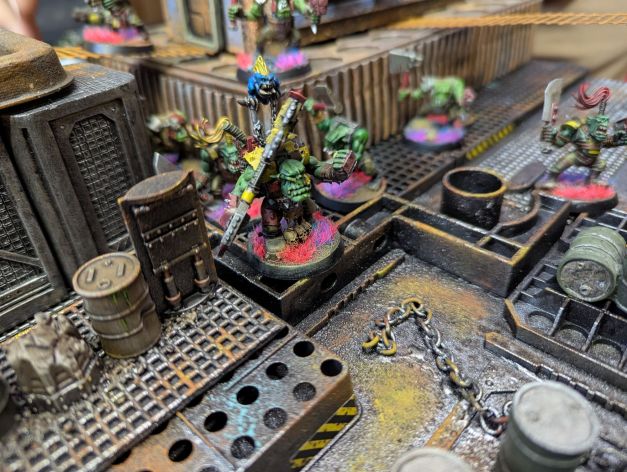
While Jim and I were frantically smashing our forces into each other, Rian was prudently advancing with his Adeptus Sororitas, taking a few potshots (and receiving a few in return). His miniatures looked epic as they navigated the tangle of walkways and pipes in the underhive.
Eventually (and predictably, given our 4-player scenario focusing on a central objective) we all ended up in a giant scrum in the center of the battlefield. Jim’s Orks burst out of cover just as Rian’s Sisters of Battle arrived on the scene, with John sniping from the perimeter and my Dark Mechanicus licking their wounds in the shadows. Another glorious clash in the underhive!
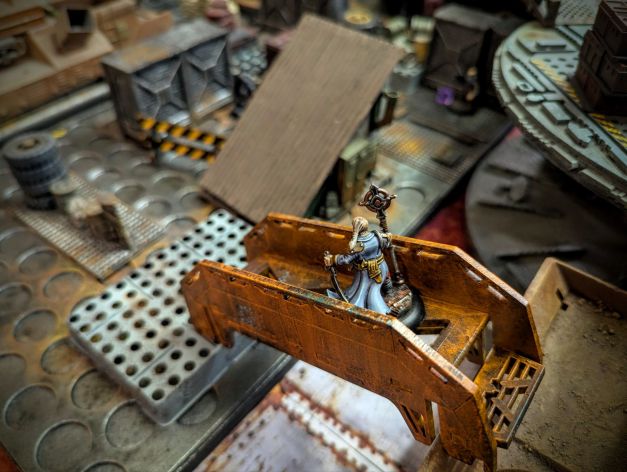
In the end, patience paid off for Rian, as he was able to haul off a couple barrels of promethium while the rest of us were preoccupied with slaying each other. Here’s his Cannoness hoisting her chainsword in triumph!
Once again, Shadow War: Armageddon gave us a great game! It was fun and easy for a new player to learn. It’s very much a GW type of game, so it has zaniness like grenade deviation and poorly balanced wargear options for the various gang lists. But it’s super streamlined and efficient … just one book is all you need. And that’s an approach that really resonates with us here at Comrade’s Wargames.
In any case, we’re interested in using Shadow War: Armageddon for an Inq28 campaign later this summer, so stay tuned for more!