
Recently I banged out a few Necromunda-style sci-fi terrain pieces after getting inspired by some posts that came across my social media showing nifty examples of aquarium filter panels being used to create terrain tiles.
I’m a sucker for cheap, creative ways of replicating the various pricey terrain sets that have come along in the last few years. In this case, the sci-fi floor tiles from Games Workshop are undoubtedly cool, but the amount of money required to make an entire tabletop of these premium pieces would probably buy a small island in the Seychelles.
So when I saw that someone had created some decent lookalikes using those super cheap plastic aquarium filter panels, I knew I had to give it a shot.
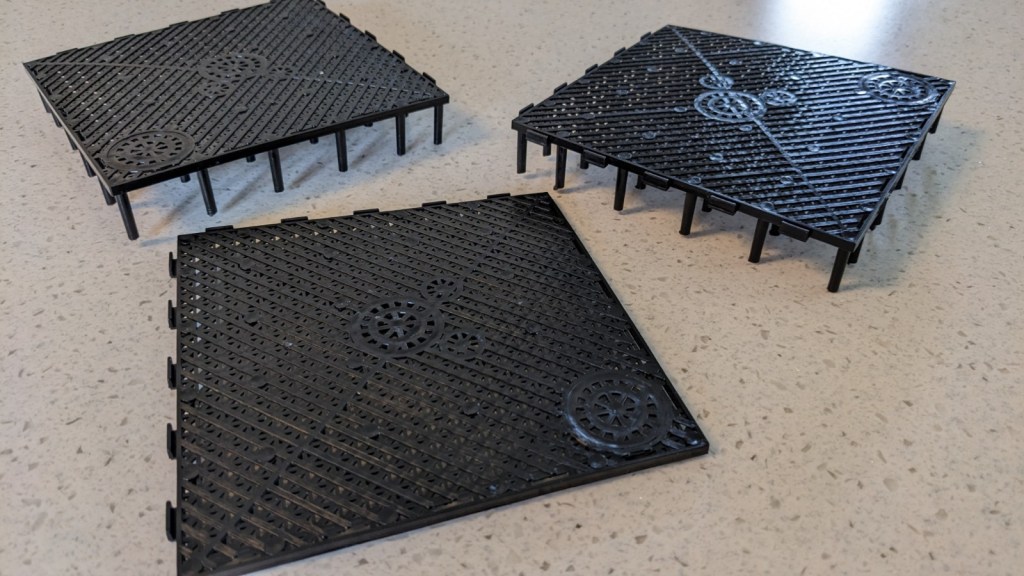
These panels are roughly 6 inches square and came in a pack of 10 for $14.99 shipped to my door. That’s my kind of price!! They come with a pleasing crosshatched pattern, plus a few round circular areas that looked ideal for future detailing.
As you can see in the photo above, they also come mounted on plastic 1-inch pegs that lift them off the ground. Very cool! I ended up snipping off the legs because these panels are made of flexible, somewhat soft plastic, and I knew I’d have to work hard to make them lie flat.

To that end, I mounted the plastic panels atop several layers of heavy corrugated packing cardboard that I had lying around. First I hardened these pieces with several layers of black paint and Mod Podge, then I glued the plastic panels down using a goopy outdoor adhesive. I had to weight them down with books to make sure the panels remained flat – they are soft and somewhat flexible, and the edges threatened to curl up without some weight.

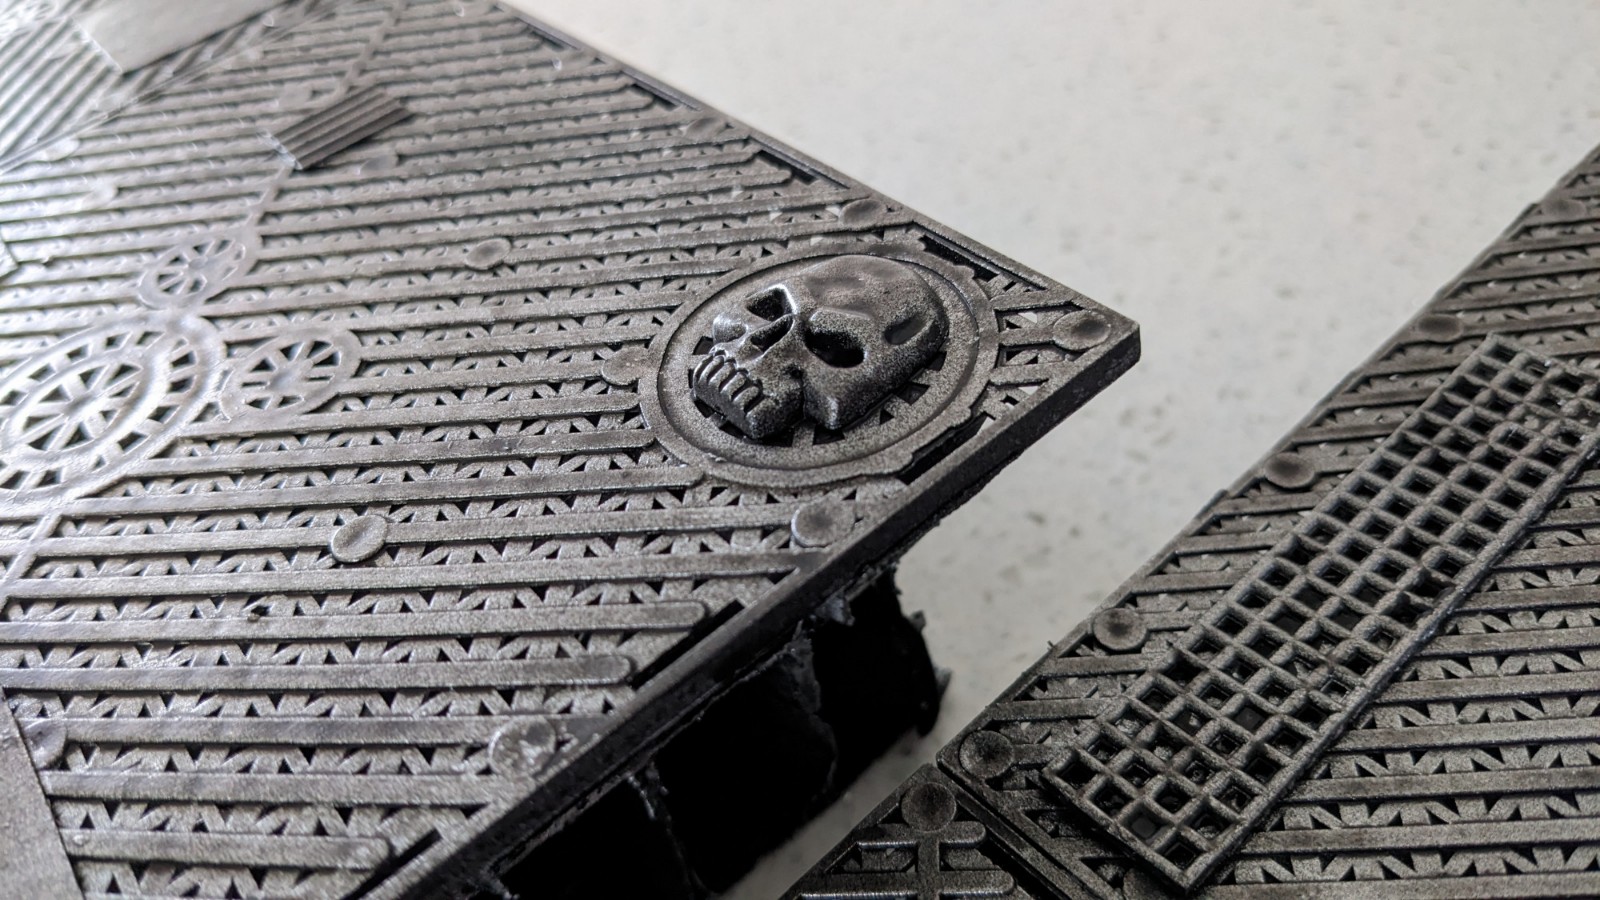
The tiles looked great out of the box, but I decided to take them to the next level by affixing some additional bits – grating, plasticard, corrugated cardboard, just a variety of textures to break up the surface a little bit and create some visual interest. You could skip this step entirely, because the base filter panels look superb as is.
I also added some skull glyph plates that had been languishing in my bits box for years. Because this is 40k after all!
As you can see, the whole thing got sprayed black, then silver using regular old rattle cans from the hardware store. I covered that with a heavy black wash that dulled everything down and set the stage for the grimdark phase, which featured heavy sponge application of browns, oranges, and yellows, plus some decals and propaganda posters to punch up the zaniness.

Oops, looks like the decals weren’t quite dry in these photos. They look great now, though!
The circular details on the filter panels look particularly fantastic. They could be hatches, manhole covers, or drains leading to a fluid reclamation system. Whatever they might be, they look tremendous!


I’m inordinately pleased with how these turned out. I’d say 75% of the painting work was accomplished with rattle cans of spray paint, and I never used a detail brush at all – just sponges for the final highlights.
The best part was that I only used 4 of the 10 tiles in the pack to make these two delightful terrain pieces. More to come for sure, and soon!

great work on these 🙂
LikeLiked by 2 people
Those look fantastic, what a cool idea. I’ll chuck that in my things to remember when working on scifi terrain next!
LikeLike
Oooh, I like them! 🙂 They do look like battered old metal constructions! Very nice!
LikeLiked by 1 person
They are very nice, really give the underhive feel.
LikeLiked by 1 person
They look fantastic. Great job on these!
LikeLike
Brilliant idea and they look fantastic
LikeLiked by 1 person
Cheers! I’ll be making more for sure.
LikeLiked by 1 person