Comrade's Wargames

Painting toy soldiers in Oregon

  • Home
  • Narrative Campaigns
    • The Cauldron: A Grimdark Sci-Fi Campaign
    • The Chronicles of Üthdyn: A Fantasy Tabletop Campaign Setting
    • Nightwatch: Beyond the Borderlands
    • Frostgrave: Mystery of the Night-Haunted City
  • About Comrade’s Wargames

Whither Comrade’s Wargames? And Some Death Guard…

Posted by Comrade on January 27, 2018
Posted in: Posts. Tagged: 28mm, 40k, chaos, death guard, miniatures, nurgle, painting, sci-fi. 4 Comments

My ten or so readers may have noticed that Comrade’s Wargames has gone silent since my last, epic, end-of-the-year post about our Apoc-Luck game at the Girl Scout center.

In truth, that game was intended as a temporary swan song for me, as I welcomed a new baby boy in early January and will be consumed with fatherhood for at least a few months, before sleeping and eating schedules settle down a bit.

In the last few days before the baby arrived, I knocked out a handful of last-minute miniatures: Typhus, the Herald of Nurgle, three Death Guard Plague Marines, and the Foul Blightspawn — all intended as reinforcements for my burgeoning Death Guard army.

Here’s Typhus. I always liked the old metal version of him, particularly after the debut of the new, slightly silly plastic model last year. Once I decided the new model didn’t suit me, it wasn’t to find a poorly painted metal Typhus for $10 in an online buy/sell group that I could strip and repaint.

Up next are the three Plague Marines from the easy-to-build set. These models are designed to go together easily, without glue so beginners can get started in the hobby. They’re also nice sculpts to complement the other Plague Marines from the Dark Imperium starter set.

These guys got my typical Death Guard paint job — sloppy block colors followed by a magic dip of Minwax Polyshades Antique Walnut, which imparted a rich rusty shade to the armor and details. The end result is passable and shaved hours off my time working on these guys. Most of the painting groups I follow on Facebook would never dream of using the magic dip, but I’ve employed it for many years and gotten really satisfactory results. Your mileage may vary.

The last figure I finished was the Foul Blightspawn. I wasn’t initially planning to include this model in my Death Guard army, but I started hearing stories about how totally brutal he was on the battlefield, so I figured I’d give it a shot.

(Sidenote: This is a very rare example of me painting up a model based solely on how well it performs in the game of Warhammer 40,000. It doesn’t happen often — more commonly, you’ll find me painting up figures that I simply *wanted to paint*, only to find out later that the 40k hive mind has determined that they’re not worth the points, or ineffective versus the current meta, or whatever. Pish posh — paint what you like, I say!)

I literally finished basing this guy the night before my new baby was born! Talk about down to the wire!

As I mentioned at the outset, I’ll be taking a break from gaming for a couple months. I’ll still be puttering away at a few projects in the meantime, so this blog may see some updates, but no promises. Until we game again!

40k Battle Report: 1st Annual Apoc-Luck Game Day

Posted by Comrade on December 9, 2017
Posted in: Posts. Tagged: 40k, apocalypse, battle report, campaign, club, game night, hobby, narrative, sci-fi, wargames, warhammer. 2 Comments

IMG_2015

December witnessed the culmination of many months of effort by my small game group as we gathered for our first (hopefully annual) Apoc-Luck game day. As you might surmise from the name, this was an Apocalypse-sized game of Warhammer 40,000 combined with a pot-luck dinner. Food and gaming: What could be better than that?!

IMG_1943

For this event, we ventured beyond the friendly confines of my game room and booked out a local Girl Scouts activity center. This proved to be a great decision, as the activity center gave us tons of space, restrooms, a full kitchen and a working fireplace!

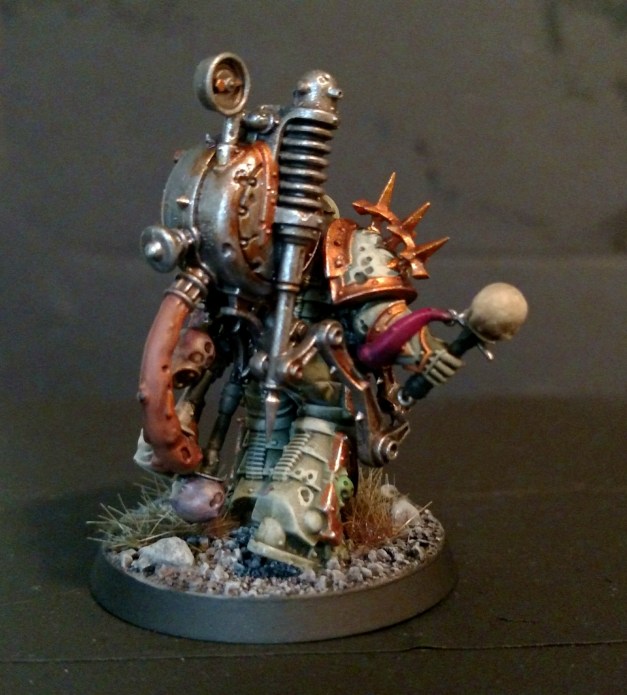
The game itself was roughly 200 Power Level per side. John, Jim and Alex represented the Forces of the Imperium as they attempted to breach the defenses at the Treyarch Defensive Salient (a key location in our Caluphel Prime narrative setting). Opposing them was a strange alliance of Death Guard Chaos Space Marines and Tau from the L’Ranna Company. My Death Guard were led by mighty Mortarion, who for this game had taken on the aspect of a fearsome plague dragon. So there was a primarch on the field, even though he didn’t look exactly like the stock model from Games Workshop! More on that later.


IMG_1948
IMG_1951
IMG_1952

The particulars of our scenario, as well as the narrative backstory for the game, can be found in our game handout. Click here to check it out!

At 200 Power Level per side, this game was on the small end of the Apocalypse spectrum, but it nonetheless represented our biggest game of Warhammer 40k to date. We gave ourselves plenty of time to play, and we also instituted a 30-minute timer on each side’s game turn. This was a master stroke, as it kept us focused on our turns and really ratcheted up the real-time tactical decision-making (and the tension that goes along with it!). I think we’ll use a turn clock for bigger games in the future.

IMG_1958

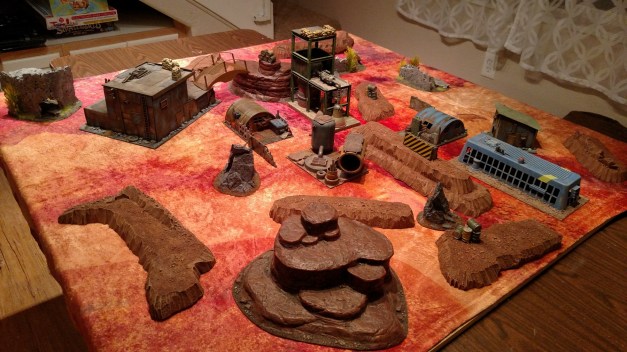
For the battlefield, we set up an urban/tundra interface zone, with a forested steppe leading into a ruined urban center. The scenario had four distinct sectors on the battlefield: the Mustering Area and the Spearpoint (both on the attackers’ side of the table) and the Defensive Salient and the Stronghold (both in the defenders’ zone). These four areas each had distinct victory conditions associated with them, detailed in the game handout.

IMG_1959

Here’s a look at the battlefield before we deployed our armies. Love that fire crackling in the background!

IMG_1955

IMG_1953

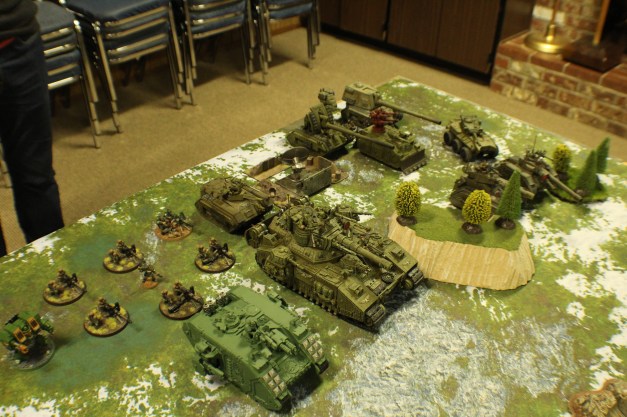
Jim and John were commanding an armored battlation of Imperial Guard, with plenty of battle tanks and veteran infantry to hold the line and drive a wedge into the defenders’ ranks. Jim’s son Alex had brought a contingent of Space Marines from the Salamanders chapter. The whole thing was anchored by Jim’s beautiful Baneblade, which had had just finished painting earlier that week! Way to go, Jim — nothing like a deadline to get you motivated!

IMG_1960

IMG_1961

IMG_1963

I could have photographed Jim’s amazing collection of Imperial armor all day! So much attention to detail and amazing conversion work…

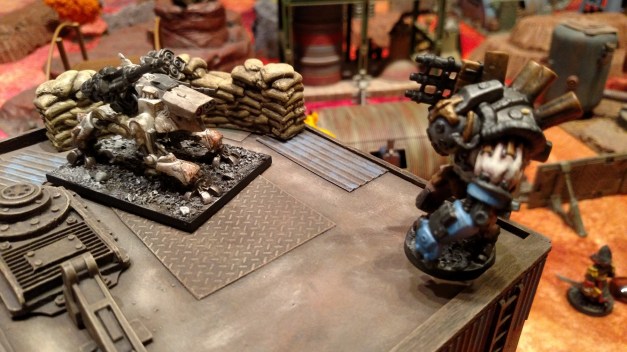
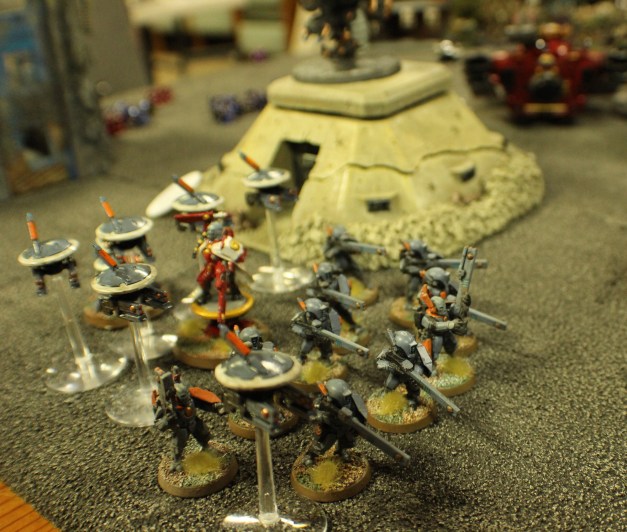
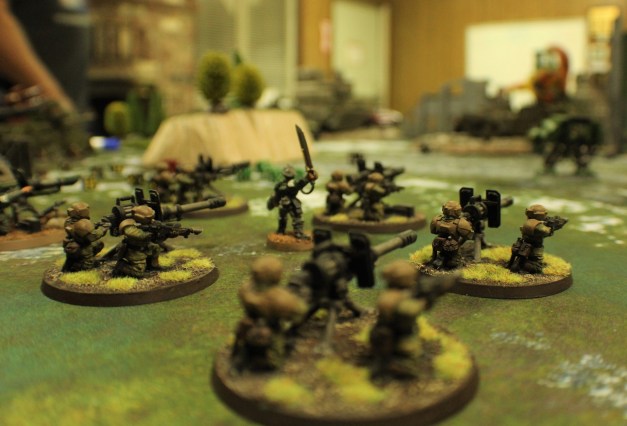
Anyway, Paul and I carefully deployed our defenders in the ruins of the Stronghold zone. We were frankly terrified of all the firepower that faced us across the battlefield! Paul kept a number of units back to deploy later in the game via ambush or deep strike, so the actual number of figures in our deployment area looked rather small.

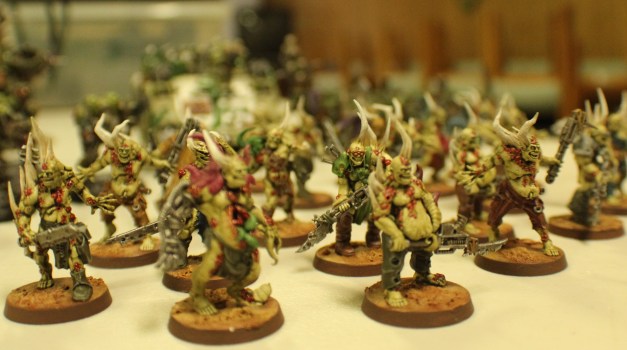
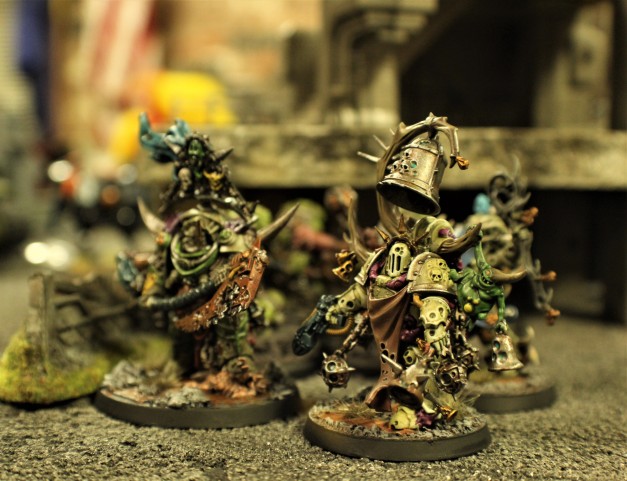
I positioned my Death Guard (led by mighty Mortarion in his plague dragon form) in a big blob in the Stronghold, ready to advance into the Defensive Salient on turn 1.

IMG_1967

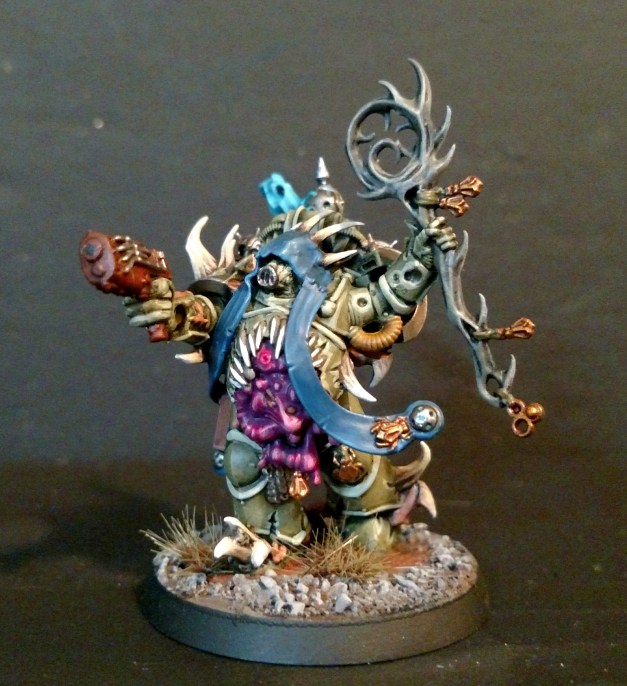
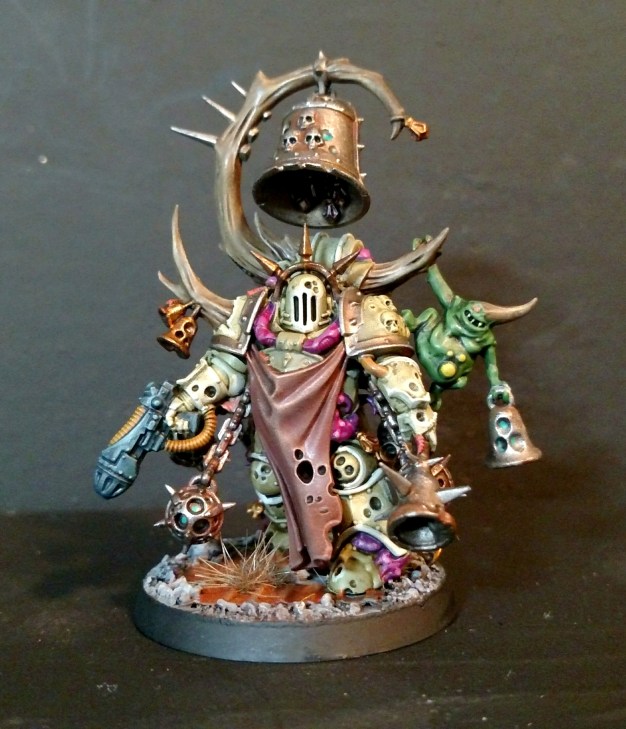
The “blob” deployment seems essential for Death Guard, who have a lot of aura effects that overlap and give benefits to nearby units. What you’re seeing here is pretty much the contents of the Dark Imperium starter set — 7 Plague Marines, 20 Poxwalkers, a Foetid Bloat-Drone, a Malignant Plaguecaster (converted) and a Noxious Blightbringer. Oh yeah, and my Lord of Contagion was standing in for Typhus.

Here’s another look at our deployment area. You can see Paul’s Hammerhead lurking just out of sight behind a ruined building, as well as his Fire Warriors camped out in the command bunker.

IMG_1970

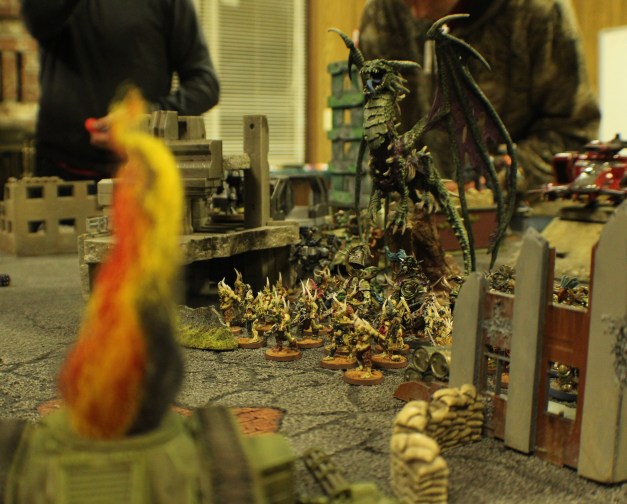
And here’s a look at what awaited us across the battlefield. It’s pretty intimidating!

IMG_1971

With that, I started the first 30-minute timer, and the Imperials began their first turn!

We quickly learned that Jim and John had spent the days leading up to Apoc-Luck 2017 developing a plan of attack for this game. They had worked out a target priority system so that they could make the most efficient use of their 30 minute turn. Their number one priority was Mortarion!

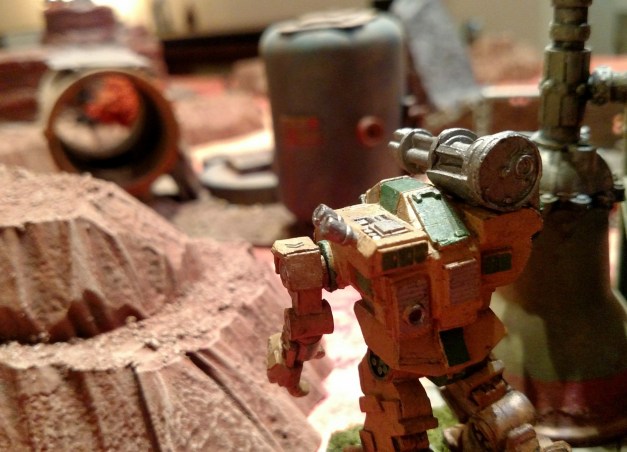
So he received the brunt of the firepower on turn 1 — battle cannons, demolisher cannons, lascannons, you name it! The size of the model coupled with the crazy range of most of these tank-mounted guns meant that virtually everything could see and fire at my big ol’ plague dragon.

John surprised us all by deploying a Leman Russ Punisher (with the big rotary cannon) in ambush near the advancing mass of Death Guard infantry. It rolled a fearsome amount of dice and helped contribute to Mortarion losing 11 wounds in turn 1 (he only had 18!).

But when our turn came, Paul’s eagle-eyed Tau fired back, destroying the Punisher and taking some stress off my flank. The advance continued!

IMG_1972

I know that in the new edition of 40k, you’re supposed to remove destroyed vehicles. But we just couldn’t bring ourselves to remove such beautiful models, particularly when we had the opportunity to add some colored wool and use them as terrain pieces after their death.

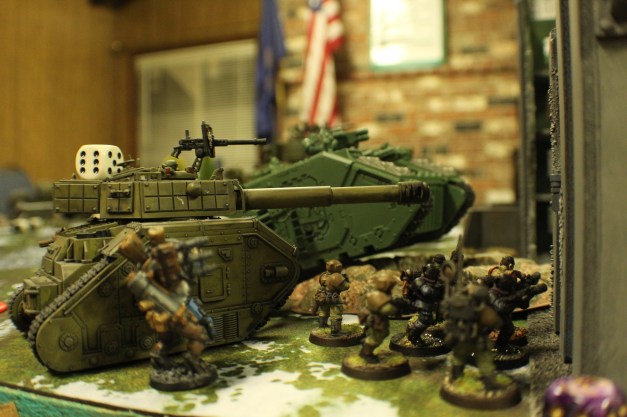
We began turn 2 with Mortarion on the ropes and the Imperial armor grinding its way through the Spearpoint and into the Defensive Salient. Here you can see a Land Raider from the Salamanders chapter (commanded by Alex) and a Leman Russ supported by a squad of veterans preparing to enter the urban center.

IMG_1975

At this point, Alex deployed a squad of Terminators into the defenders’ backfield in a desperate gambit to take out Paul’s heavy Riptide battle suit. Suddenly we had the enemy knocking on our back door!

IMG_1976

Paul very wisely advanced a squad of Fire Warriors out of the cover of their bunker and used this force to mercilessly cut down the marauding Terminators.

IMG_1980

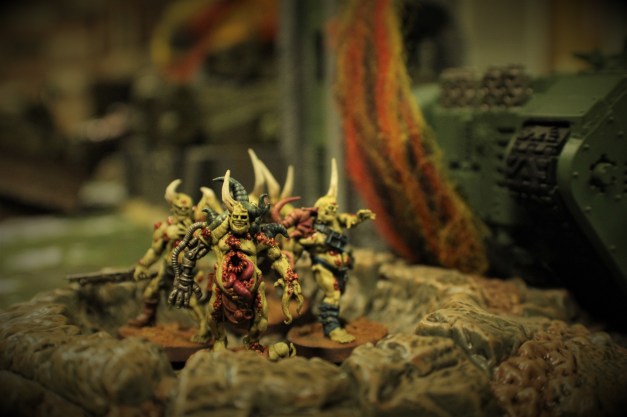
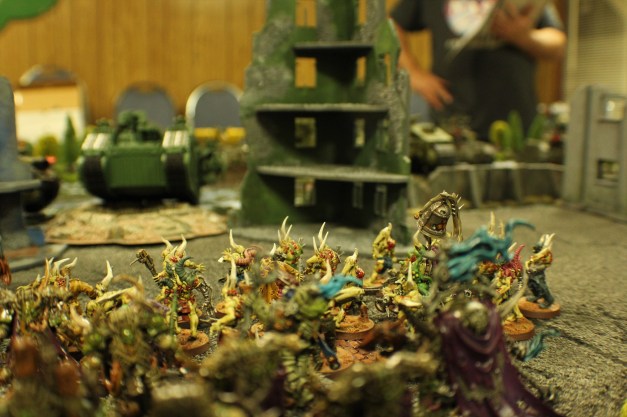
Back in the center of the table, the Death Guard advance was grinding forward into the Defensive Salient. This was a major objective for the Chaos and Tau players — to occupy the salient while throwing back the assault by the attackers. So we had to move forward, while somehow stopping the grim armored spearpoint that was surging towards us.

IMG_1982

It was around this point that Mortarion died. Oh no! He actually perished without doing much of anything on the battlefield. He never fired his cool gun or got into close combat. I used his psyker powers a few times, to decent effect, but his major role on the battlefield was ammo sponge.

At this point, I started to realize a few things about the Death Guard army as presented in the new codex. Namely, most of their offensive abilities are designed to interact with enemy infantry squads, not single models like vehicles or dreadnoughts. And since John and Jim didn’t bring much in the way of infantry, I didn’t have a lot of opportunities to use all of my cool new rules!

There were a couple turns in the game where I just moved, cast Smite a few times (my other psyker powers being more designed to wallop infantry, alas) and fired a few heavy weapons. I mean, my guys looked *damn good* throughout all of this, but it was still a bit of a mismatch in terms of the juiciest bits from the Death Guard codex.

IMG_1985

Funny, I didn’t hear Jim or John complaining about it! 🙂

As you can see from these pics, our forces crashed together in the center of the Defensive Salient. Battle tanks equipped with horrific cannons and lasers unleashed their ordinance on the oozing, putrid ranks of the Death Guard.

In response, the combined firepower of the Tau and Death Guard ripped through the advancing tanks, leaving burning wreckage in their wake.

IMG_1988

At this point, we were midway through the game, and Paul and I noticed that the attackers had cleverly boxed us out of any sort of ambush deployment on their side of the table. In 40k, ambushers can appear anywhere on the table that’s more than 9 inches away from an enemy model — but careful model placement by the attackers meant that Paul and I didn’t have any viable real estate to use for ambush deployment!

Well played, Imperium.

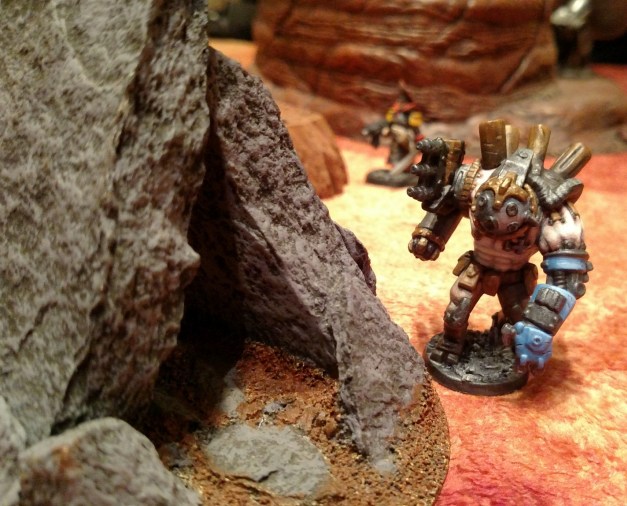
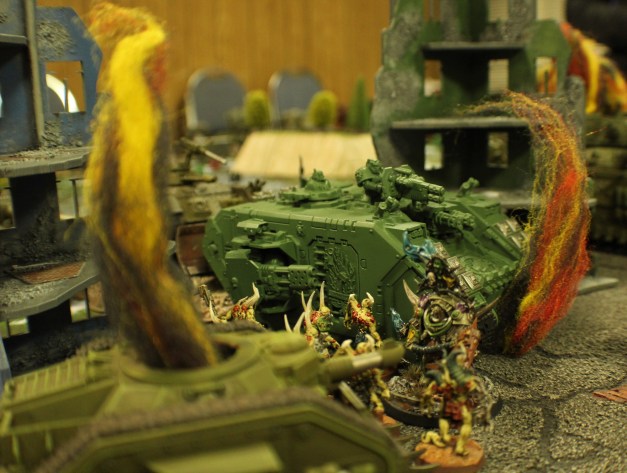
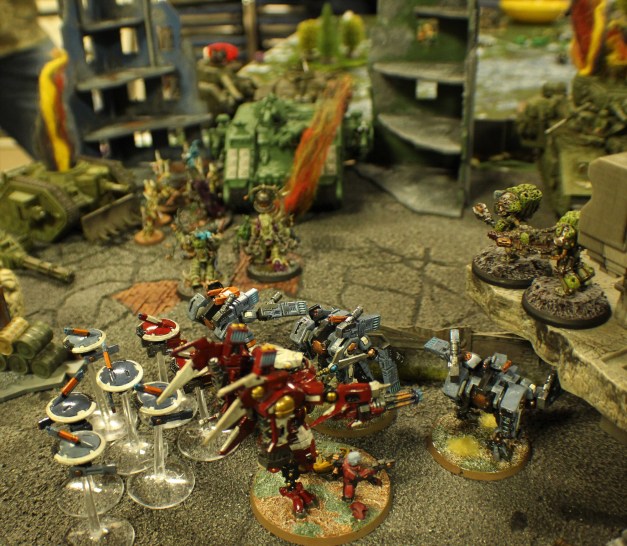
So instead, Paul and I said “screw it” and dropped our ambushers right into the Defensive Salient, where the fighting was the thickest. Here are Paul’s Crisis Battle Suits arriving, while in the background my Blightlord Terminators teleported onto the elevated ruin.

IMG_1986

The arrival of these ambushers proved decisive for the defenders — and helped contribute to the downfall of the mighty Baneblade!

Yes, it’s true. The centuries-old battle tank, veteran of a hundred wars on a thousand planets, burst apart under the sustained firepower of the Tau and Chaos defenders.

IMG_1989

Farewell, you gorgeous behemoth.

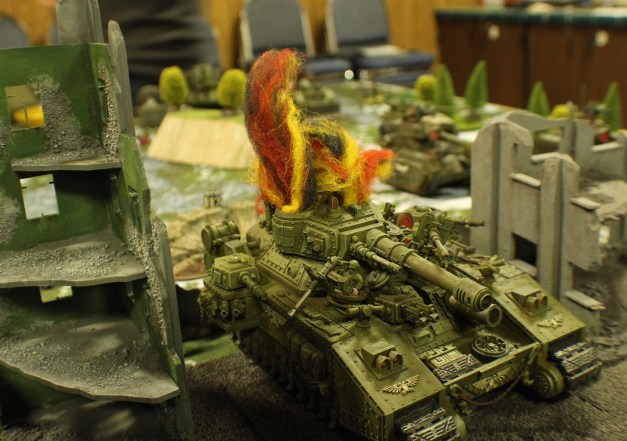
Even as the Baneblade met its glorious end, the force of the Imperium were continuing their sustained assault upon the Defensive Salient. Wave after wave of artillery fire crashed in amongst the ranks of the Death Guard, eviscerating the Poxwalkers and seriously pissing off Typhus and his lieutenants.

Out on the steppe, infantry reinforcements advanced toward the smoke and flames of the Defensive Salient.

IMG_1991

IMG_1994

Talk about a human wave!

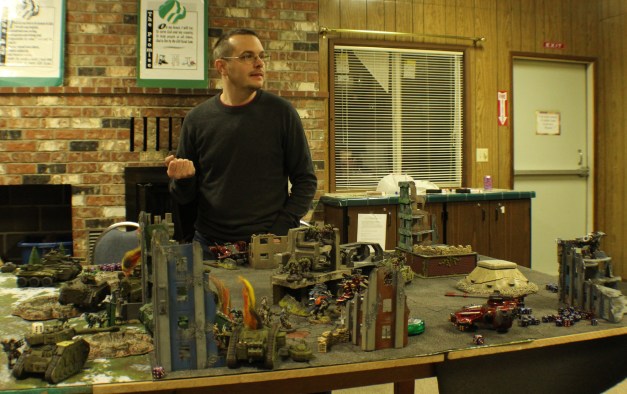
Here’s a poignant photo of John as he gazes off into the middle distance, weighing the fate of countless hundreds of soldiers in the palm of his hand.

IMG_1993

And here’s a closer look at the gnarly situation in the center of the battlefield. So much devastation! The Tau and the Chaos Terminators consolidated their position, occupying the ruins and basically daring the attackers to venture into this cauldron of destruction.

IMG_1990

At this point, despite the horrendous casualties we’d taken, both Paul and I had a fairly solid mobile reserve still available in the Stronghold area. In particular, I had a Foetid Bloat-Drone and a Rhino with 10 Plague Marines packed inside, both fresh and just waiting for the opportunity to pounce.

IMG_2000

The Imperials still had a lot of guns and some mobility, but they were running short on time to complete their mission objectives. They decided to throw everything they had into the Defensive Salient!

That meant these Tau weren’t long for the world, alas.

IMG_2011

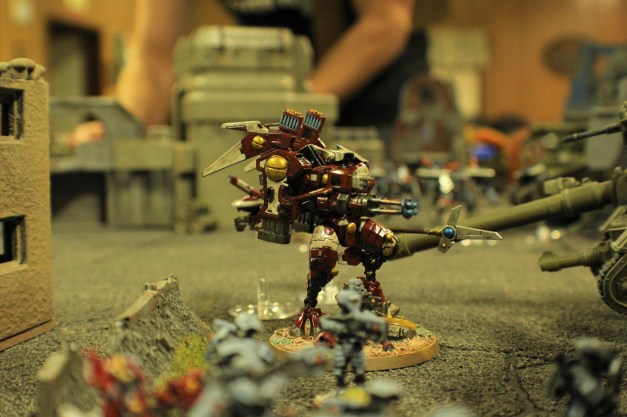
Even as his Crisis Suits were slaughtered, Paul still had a few tricks up his sleeve. His HQ unit, Commander Goldmoon, was a potent force to be reckoned with, and he positioned her for a long-range strike on the Imperials’ backfield resources. If she could get into combat, any one of the vulnerable support units in the backfield might be toast.

IMG_2002

IMG_2005

Over in the center of the battlefield, near the massive scrum of smoking, wrecked tanks, the Death Guard were readying themselves for one final push — out of the Defensive Salient and into the Spearpoint. In a word: CHAAAAAAARGE!

IMG_2008

By occupying the Spearpoint sector, they were attempting to deny a victory point for their opponents. Clever!

As fate would have it, the battered remnants of the Poxwalkers horde (initially 20-strong at the outset of the game, now numbering just half a dozen) were the first ones to surge past the burning tanks and into the Spearpoint sector.

IMG_2020

At this point, the three Imperial players realized they would need to eliminate the Poxwalkers if they wanted to gain the victory point for holding the Spearpoint zone. John and Alex frantically discussed strategy to see how many guns they could bring to bear.

IMG_2013

Jim attacked with the handful of units that still remained able to deal damage on his side of the table. The expression on his face should tell you everything you need to know about how this dice roll went.

IMG_2014

When the smoke cleared, all but one of the Poxwalkers had been slaughtered. ALL BUT ONE! The lone survivor cackled with glee as the Imperials were denied their crucial victory point.

IMG_2015

(I didn’t have a photo of the very last guy, so you’ll have to make do with a photo of the last *few* guys.)

At this point, we did the math and found that the Imperial players didn’t have time to make up the difference in victory points separating them from the defenders.

The Tau and Chaos forces had emerged victorious! But their victory came at a fearsome cost, with dead soldiers and wrecked materiel strewn across the battlefield. The Death Guard in particular had been shattered by the defeat of their daemon prince primarch.

Conclusion

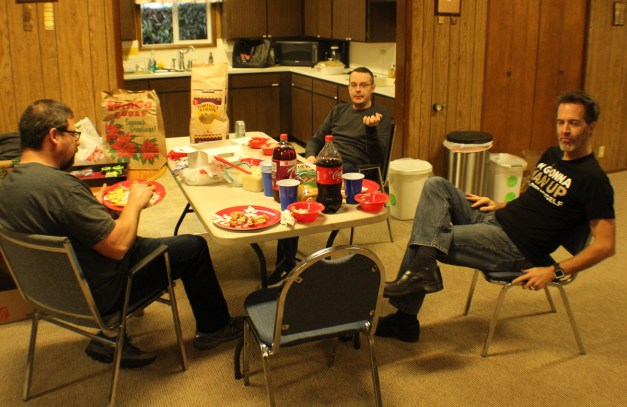
After the game, we took our time packing up and discussing the game. We agreed that we really liked the venue — the Girl Scout center was fairly affordable and offered a lot of space. The ability to spread out our stuff was really ideal. Each player had an entire table to himself to organize his models, books and figures. It was nice to get a “change of scenery” for our big games. We discussed doing this again next year, and maybe even opening up the facility to a few more attendees.

The game itself was a ton of fun. It featured several big initiative swings in both directions over the course of the game. For example, I would have assured you that the defenders were going to be defeated following the fall of Mortarion, particularly since I knew he had died without taking out *any* opposing unit. Ugh, indeed.

But Paul and I rallied after that loss and played to the scenario, and were rewarded for it.

The 30-minute turns definitely raised the stakes for our game, particularly in the early turns, but we agreed it also added a lot of suspense — and it probably made us better better players as a result.

So the narrative of Caluphel continues, with the forces of the Imperium dealt a grievious setback by their defeat at the Treyarch Defensive Salient. The Tau have an opportunity to expand beyond their initial landing zone, and the Death Guard have some new corpses to reanimate as gruesome Poxwalkers.

On the horizon for us … more 40k, more Scrappers, maybe some Necromunda? Stay tuned!

A Face Only Grandfather Nurgle Could Love

Posted by Comrade on November 30, 2017
Posted in: Posts. Tagged: 40k, chaos, death guard, nurgle, painting, sci-fi, warhammer. Leave a comment

This is it — I’ve finally completed last two models from the Warhammer 40,000 Dark Imperium boxed set. The last two figures (the Noxious Blightbringer and the Malignant Plaguecaster) are imposing character models with a lot of details. But they’re done at last, and not a moment too soon: Apoc-Luck is this weekend!

Up first is the Malignant Plaguecaster. He’s a sort of sorcerer for the Death Guard Plague Marines. The basic sculpt included several silly details that I didn’t like, such as a weird head with a creepy babydoll face, and a fart/vomit stream coming out of his hand. Here’s the original stock sculpt from Games Workshop.

250px-plaguecaster1

The baby face and fart cloud were certainly flavorful flourishes, but I didn’t like ‘em, so out came the clippers.

IMG_20171128_071140.jpg

I replaced the baby face with the snout from a Pig Iron gas mask head. There wasn’t a lot of space under his cowl, so I really just needed the nose part of the head, nothing more than that.

I snipped the fart cloud right off and replaced it with a more traditional gun from my bits box. Oops, looks like I forgot to drill out the barrel.

I also skipped the floppy robe pieces that go on the back of his armor and instead attached a puckered sphincter piece and one of those smoky incense balls (snipped off another unsuspecting Plague Marine model), both of which I had sitting around in my bits box. Again, it’s nothing spectacular, but it does give this figure a unique flair that you won’t get with the stock sculpt.

IMG_20171128_071222.jpg

Anyway, I think the model is a little bit less ostentatious now. It’s still plenty gruesome and creepy, and it still definitely screams “PLAGUE MARINES!”

Up next we have the Noxious Blightbringer, a massive warrior who carries an equally large bell (lots of bells, actually — they’re hanging all over his armor!).

IMG_20171128_071303.jpg

This was a fairly straightforward paint job, but I was really pleased with how he came out. Lots of smooth colors and highlights, as opposed to my typical “block colors + magic dip” approach. I spent a little extra time on this guy, and it shows.

IMG_20171128_071341.jpg

Oops, I forgot to paint up that incense ball and the little fly on his backpack. Oh well! Anyway, they’ll both be hitting the table alongside a solid block of Plague Marines and Poxwalkers in this weekend’s Apoc-Luck battle! Stay tuned for more!


Apoc-Luck 2017: Hour of Darkness

Posted by Comrade on November 29, 2017
Posted in: Posts. Tagged: 40k, apoc luck, apocalypse, club, game night, narrative, sci-fi, warhammer. Leave a comment

C2C9C905-9116-47B8-95B1-053B4000D895

We’ve got a fun event coming up this weekend: Apoc-Luck!

For those unfamiliar, this event combines an Apocalypse-sized game of Warhammer 40,000 with a potluck dinner. It’s a great excuse to enjoy an evening of gaming with good friends and FOOD!

I first heard about this phenomenon last year and were immediately inspired to try it out. For our little group, we’re renting out an activity room in a facility just around the corner from my house.

We developed a fun scenario designed to get all those big, expensive toys on the table for an epic (yet still playable) slugfest. I think we’ll have a big game that’s still manageable and capable of being played to conclusion. Check out the game handout for more info on the special rules for this game:

Apoc-Luck Game Handout

Doubtless this game will produce some pretty incredible photos and stories. Stay tuned for a truly epic battle report!

Scrappers Game Report and Review

Posted by Comrade on November 27, 2017
Posted in: Posts. Tagged: game night, post-apoc, review, sci-fi, skirmish, warbands. Leave a comment

IMG_20171114_085248.jpg

Earlier this month John and I had a chance to try out Scrappers, the new post-apocalyptic ruleset by Bob Faust and published by Osprey. This was actually our second run-through with Scrappers; we tried it out a couple months back and resolved at that time to try a proper campaign game. So we’ve had two outings with the game, and so we wanted to share some thoughts.

If you know me, you’ll know I love warband-sized games with 5 to 20 figures per side. They’re perfect for a weeknight evening, and they’re also a great excuse to paint up a handful of cool new miniatures — without having to commit to a full army’s worth of models. In the past, I’ve had great luck trying out compact, tightly produced post-apocalyptic tabletop wargames, so I was excited to give Scrappers a try.

As with similar titles from this publisher, the game is a sleek volume, light on the fluff but heavy on the crunch, with lots of replay value packed into the core rulebook. Warbands are composed of individual figures — typically humans, mutants, synthetic robots, further defined by various faction traits.

Unit creation is entirely customizable, with a strong affection for WYSIWYG gameplay (no invisible turbolasers or hidden rocket launchers, please). I have a pretty sizable collection of post-apocalyptic and sci-fi miniatures, and I’m pleased to say that I could get them onto the battlefield with Scrappers.

John and I put together a couple basic warbands — both from the Freelancer faction, which is the generic catch-all faction that represents all of the mercenaries and raiding parties that lurk in the hinterlands, competing for scrap. There more specific factions, such as the all-mutant Gamma Lords and the half-life warboys who make up the Sons of Entropy.

I took this game as an opportunity to drag out my brand-new double-sided plush game mat from Cigar Box Battle Mats. I had received it in the mail following their Kickstarter just a few weeks prior, and was eager to give it a baptism by fire. Here’s the setup.

IMG_20171112_211517248.jpg

Pretty crowded! In Scrappers, gameplay is tightly focused on the basic “treasure hunt” mission, where both sides are competing to retrieve scrap tokens from the battlefield. I jokingly referred to Scrappers as “sci-fi Frostgrave,” but the characterization is apt. I find this type of focused gameplay to be very refreshing, and it makes pre-game setup easy. Here are the loot tokens we distributed around the battlefield.

IMG_20171114_085539.jpg

After going over the rules once more, we got underway.

Now’s the point where I explain how Scrappers has *a lot* of rules. Seriously, this is the sort of game that has two full pages of text to describe the mechanics for climbing, jumping and falling. It is extremely tactical, with lots of overlapping rules for both figures and their gear. This allows for lots of customization during unit creation, and lots of rich, unique campaign play — but it also leads to plenty of rulebook flipping, particularly during those early games. This is most decidedly not a rule-lite game — just something to know before going in.

IMG_20171114_085248.jpg

As our game unfolded, John and I both saw immediately how the d10 dice resolution system in Scrappers keeps both players engaged at all times. The game uses alternating unit activation coupled with a unique initiative system. Dice rolls are always opposed — you are never rolling against a static number, always against an actual opponent, even for something as mundane as a climb check. That’s fun and engaging.

IMG_20171114_085446.jpg

In our game, we both sent our figures creeping into the ruins to try to secure the scrap tokens. Small firefights erupted throughout the battlefield as our guys spotted each other and exchanged fire.

Here’s one of my veterans, Lieutenant Shashlik, exploring a rusted power conduit. Wonder what scrap he’ll come up with?

IMG_20171114_085412.jpg

In Scrappers, each scrap token has the possibility of generating a random event (based on a big table in the rulebook). The dramatic moment when you roll for a random event is definitely one of my favorite parts of the game. It adds a lot of unpredictability to the game, and of course random weird stuff is one of the hallmarks of the post-apoc genre.

The wide-open nature of unit creation allows players to min-max and create virtually any sort of character archetype imaginable. In John’s case, this meant a deadly sniper who seized the high ground early on and began picking off my figures one by one.

IMG_20171114_085215.jpg

In my case, custom unit creation yielded SN0-C4T, a quadrupedal combat robot who could scale any piece of terrain and blaze away with his integral auto-shotgun.

IMG_20171114_085348.jpg

We traded fire for a few turns until a rad storm blew in and began saturating our characters with radiation. By that point, I had lost a few figures and gained a few scrap tokens, so I wisely decided to quit the field rather than risk irradiating my warband. And SN0-C4T was about to tangle with Ashford, John’s hulking mutant warrior, so it was probably better for me to just flee.

IMG_20171114_085513.jpg

IMG_20171113_215350.jpg

John “won” the game, but during the post-game loot checks, we found that one of my scrap tokens was actually a force shield — a powerful artifact from before the worldwide collapse. So I actually scored more loot, though I’d have to spend some of it re-equipping my guys who lost their gear.

We remarked after the game that we didn’t get into close combat all — not in this game, and not even in our previous game. Ranged combat seems extremely potent, so much so that melee seems difficult to leverage without building your entire warband around it. And again, this is a WYSIWYG game — I want the game to play properly with a bunch of regular figures armed with pistols and autoguns and knives, because that’s what I’ve got in my collection. I’m not interested in building a min-maxed uber-warband just to fight in close combat.

And now, some thoughts on Scrappers from my stalwart opponent…

John’s Thoughts on Scrappers

After reading the rules I was nervous about playing Scrappers, but once I did I had a wonderful time and can’t wait to play again.

We played Scrappers following a series of stripped-down one page rulesets, like Grimdark Future and Double Tap, which leave  many procedural decisions up to player interpretation and common sense. If those rulesets are sketches, Scrappers reads more like a detailed technical drawing. Before playing, I felt the rules text over-explained some concepts or dwelled on trivialities. Scrappers clearly means to handle being played competitively.

I worried gameplay would feel stilted as a result, but the game flowed beautifully. The rules supported play without obstructing us, and helped us avoid getting bogged down negotiating the gentleman’s agreements often required by looser rules.

IMG_20171113_203243665.jpg

The system for choosing who goes when leads to rich tactical decision-making. Opposed d10 rolls gave me a twinge of nervous excitement each time we rolled, which I sometimes lack in handfuls-of-d6s-style rules.

Scrappers only offers one type of scenario, hauling away scrap under fire from your opponent, but it’s a robust scenario that held up fine across both our playthroughs. A random event always occurs sometime during the first four scrap tokens recovered, maybe wonderful, maybe dangerous for the player who triggers it. That variety and uncertainty give the scrap scenario the legs it needs to carry a campaign. Rolling after the battle to find out how much loot you hauled off is simply joyful, but the trauma table can do some nasty things to your wounded models if you’re not lucky.

Overall I found the balance of risk vs. reward and long- vs. short-term benefit embedded in campaign play to be just right.

IMG_20171114_085139.jpg

Scrappers would really benefit from trait and equipment cards. Special capabilities in Scrappers are expressed in terms of trait keywords, which must be referenced separately from where they are listed. For example, the machine gun profile lists its range, rate of fire, and damage, followed by a Directed Burst keyword, whose effects are described several pages earlier in the book. There are also several traits listed throughout the book in different spots based on the source of the trait (e.g., whether it was granted by lifeform type, faction, or was purchased, etc). I would like a tool that pulls the trait descriptions onto my crew sheet for ease of reference.

I think I will play Scrappers often, and recommend it to anyone looking for a sturdy, fast-playing post-apocalyptic skirmish wargame.

Conclusion

Well there you have it! Scrappers is a crunchy game that rewards the players who take the time to dig into the nuances of all the special rules and funky interactions. It also contains enough flavor and random gonzo weirdness to keep the narrative crowd engaged as well. We’ll play this one again soon!

Posts navigation

← Older Entries
Newer Entries →
  • Recent Posts

    • Shadow War Armageddon: The Promethium Must Flow!
    • Cold Data and Fiery Logic: The Dark Mechanicum
    • Building a Grimdark Battle Board
    • Hobgoblin: More Thoughts and Musings
    • Grimdark Future: The Scouring of Hundvolst
  • Follow Comrade's Wargames on WordPress.com
  • Tags

    28mm 40k army battle report caluphel campaign chaos club death guard dragon rampant dwarves fantasy game night grimdark hobby miniatures narrative nurgle painting post-apoc project saga sci-fi skaven skirmish terrain warbands wargames warhammer workshop
  • Archives

    • March 2026 (1)
    • February 2026 (1)
    • January 2026 (1)
    • November 2025 (1)
    • October 2025 (2)
    • September 2025 (1)
    • October 2023 (2)
    • September 2023 (1)
    • August 2023 (2)
    • July 2023 (3)
    • June 2023 (3)
    • May 2023 (4)
    • April 2023 (2)
    • March 2023 (5)
    • February 2023 (2)
    • January 2023 (2)
    • December 2022 (1)
    • November 2022 (1)
    • October 2022 (4)
    • August 2022 (2)
    • July 2022 (1)
    • June 2022 (2)
    • May 2022 (5)
    • March 2022 (1)
    • February 2022 (1)
    • January 2022 (3)
    • December 2021 (1)
    • November 2021 (2)
    • October 2021 (1)
    • September 2021 (2)
    • July 2021 (1)
    • June 2021 (1)
    • May 2021 (2)
    • March 2021 (3)
    • February 2021 (1)
    • January 2021 (3)
    • December 2020 (1)
    • October 2020 (1)
    • September 2020 (2)
    • August 2020 (1)
    • July 2020 (1)
    • June 2020 (1)
    • May 2020 (1)
    • April 2020 (1)
    • March 2020 (1)
    • February 2020 (2)
    • January 2020 (3)
    • December 2019 (5)
    • November 2019 (1)
    • October 2019 (1)
    • September 2019 (2)
    • August 2019 (2)
    • July 2019 (4)
    • June 2019 (3)
    • May 2019 (3)
    • April 2019 (1)
    • March 2019 (1)
    • February 2019 (2)
    • December 2018 (3)
    • November 2018 (3)
    • October 2018 (5)
    • September 2018 (5)
    • August 2018 (5)
    • July 2018 (5)
    • June 2018 (2)
    • May 2018 (1)
    • April 2018 (3)
    • March 2018 (1)
    • February 2018 (1)
    • January 2018 (1)
    • December 2017 (1)
    • November 2017 (5)
    • October 2017 (1)
    • September 2017 (2)
    • August 2017 (4)
    • July 2017 (4)
    • June 2017 (3)
    • May 2017 (4)
    • April 2017 (3)
    • March 2017 (7)
    • February 2017 (6)
    • January 2017 (2)
    • December 2016 (5)
    • November 2016 (2)
    • October 2016 (3)
    • September 2016 (4)
    • August 2016 (5)
    • July 2016 (6)
    • June 2016 (8)
    • May 2016 (2)
Create a website or blog at WordPress.com
Comrade's Wargames
Create a website or blog at WordPress.com
  • Subscribe Subscribed
    • Comrade's Wargames
    • Join 153 other subscribers
    • Already have a WordPress.com account? Log in now.
    • Comrade's Wargames
    • Subscribe Subscribed
    • Sign up
    • Log in
    • Report this content
    • View site in Reader
    • Manage subscriptions
    • Collapse this bar
 

Loading Comments...