I’ve had a lot of fun building terrain for our grimdark / Inq28 style sci-fi campaign (The Cauldron). I tackled somelargepieces for our modular underhive board, and now I’m back to showcase some smaller bits of scatter terrain to spice up the battelfield.
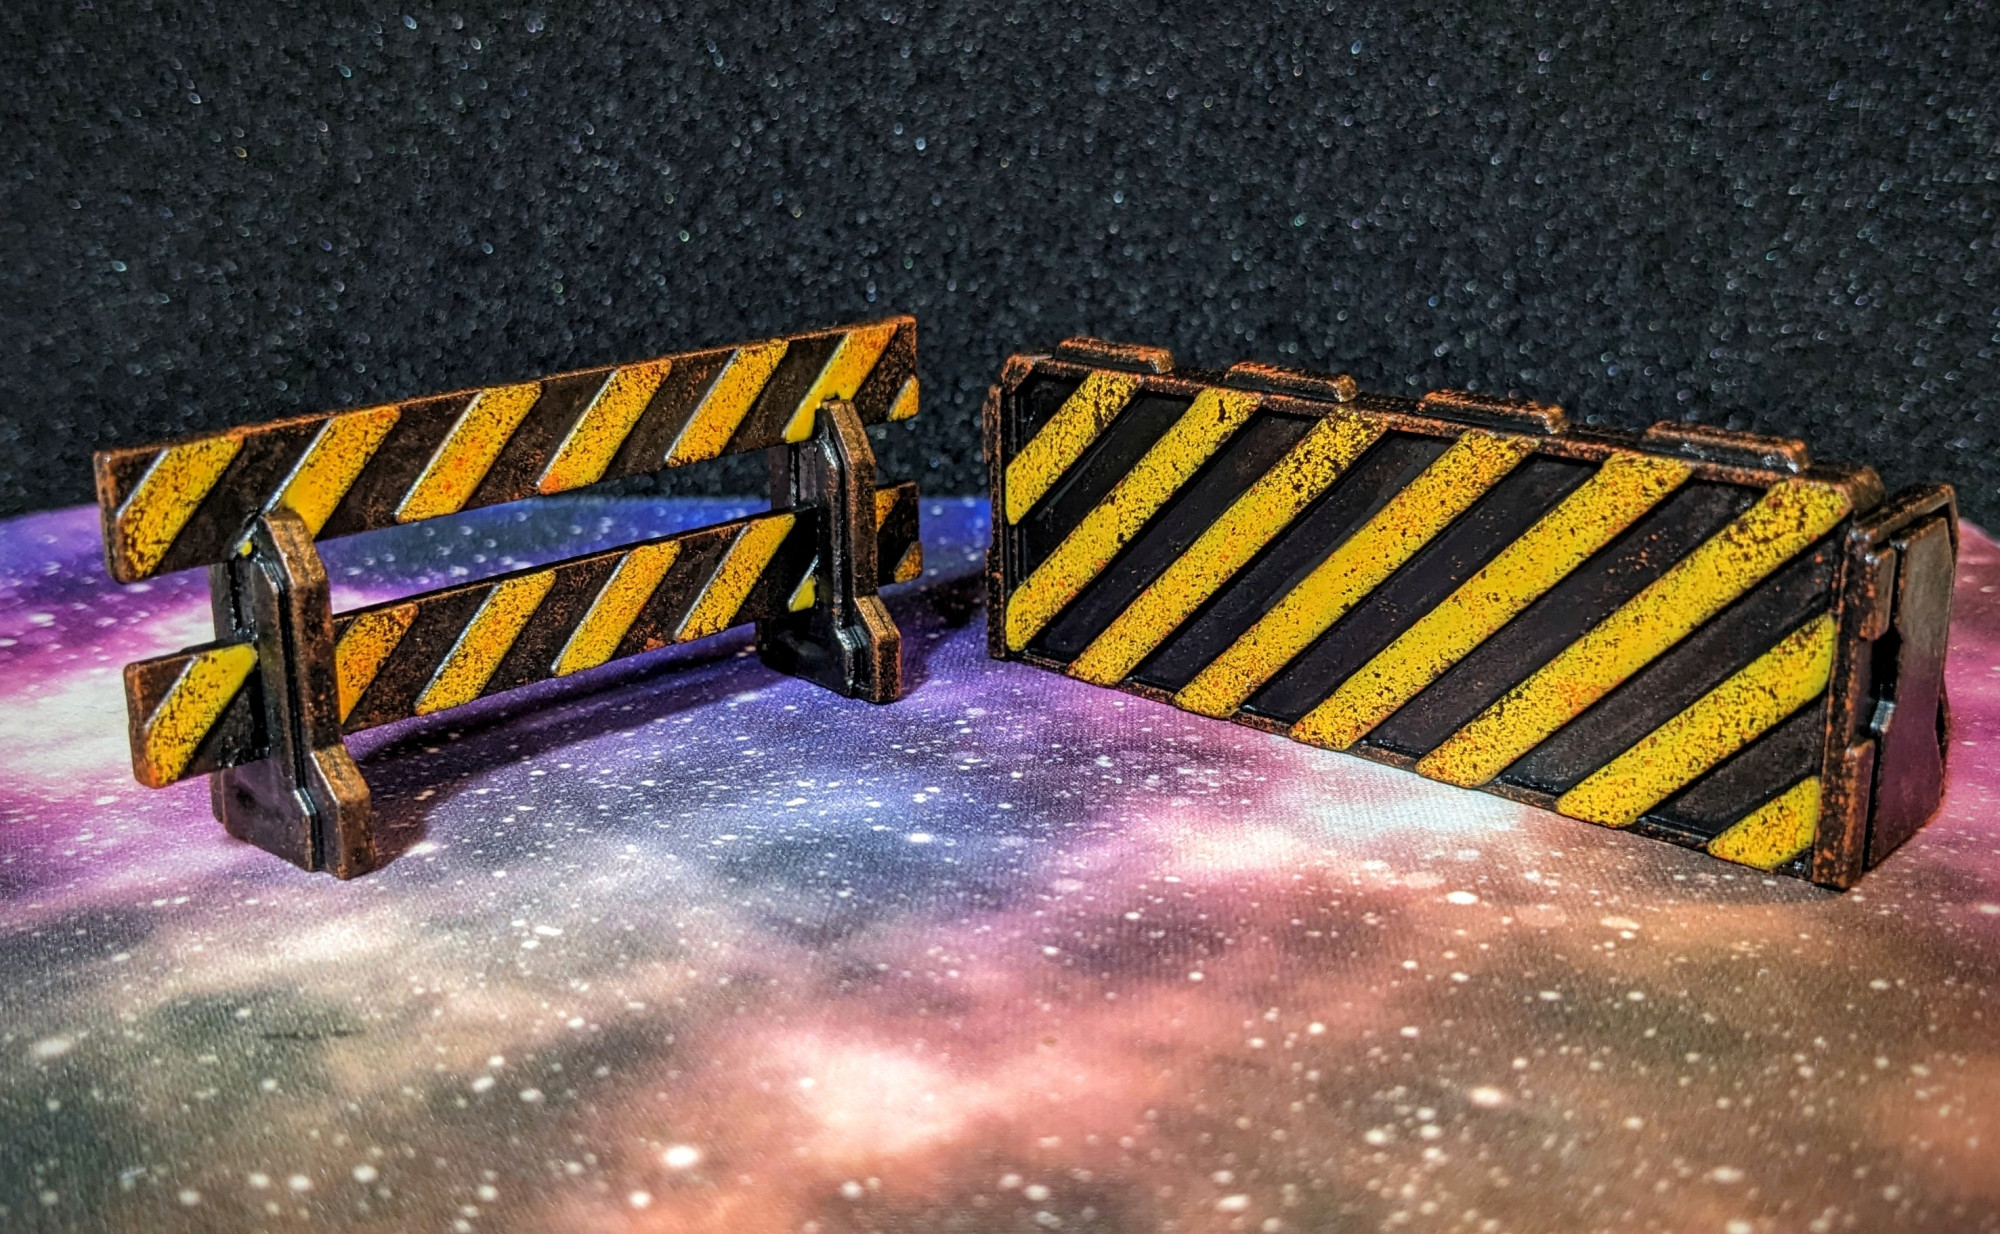
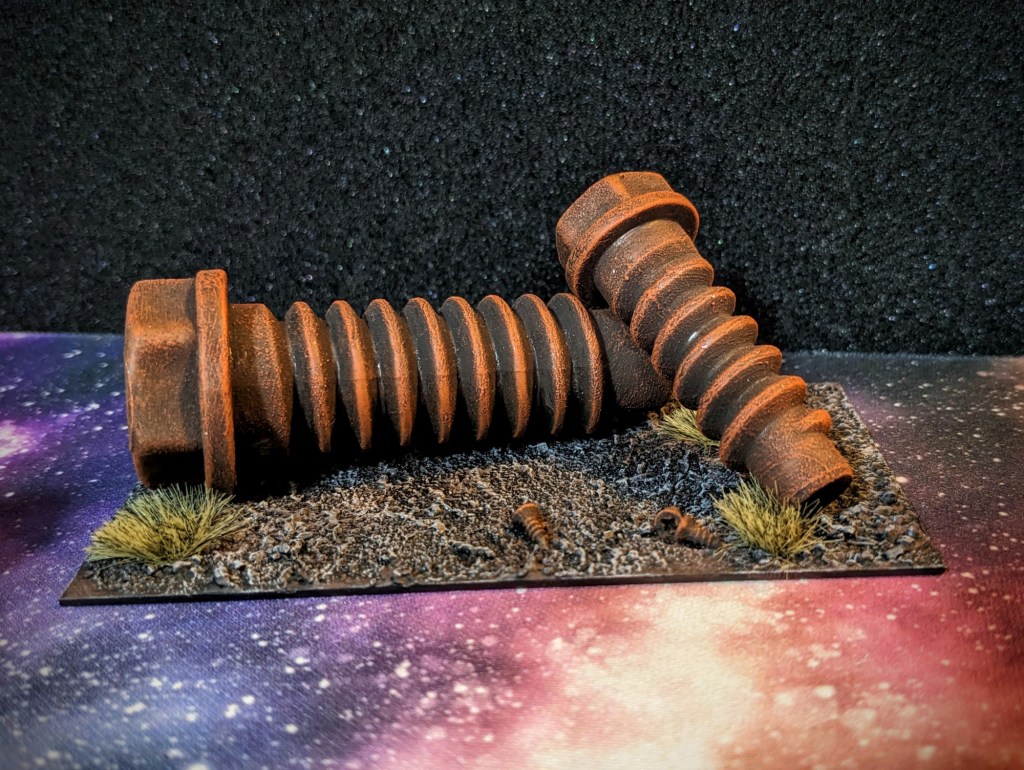
Up first are some industral pieces: two barricades (from Mantic’s Deadzone set, I think) and two gigantic oversized bolts that I liberated from my kids’ toy box and painted in crusty, rusty colors.
Up next we have some very simple alien growths, perfect for use as objective markers or to dress up a wall or panel. These are Tyranid cysts from some sort of 40k set. I affixed them to small pieces of plasticard painted in a simple rusty metallic paint scheme.
These pieces can be used on the ground as objective points, but to me they work even better when affixed to a wall or door with a bit of sticky tack.
They look like the sort of oozing, ichor-filled growths that would adorn a tunnel or hallway within an area that’s being overtaken by foul xenos. Yeah, that’s the stuff.
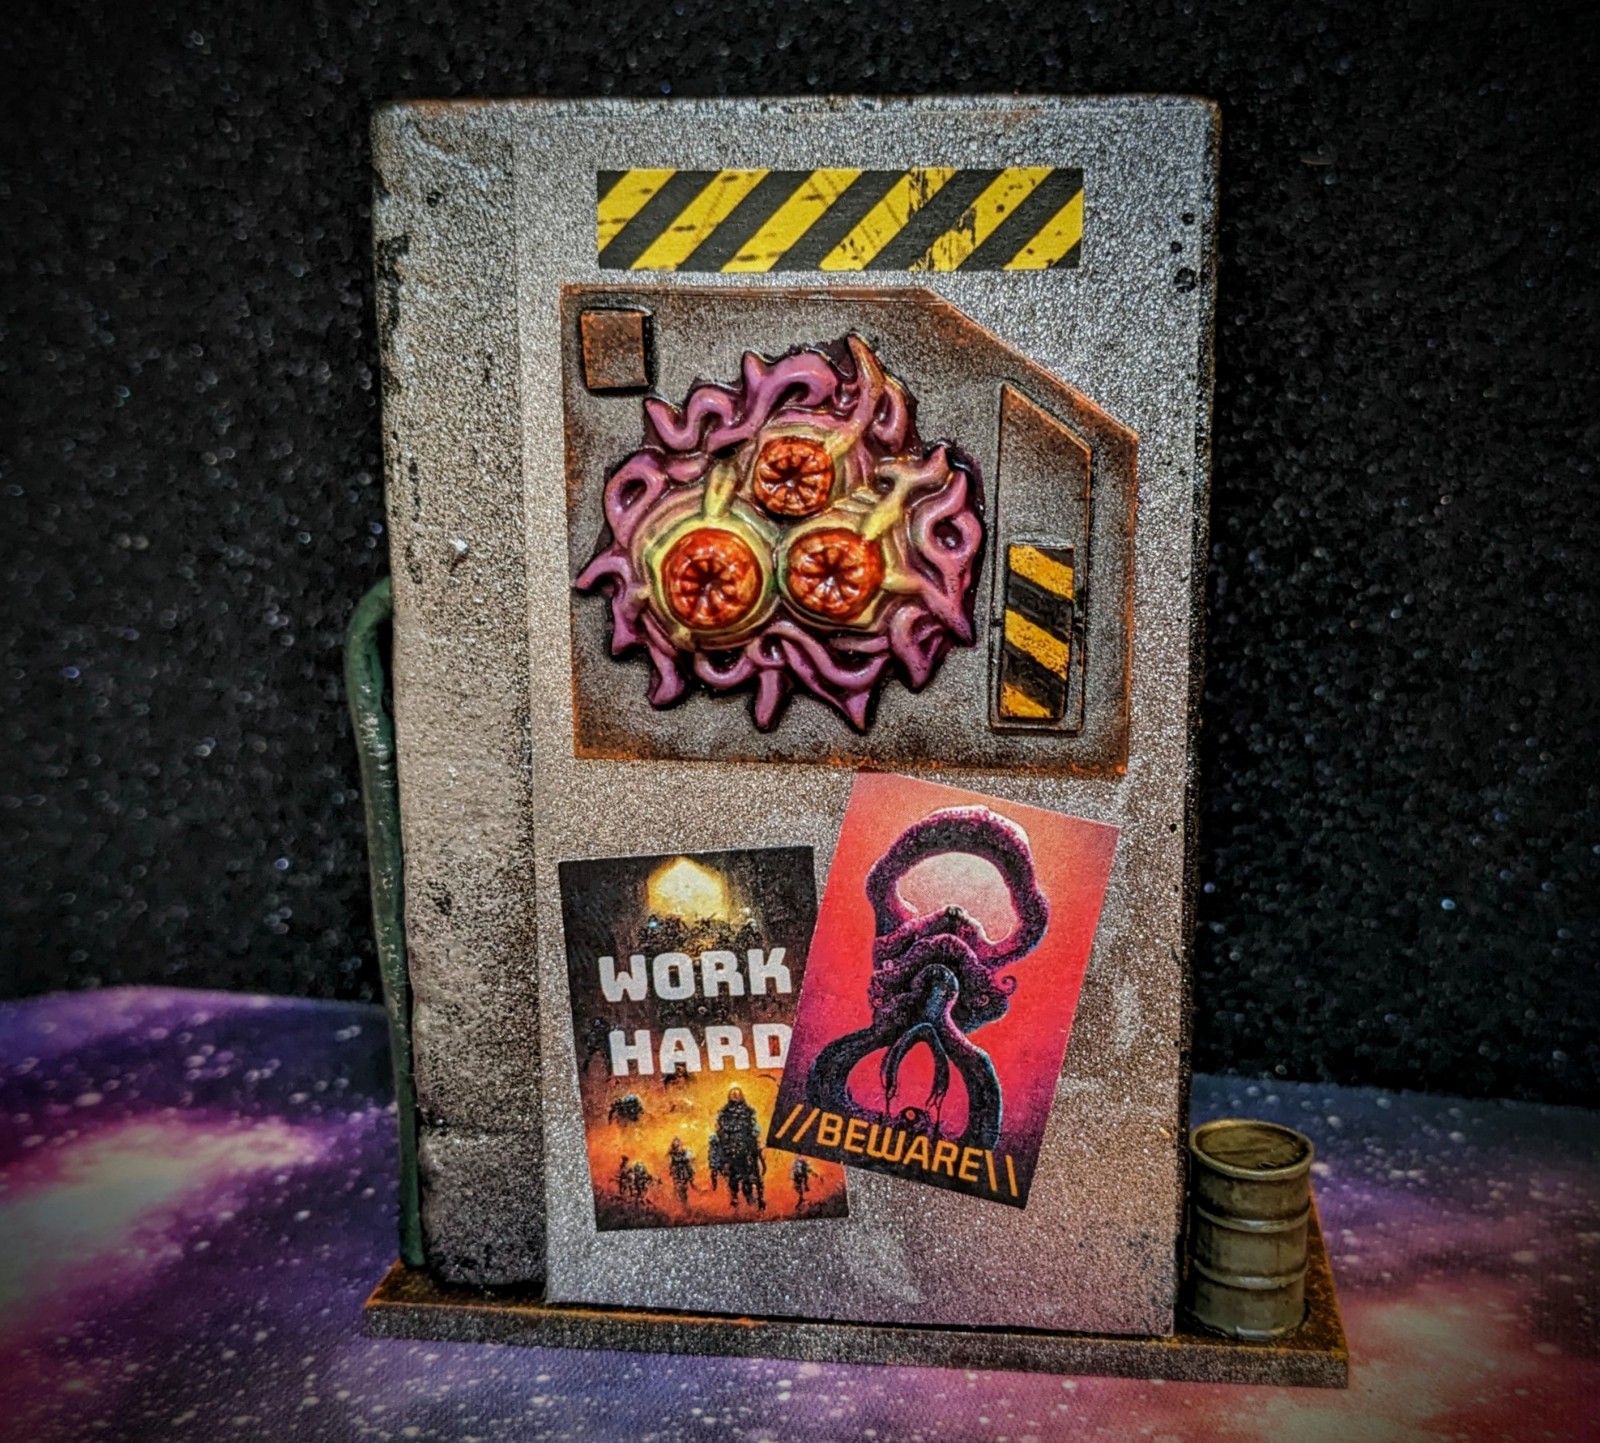
This last piece was something I’ve been wanting to kitbash for a long time – a servitor medicae station, one of countless thousands of such sites located throughout the working class levels of Hive Sacrament.
These little stations feature prominently in Darktide, the 40k first person shooter where you play as part of a ragtag Inquisitorial warband purging the taint of chaos from the cruel underhive.
This terrain build was pretty simple – a piece of pink foam fitted with a vaguely religious alcove piece kindly provided by John’s 3D printer. On top of that I affixed some industrial lamps, cables, and grating – all OSHA approved, of course. The servitor model was an old piece from the Inquisitor Karamazov kit that’s been bouncing around in my bits box for years.
After a couple of large, multiplayer sessions in our grimdark sci-fi campaign (The Cauldron), it was a nice to downshift a little bit and try a smaller, more intimate affair for this most recent game. We crafted a custom scenario centered on THE TECHNOBRIDGE, a terrain creation that you can read about at the link.
For this game, we set up a custom, somewhat assymetric scenario that saw Rian’s Battle Sisters assaulting the heretics’ fortified hideout. The Sororitas had three objectives that they had to complete in sequence: lower the bridge, enter the bunker on the far side to retrieve the corrupted data cores, and then escape into the sewer pipe.
The heretics had more forces (500 points compared to 400 points for Rian) but they arrived in piecemeal fashion over several turns. It was an interesting custom scenario that forced some do-or-die decisions on Rian as he advanced across the Bridge of Faith!
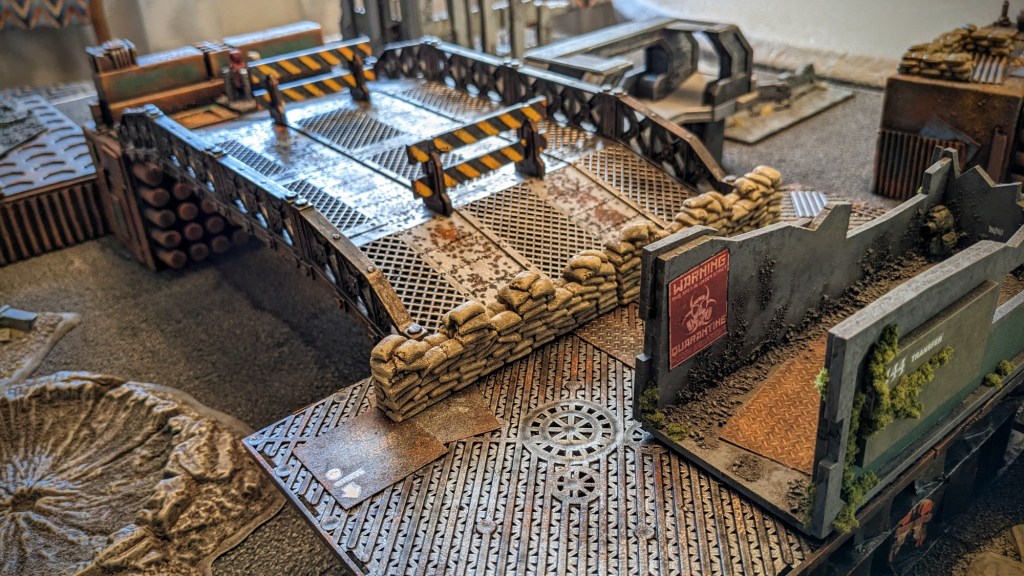
The game began with the Bridge of Faith raised (i.e. not present on the table, as you can see in the photo above). The small control station on the far side of the chasm operated the bridge. Rian would need to seize the control station in order to lower the bridge.
The sandbagged area represents the heretics’ fortified hideout. They also had an armored bunker and some other emplacements under their control – a potentially tough nut to crack, except that they had a limited number of warriors on the table at the start of the game.
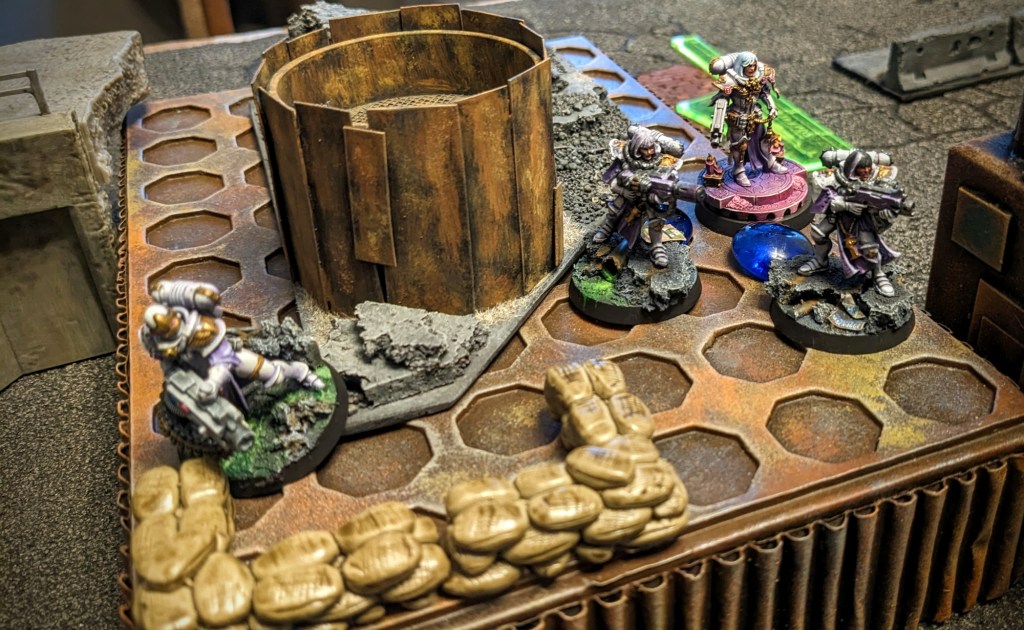
Rian’s Sister of Battle deployed near their side of the bridge. They intended to seize the control panel as early as possible, to effect an assault across the relatively open bridge.
The game began with the Battle Sisters laying down covering fire from elevated ruins near Rian’s deployment zone.
The fast-moving Sisters Repentia, unarmored and wielding gigantic chainswords, raced ahead under withering fire and captured the control panel. The bridgehead was under the Imperium’s control!
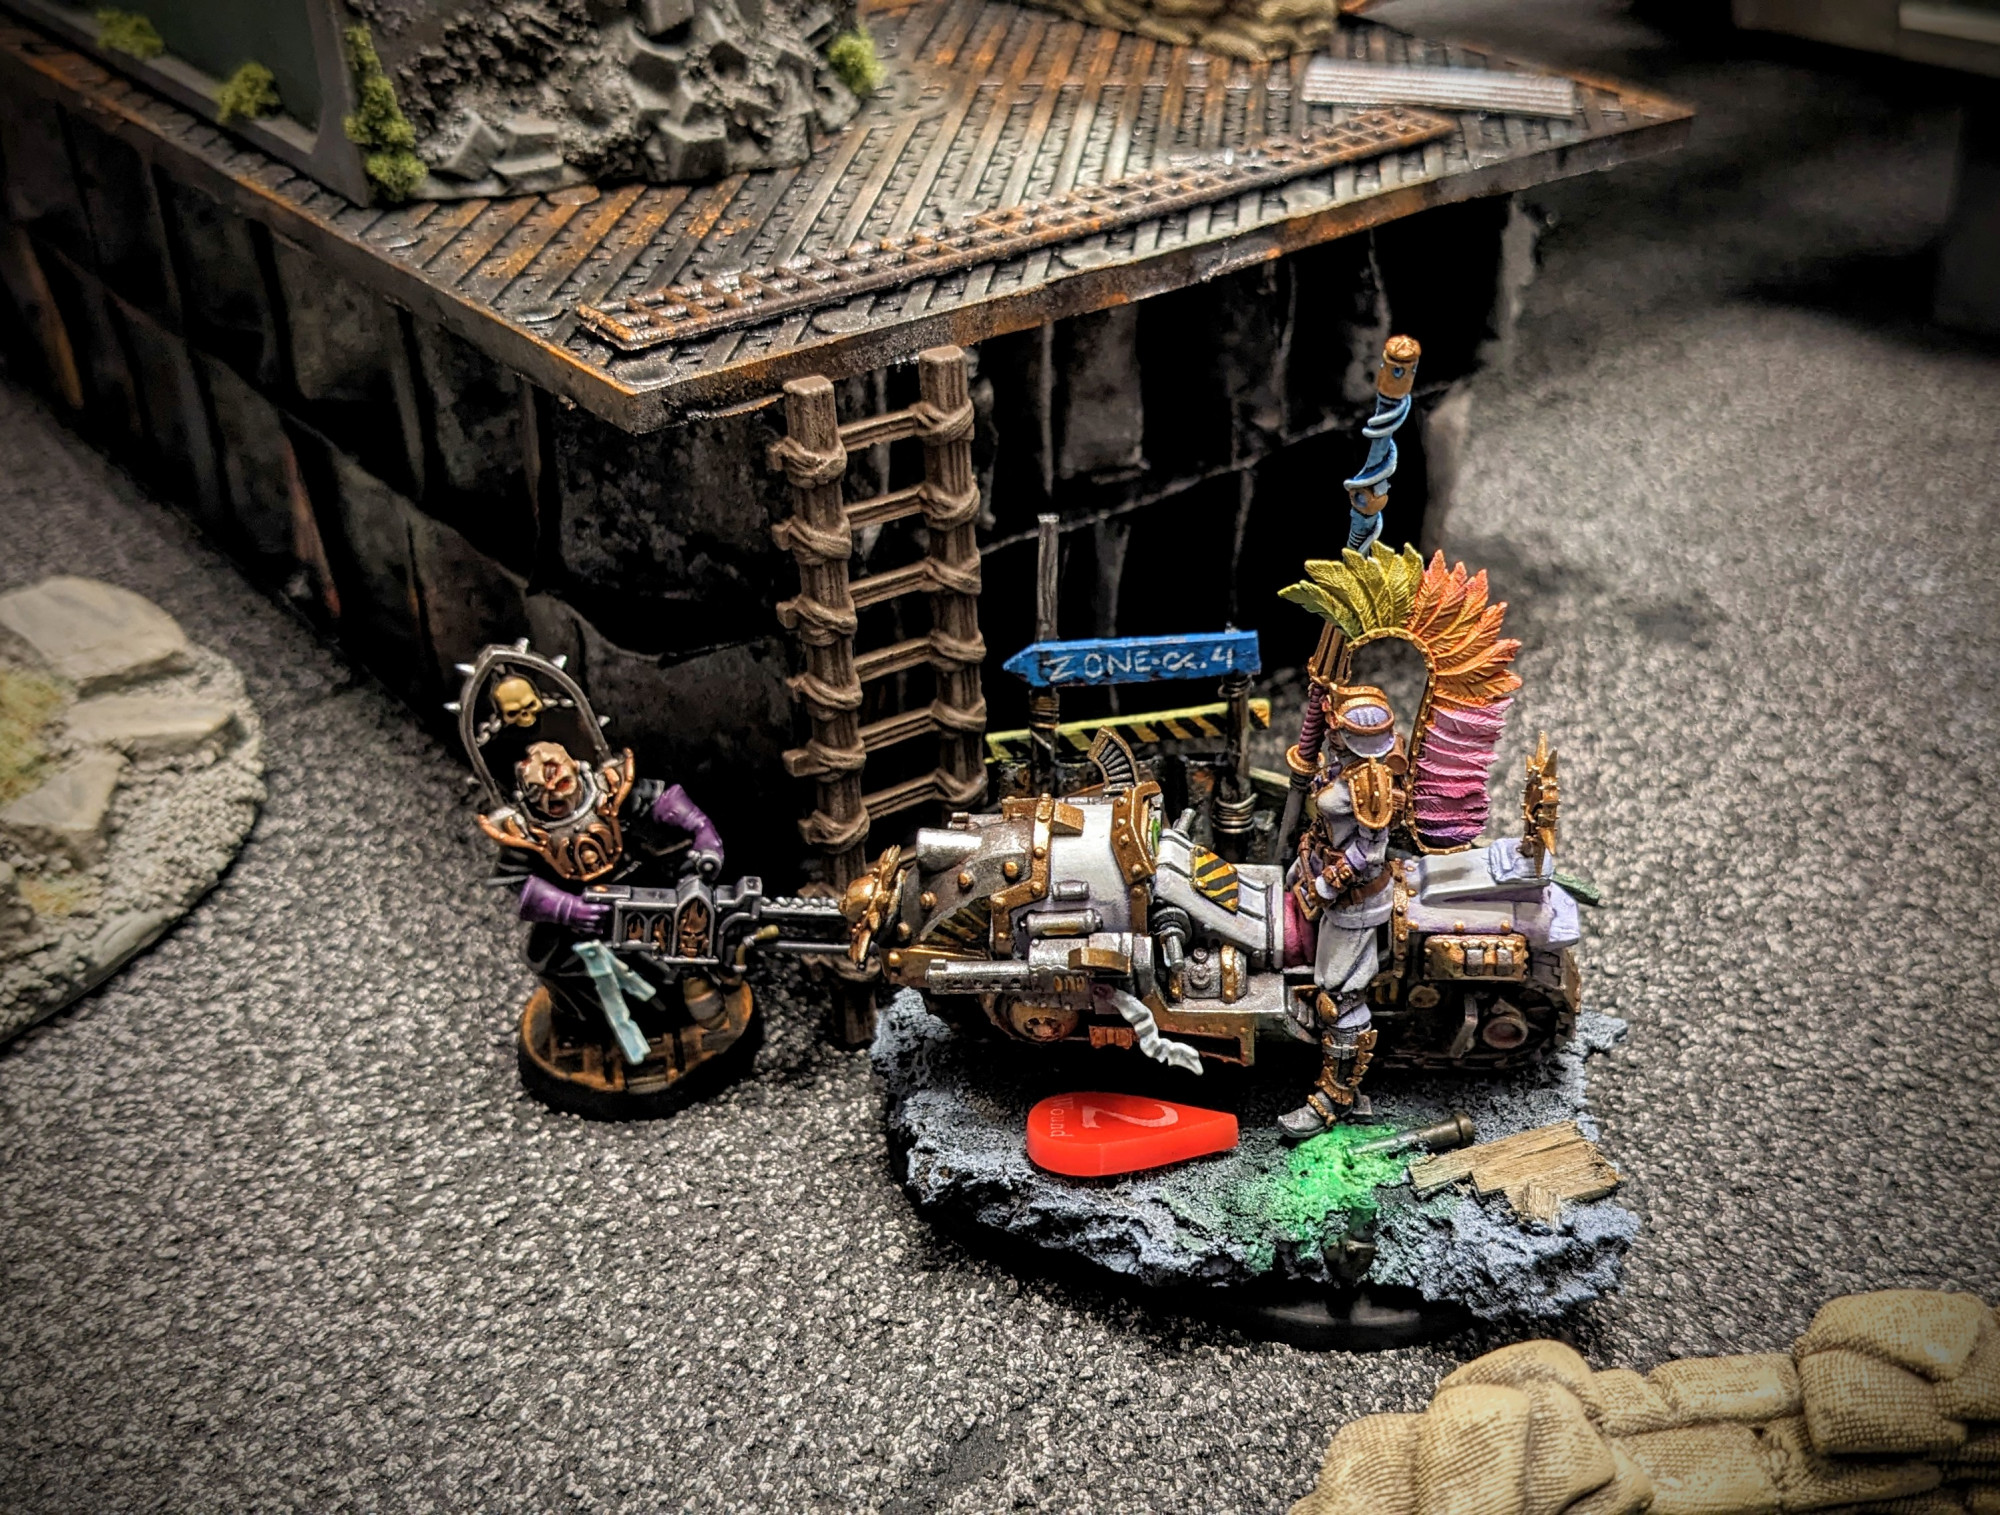
I realized at this point that I didn’t get too many shots of my own miniatures. I didn’t have a ton of guys on the table at the start of the game, and my figures mostly lurked in their fortified hideouts taking potshots at his advancing soldiers. Interestingly, both Rian and I chose purple accent colors for our respective factions.
Now, most of the Adeptus Sororitas chose to advance up and over the bridge…except for Rian’s badass newly painted biker! She spent the game motoring around the lower level of the battlefield, engaging my warriors at range and generally creating havoc in my backfield.
The first clash came as the Battle Sisters consolidated their position aroud the bridgehead. The first wave of heretic reinforcements arrived, and Josh sent one of his cyborg brawlers charging headlong into combat with the Sororitas.
The clash was brutal and short-lived – the Battle Sisters mobbed the cyborg and dispatched him with ruthless efficiency. With that little threat out of the way, they advanced at a cautious, implacable pace.
Unfortunately, a “cautious” pace wasn’t going to cut it for our scenario! The two remaining locations that the Sisters of Battle had to visit (the bunker and the sewer pipe) were still fairly far away, and the clock was ticking. For Rian to succeed, he would need to abandon his cautious approach and light a fire under his nuns’ collective rear ends.
We quickly realized that the Adeptus Sororitas would have to take a “leap of faith” from the platform at the end of the bridge, onto the roof of the bunker, in order to secure the corrupted data core and escape through the sewer pipe by the end of the game.
Thankfully, Grimdark Future: Firefight has simple rules for jumping. Just roll some dice and hope for high results. If you fall, you’re pinned. Can’t be that hard, right? Wellllll…..
As you can see from the photo above, the Sisters’ attempts at jumping across to the bunker left a lot to be desired. Three nuns flubbed their rolls and fell flat, one after the other. The execution was so abysmal that we suddenly wondered whether the Sisters of Battle were going to be slaughtered outright. My Dark Mechanicum leader (Rho-Terak, the Enslaver of Logic) rushed into the fray, killing the Sororitas leader as she lay prone on the groud. Big yikes!
Thankfully, the Sororitas champion on the bike was still present as a threat on my flank. She kept up the pressure just long enough for one of the Battle Sisters to successfully make the leap over to the bunker. Hurray – Rian was two-thirds of the way to victory!
Beyond this point, I did not capture photos of the final moments of the game. The last wave of heretic reinforcements showed up – two small fire teams of three models each – but alas, Josh and I didn’t place them particularly well, and the new arrivals were unable to interdict the Adeptus Sororitas as they raced from the bunker to the sewer pipe to make their escape.
So it was a major victory for Rian and the Sisters of Battle – but only just! If he had dithered, or if the heretics had been able to stall his advance even for one turn, the outcome would have been dramatically different.
This was a fun game with a nifty scenario that featured creative input from all the players. Oh, and we got to use THE TECHNOBRIDGE. So that was a win all around.
You may have seen a fun new terrain piece in the background of my recent battle report (Cultists Rampant!). It’s a gigantic sci-fi bridge from Pegasus Hobbies, and I love how it turned out so much that I bought another one. (It’s also super cheap at $15.99 on their website.)
Here’s a peek from the game earlier this month, with a tank parked atop its rusted, pitted surface. THE TECHNOBRIDGE fits right in with the rest of our grimdark sci-fi terrain!
I’m ashamed to report that this simple, effective terrain kit languished in my projects pile for probably 2+ years until I got around to building and painting it. It’s simple to put together – a sprue for the large bridge panels and another sprue for the guardrails, and you’re done! All sci-fi terrain kits should be this easy.
As far as painting, I wanted to try some rock salt chipping to create rusty pits and gouges in the metal surface of the bridge. I painted the whole thing black, then sponged on some bright orange spots in the center of the two bridge channels. I sprinkled rock salt over the orange areas and stuck it in place with a quick spritz of hair spray.
My friend Jim had gifted me a spray can of metallic silver, so I used that spray over the entire model. Once that was dry, I used a toothbrush under running water to gently loosen and scrub off the salt, revealing the spotty orange rust patches. Then the entire TECHNOBRIDGE got a heavy black wash to dull down the shiny metallic finish and the bright orange rust spots. After that, I did some gentle sponging with oranges and browns to punch up the rust effect throughout the model.
This was a VERY fast paint job, accomplished exclusively with spray cans, heavy washes, and various chipping/sponging effects. No small paintbrushes were harmed in the creation of this TECHNOBRIDGE!
I think the overall effect is great, and I’m continually impressed by the sheer size of this terrain piece. You could comfortably drive a Land Raider across the TECHNOBRIDGE. In fact, it served as the centerpiece of a forthcoming battle report from last week’s game of Grimdark Future Firefight! Here’s a sneak peek.
It’s been a while since we checked in on our Nightwatch campaign. I’ve actually had these photos on my phone for a couple months, just haven’t gotten around to doing the writeup.
Anyway, we gathered a few months back to play the fifth (5th) session of our Nightwatch campaign. A proper, by-the-book Nightwatch campaign is a carefully scripted affair, with seven sessions that slowly increase the intensity and danger, culminating with an epic “boss battle” in the final session.
So by that metric, you can see we’re quite advanced by this point in our campaign. Our characters are proficient and deadly, and they’re outfitted with all manner of deadly weapons, artifacts, and gear.
We’ve played a variety of objective-based scenarios up to this point in our campaign. For our fifth session, we decided to try a seemingly simple game mode – survive for seven turns. That’s it! Nothing more complicated than that.
It seemed easy, but the players barely escaped from this game with their hides intact. The danger started early and often, as terrifying beastmen began emerging from the depths of the Embermoon Forest on turn 1.
From there, the danger just increased expontentially. The slower characters, like Jim’s knight Sir Joshua, got bogged down in grinding melee combat just a few inches beyond the heroes’ deployment zone.
This meant that the more mobile characters, like Vincent’s alchemist, had to stay somewhat nearby to protect their slower comrades, and couldn’t race ahead to engage the beastmen reinforcements that were arriving every. single. turn.
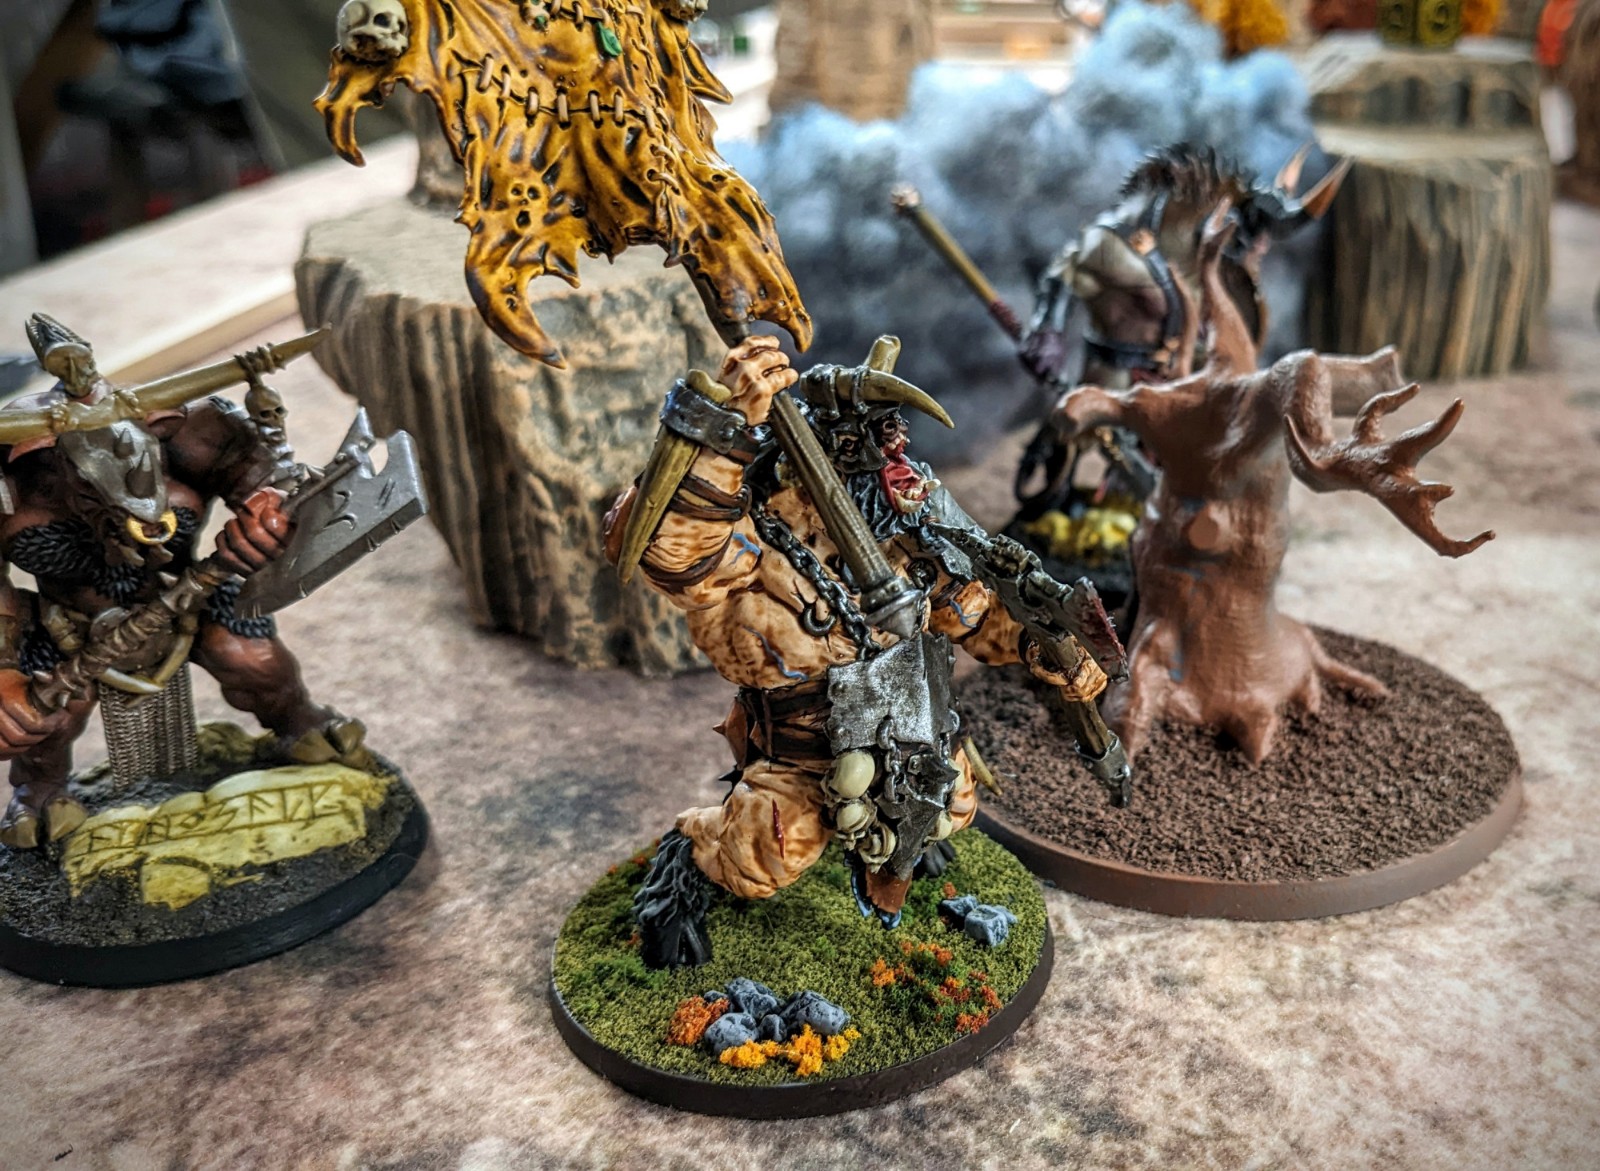
This game featured repeated appearances of Terrors – those horrid, panic-inducing monstrosities that represented the near-pinnacle of the Nightwatch bestiary.
Terrors were nearly as powerful as the players’ characters, capable of dealing out fearsome amous of damage, and they arrived with frightening regularity as the game wore on.
It was, as evidenced by these photos, an absolute bloodbath in the Embermoon Forest. The beautiful autumnal foliage was splashed with ichor and gore, the branches blackened by explosive grenades and errant mage bolts. The entire valley was hazy with smoke as the battle wore on. Who would emerge victorious?
Heroes fell in the chaos, then gained their feet, only to fall again. A well-placed magical wall of vapor managed to block a rampaging mob of beastmen reinforcements, gaining precious time for the heroes to organize their defense and gain the upper hand over the savage interlopers.
The beastmen attacked with exceptional savagery, and their onslaught prevented the heroes from moving … anywhere, really. Let’s take a moment and be thankful that this wasn’t a scenario where the heroes had to race around the battlefield and visit different locations. If that had been the case, they would have been doomed!
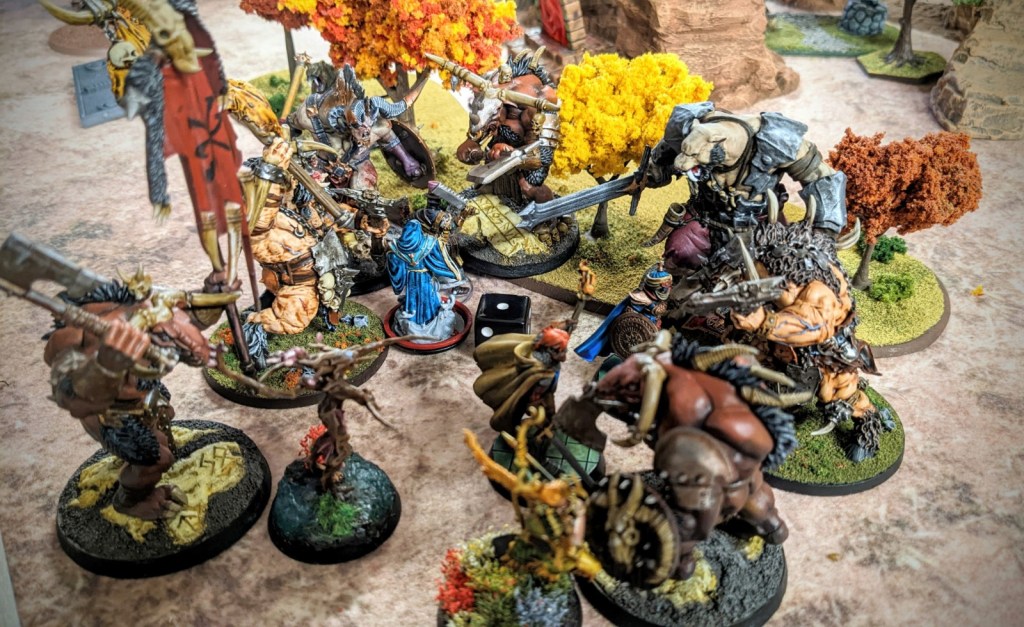
The heroes spent the final turns in a desperate huddle, hacking at the hordes and using every tactic in their playbook to stay alive until the conclusion of the seventh turn.
These two photos offer a glimpse at the utterly relentless attack that they withstood in the final turns of the game.
And then, as quickly as they had come, the beastmen withdrew into the night, sounding horns and loosing arrows to cover their escape. Who can say what signal caused them to retreat? Perhaps they were called back to their villainous master to serve some darker purpose? Whatever the reason, they fell back in haste, leaving their dead and wounded to moulder in the wilderness of the Embermoon Forest.
And thus concluded our most frenetic, brutal game of Nightwatch yet! We have one more “regular” session ahead of us, followed by an encounter with the savage chieftain of the beastmen … stay tuned for more!
Recently I banged out a few Necromunda-style sci-fi terrain pieces after getting inspired by some posts that came across my social media showing nifty examples of aquarium filter panels being used to create terrain tiles.
I’m a sucker for cheap, creative ways of replicating the various pricey terrain sets that have come along in the last few years. In this case, the sci-fi floor tiles from Games Workshop are undoubtedly cool, but the amount of money required to make an entire tabletop of these premium pieces would probably buy a small island in the Seychelles.
So when I saw that someone had created some decent lookalikes using those super cheap plastic aquarium filter panels, I knew I had to give it a shot.
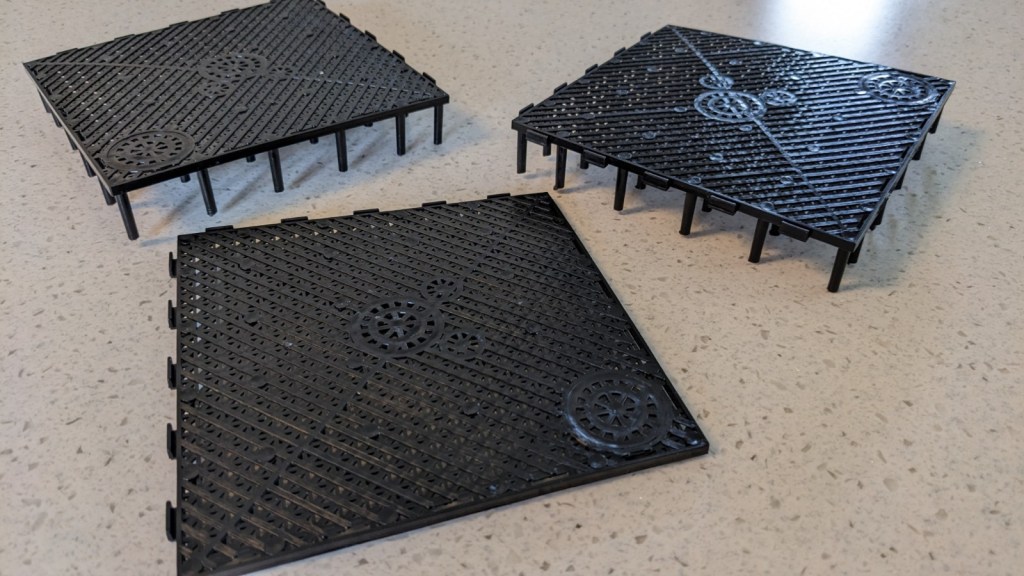
These panels are roughly 6 inches square and came in a pack of 10 for $14.99 shipped to my door. That’s my kind of price!! They come with a pleasing crosshatched pattern, plus a few round circular areas that looked ideal for future detailing.
As you can see in the photo above, they also come mounted on plastic 1-inch pegs that lift them off the ground. Very cool! I ended up snipping off the legs because these panels are made of flexible, somewhat soft plastic, and I knew I’d have to work hard to make them lie flat.
To that end, I mounted the plastic panels atop several layers of heavy corrugated packing cardboard that I had lying around. First I hardened these pieces with several layers of black paint and Mod Podge, then I glued the plastic panels down using a goopy outdoor adhesive. I had to weight them down with books to make sure the panels remained flat – they are soft and somewhat flexible, and the edges threatened to curl up without some weight.
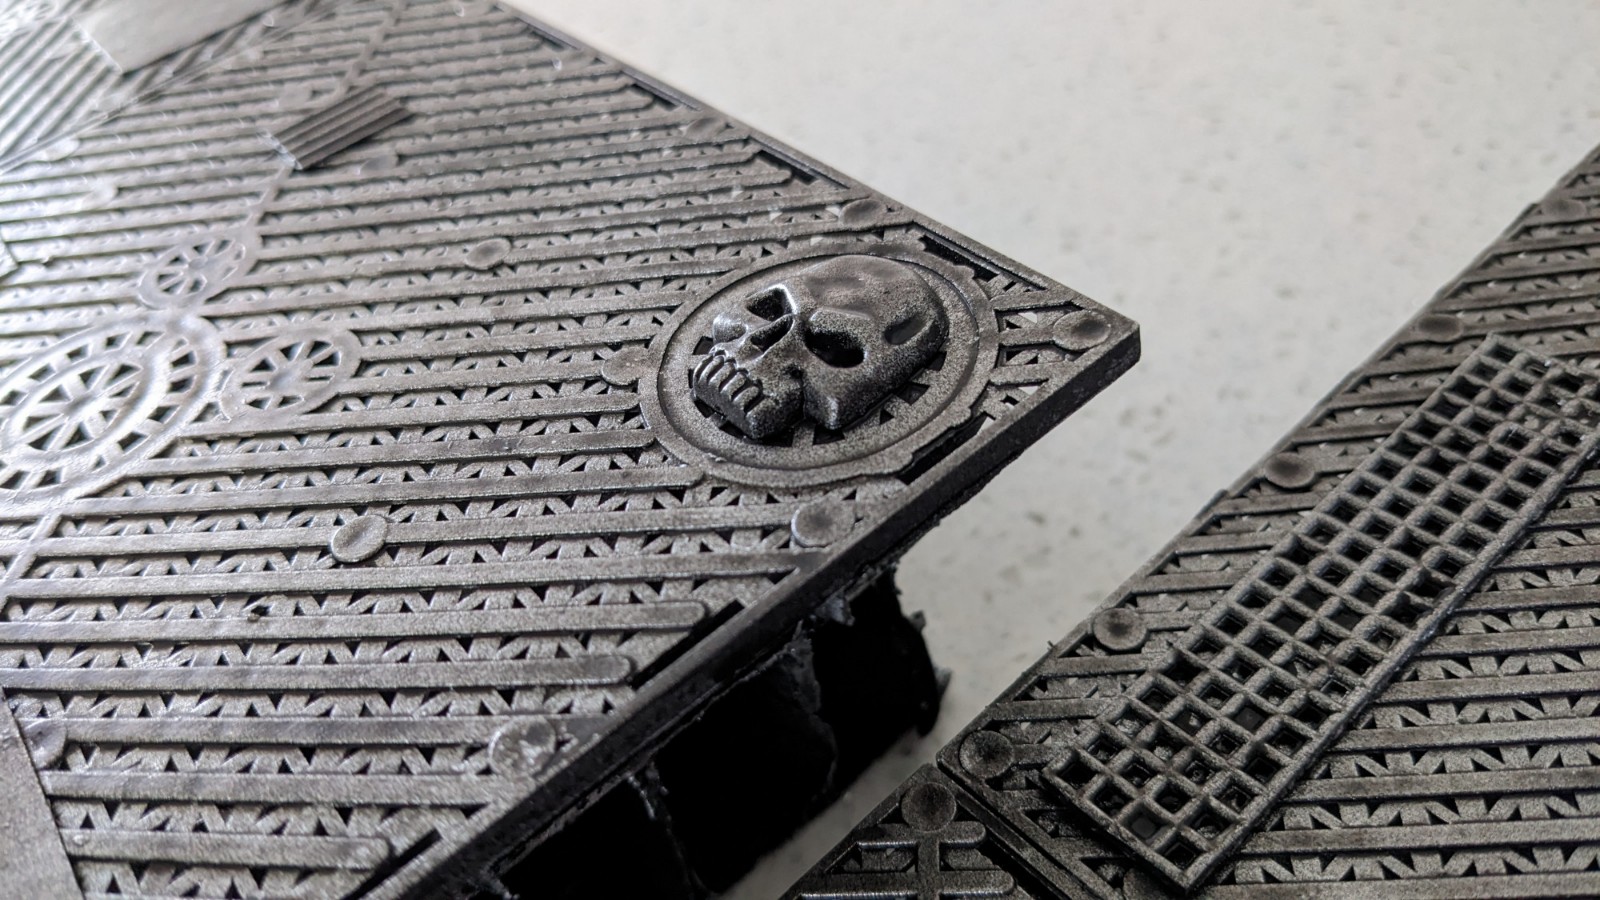
The tiles looked great out of the box, but I decided to take them to the next level by affixing some additional bits – grating, plasticard, corrugated cardboard, just a variety of textures to break up the surface a little bit and create some visual interest. You could skip this step entirely, because the base filter panels look superb as is.
I also added some skull glyph plates that had been languishing in my bits box for years. Because this is 40k after all!
As you can see, the whole thing got sprayed black, then silver using regular old rattle cans from the hardware store. I covered that with a heavy black wash that dulled everything down and set the stage for the grimdark phase, which featured heavy sponge application of browns, oranges, and yellows, plus some decals and propaganda posters to punch up the zaniness.
Oops, looks like the decals weren’t quite dry in these photos. They look great now, though!
The circular details on the filter panels look particularly fantastic. They could be hatches, manhole covers, or drains leading to a fluid reclamation system. Whatever they might be, they look tremendous!
I’m inordinately pleased with how these turned out. I’d say 75% of the painting work was accomplished with rattle cans of spray paint, and I never used a detail brush at all – just sponges for the final highlights.
The best part was that I only used 4 of the 10 tiles in the pack to make these two delightful terrain pieces. More to come for sure, and soon!