Comrade's Wargames

Painting toy soldiers in Oregon

  • Home
  • Narrative Campaigns
    • The Cauldron: A Grimdark Sci-Fi Campaign
    • The Chronicles of Üthdyn: A Fantasy Tabletop Campaign Setting
    • Nightwatch: Beyond the Borderlands
    • Frostgrave: Mystery of the Night-Haunted City
  • About Comrade’s Wargames

Open Combat: Ambush at the Greenfire Portal

Posted by Comrade on May 21, 2021
Posted in: Posts. Tagged: 28mm, chaos, fantasy, narrative, open combat, skirmish, warband. 1 Comment

John and I got together earlier this month for a quick midweek game of Open Combat. It was to be John’s first game; I had played Open Combat a few times over the last few years and found it to be an excellent rules-lite skirmish game for small scraps featuring 6-12 figures per side.

The default playing area is two feet square, which is quite small compared to a game like Warhammer 40,000 or even Saga: Age of Magic. But it was perfect for my kitchen table on a busy weeknight, which is certainly part of the appeal of Open Combat — you can knock together a warband in no time flat and sneak in a game whenever you and your opponent can find a spare hour or two.

For our game, we both made chaos-inspired warbands of evil brutes equipped with gnarled armor and savage weaponry. We selected a scenario from the Open Combat rulebook called “The Arrest,” where one warband is trying to overpower and capture the chieftain of the opposing warband. We put a narrative twist on it and decreed that John’s warband was emerging from the green, glowing portal in the terrain piece above, having been on some nefarious errand in the realms of the outer dark, only to be met by my warriors who had been ordered to subdue and drag off the loathsome leader before she could exploit the dark secrets she had acquired. Yeah, that’s the stuff!

Per the scenario, John deployed a portion of his warband in the center of the table around the portal, then kept the rest in reserve (to arrive on turn 3). My warriors could enter from any table edge, giving me the opportunity to surround and engulf John’s dudes before their reinforcements arrived.

The first few turns were tense and tough. I was able to quickly make contact with John’s sorceror and began dragging her to my table edge, but the arrival of the reinforcements leveled the playing field and stymied my progress. John’s guys were just a little bit tougher than mine, and that paid off as the game entered its final turns and my guys started dying in droves.

Open Combat is tightly written ruleset with plenty of meat on the bone, but absolutely no fat. Every rule and special ability is carefully crafted to dovetail perfectly into the game as a whole. We’re still waiting on the magic supplement for Open Combat, but you can make a decent approximation of some common magical abilities using the existing rules from the main rulebook.

The best part of Open Combat, of course, is how it inspires you to grab a handful of miniatures that tickle your fancy — newly painted figures, leftovers from an abandoned project, whatever — and have a quick and satisfying battle. Doubtless we’ll play this one again soon!

Frostgrave: The Silent Tower

Posted by Comrade on May 14, 2021
Posted in: Posts. Tagged: 28mm, campaign, club, fantasy, frostgrave, game night, narrative, skirmish, warbands. 3 Comments

The next scenario in our Frostgrave campaign was straight out of the second edition rulebook: The Silent Tower!

“Frostgrave has many dangerous places, yet few are as notorious and feared by wizards as this tower. A null-field, it negates all magic, leaving spellcasters powerless and vulnerable. Only the most daring and reckless dare to venture inside – their bodies rest quietly on the damp floors and stairs of the Silent Tower.”

By this point in our campaign, several of the warbands had a few games under their belts and were starting to improve their wizard, learn new spells, and hire better soldiers. We set up a battlefield featuring the titular tower in the center of the table, plus plenty of narrow alleys, creaky ladders, and crumbling ruins.

Here’s a look at the warbands: my dwarven enchanter, John’s sigilist, Mark’s chronomancer, and Vincent’s summoner.

The goal of the scenario was to pay a visit to the Silent Tower; warbands could claim experience points for sending their wizard or their apprentice (or both, for maximum value) into the tower. Of course, this positioned the tower as the most dangerous spot on the whole battlefield.

Luckily, the scenario also included a number of treasure tokens scattered around the battlefield. In the opening turns, the warbands angled to scoop up this loot on their way toward the central tower.

The cluttered tabletop meant that we could snake through the ruins and avoid enemies … for a while, at least.

After picking up a treasure token, there’s a chance that a wandering monster will appear, providing more opportunity for danger and reward. This is one of the most satisfying components of a game of Frostgrave … wandering monsters add a ton of fun to our games. For this game, we had a big ol’ whiteboard set up next to the game table, and we jotted down the stats of each critter as it arrived, so we could all easily reference this info as we planned our turns.

The first unwelcome guest was a Large Bear that arrived within striking distance of John’s warband led by his sigilist.

John was bear-ly able to evade this marauding ursine, which proved too dangerous to truly ignore even as his warband crept closer to the Silent Tower.

Elsewhere, a pair of constructs clattered out of some buried ruin and moved to menace Mark’s chronomancer. The constructs went down with a clang and Mark notched some more XP in the process.

Vincent used his Leap spell to catapult a hapless soldier atop the Silent Tower itself. The tip-top portion of the tower housed a particularly potent treasure token, and we all wanted it! Vincent got there first, which set off a frantic scramble. I think someone else used another spell, maybe Push, to dislodge the soldier before he could claim the treasure.

My dwarven warband found itself in a running battle along an elevated walkway leading to the tower entrance. Even as we were fighting on the ground, Vincent was using Leap to toss more fighters up to the parapet.

Elsewhere, the wandering monsters continued to pop up where they were least expected. Vincent’s warband suddenly found itself toe-to-talon with a ghostly ice wraith.

The Large Bear continued its plodding advance, drawing the attention of Mark’s warband as they closed in on the Silent Tower.

One of the most entertaining aspects of Frostgrave is how a particular terrain piece can be the focal point for a mini-narrative. In our case, a narrow stone ledge proved to be a nearly insurmountable obstacle when I placed a solitary dwarf thief atop it as defender. (He’s the guy with the candle on his helmet in the image below.)

This stout defender repeatedly repelled assaults by individual soldiers in John’s warband, tossing them off the ledge, one after the other. Eventually the dwarf defender was pulled down and stabbed to death by the enraged warriors of John’s warband. It was a good warrior’s death!

Here’s a look at the battlefield as we entered the final turns. Mark’s warband was making an all-out push for the Silent Tower. Vincent and I were battling it out on the walkway just outside the tower. John was screening his warband from the marauding bear with a well-placed Wall spell.

Ultimately I was able to batter my way into the Silent Tower with a bloodthirsty dwarven man-at-arms, who proceeded to dash up the stairs just as Vincent’s wizard leaped up to the highest parapet. You can see John’s Bridge spell creating a convenient entry point for his warband in the images below.

The man-at-arms met Vincent’s summoner in single combat and we were once again reminded that wizards generally have fairly weak combat stats. The man-at-arms cut down the wizard in a ghastly turn of events for Vincent. But the dwarf wasn’t quite able to claim the treasure token before the game ended.

In the final turn of the game, Mark’s gambit paid off, as he was able to rush his wizard and apprentice into the tower to claim the XP bounty. Good job, Mark!

And John made a big show about securing the treasure token that my poor sad little dwarven thief had been defending. Why would he do that? There’s been enough senseless butchery for one day, John. But I’ll let you have this moment of victory.

You’ll be pleased to hear that Vincent’s wizard didn’t actually die … he rolled on the casualty table and got a favorable result, as I recall. But still — it was a gutwrenching moment indeed when his wizard fell in combat atop the parapet.

What’s that? You’d like to see another photo of the moment when the summoner met her untimely end?? It seems I cater to utter savages on this gentle blog. But I acquiesce to your demands. Give the people what they want, that’s what I always say. Behold, the carnage on the battlements!

This was our third campaign game, and things were really humming along from a gameplay perspective. Our warbands are advancing and we’re finding new/cool/weird loot in the ruins of Felstad. We’re also taking a deep dive into our miniatures collection to come up with all of the skeletons, wraiths, boars, spiders, constructs, and Large Bears required to fully embrace the wandering monster table. Stay tuned for more!

Take a Peek at Our Modular Frostgrave Setup

Posted by Comrade on March 30, 2021
Posted in: Posts. Tagged: 28mm, campaign, club, fantasy, frostgrave, hobby, terrain. 1 Comment

My friend John, purveyor of fine postings at Barty B’s Command Crate, has put together a tremendous write-up about the origins and development of our modular Frostgrave table, which you may have read about in some recent posts. Do yourself a favor and click the link below to check out his expositions!

About a year ago my gaming group decided to collaborate on a terrain board to prepare for the release of Frostgrave 2nd Edition. After some back-and-forth in our Slack team, we agreed to build modular tiles using shared standards for certain key geometries and base coat colors.

Our modular Frostgrave — Barty’s Command Crate

Rescue Job: Putrid Blightkings

Posted by Comrade on March 18, 2021
Posted in: Posts. Tagged: 28mm, chaos, fantasy, hobby, nurgle, painting, saga, warhammer. 11 Comments

Among my very favorite models released in the current “modern era” of Warhammer figures are certainly the Putrid Blightkings. These multi-part plastic kits can be used to build a wide variety of oozing, pus-filled champions of Nurgle, armed with a variety of rusted, wretched weaponry and armor. Each kit comes with more than enough pieces to make five warriors, ensuring that you will end up with a variety of surplus bits to use elsewhere.

I love the models and have wanted to try my hand at painting them for a while now. But I’ve been put off by the retail price — $57 for five figures, well above my typical price tolerance of a few bucks per figure. In addition, while I liked the idea of having a big pile of leftover bits, in practical terms I had no real need for such accoutrements … I just wanted the toy soldiers, thank you very much.

Thankfully, I was able to patiently scour ebay to find the exact solution to fit my needs: a clutch of four Blightkings, already assembled and sloppily painted, for super cheap. I want to say I got the four of them for $20, which made me feel like I’d just won the lottery. In a strange way, acquiring them pre-assembled was actually a relief. I am not super interested in fiddly assemblies these days, and so I was glad to have that task done for me ahead of time.

These guys were about 75% complete when they arrived. A couple of them were missing the all-important butt pieces, which cover their rear ends and generally complete the miniature. I was able to fashion replacement butt pieces using green stuff and various satchels, packs, and bandoliers from my bits box. I must admit I was sorely tempted to sculpt a yawning anus on one of these guys, just for the Nurgle style points.

After a quick dip in the paint stripper, they were ready for some brushwork. The paint job included contrast paints for the flesh, together with dark, grimy chainmail and lurid green plate armor. I like painting my Nurgle guys in a bright, almost cartoonish paint scheme.

Here’s a peek at the butt solutions I came up with. The swishy tail is from a leftover cavalry horse!

All in all, these guys fit the bill for exactly what I was seeking — cheap models, pre-assembled, ready to strip & repaint. I’m not even bothered by only having just four of these guys, because they’ll be a standard-sized unit of hearthguard in Saga: Age of Magic.

What’s your favorite chaos-aligned figure or unit?

Frostgrave: Exploring the Mausoleum

Posted by Comrade on March 17, 2021
Posted in: Posts. Tagged: 28mm, campaign, fantasy, frostgrave, game night, narrative. 7 Comments

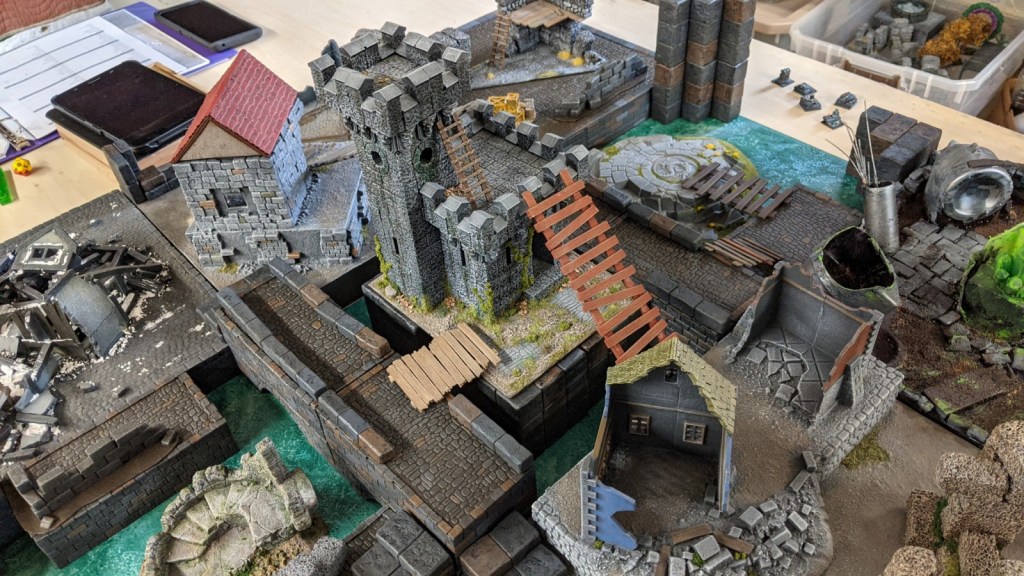
The next installment in our nascent Frostgrave campaign was a classic scenario from the main rulebook: The Mausoleum! The setup called for a crypt in the center of the table, which would spawn skeletons each turn as the warbands advanced through the ruins.

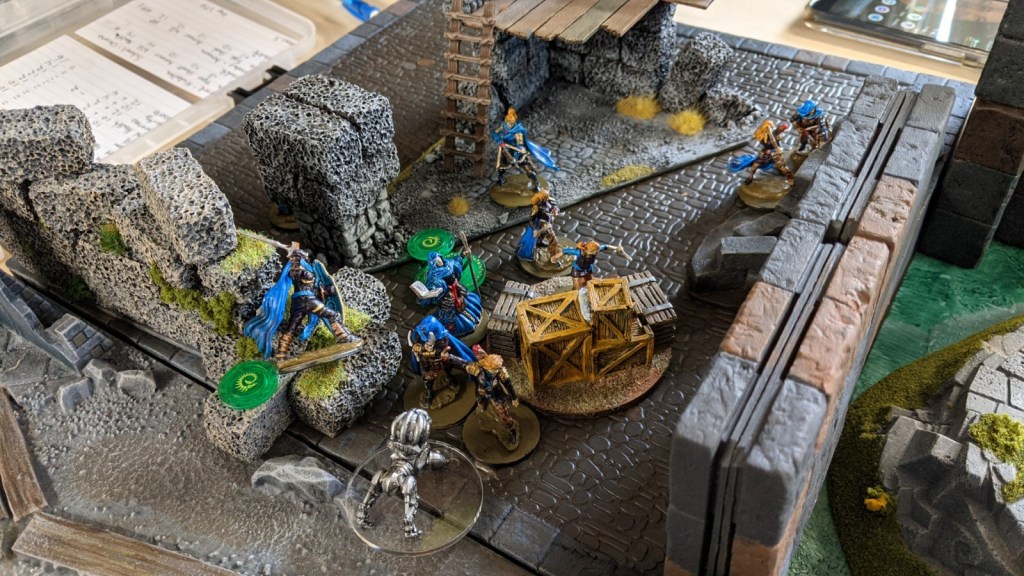
Mark provided an excellent terrain setup for our mausoleum. We plopped it onto the center of our modular terrain tile setup, tossed on some scatter terrain to clutter up the board, and then set about deploying our warbands.

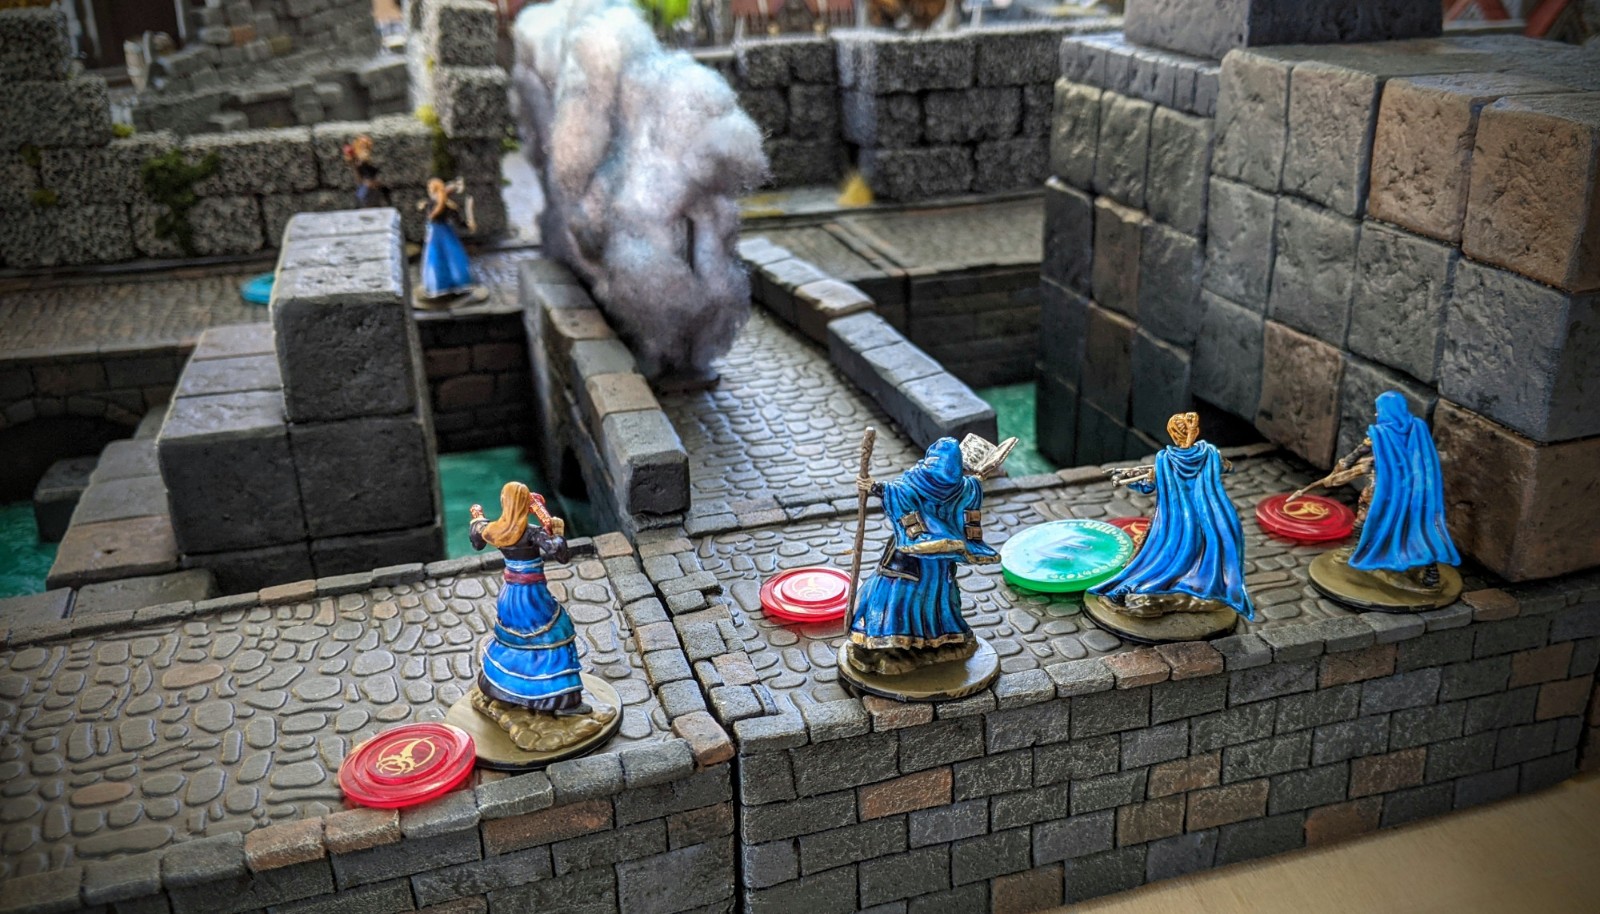
We had Mark’s chronomancer, who was leading a new warband made up of various versions of herself recruited from different timelines. (Cool concept!)

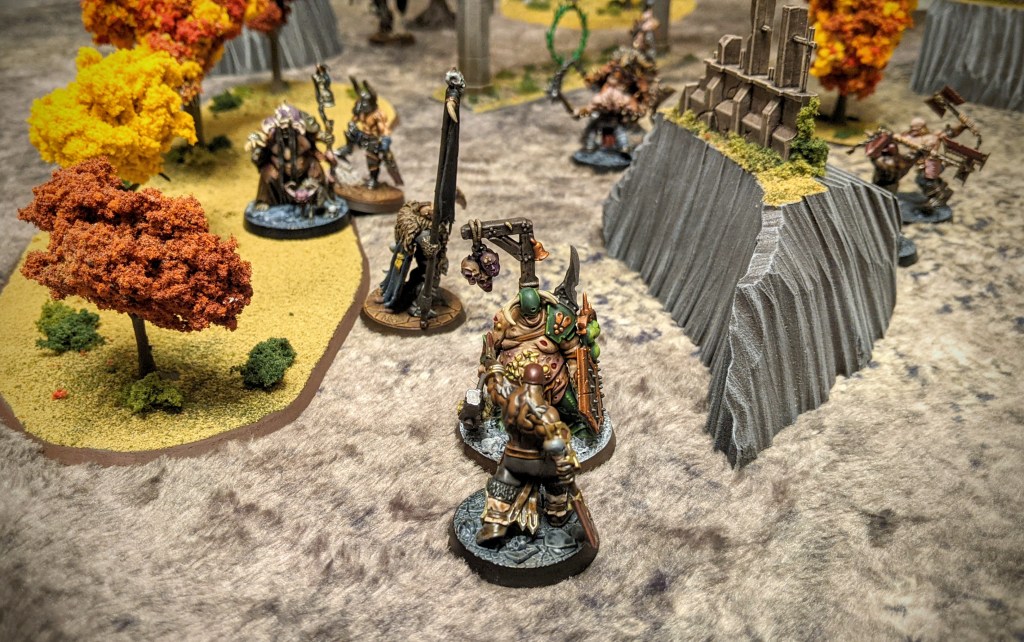
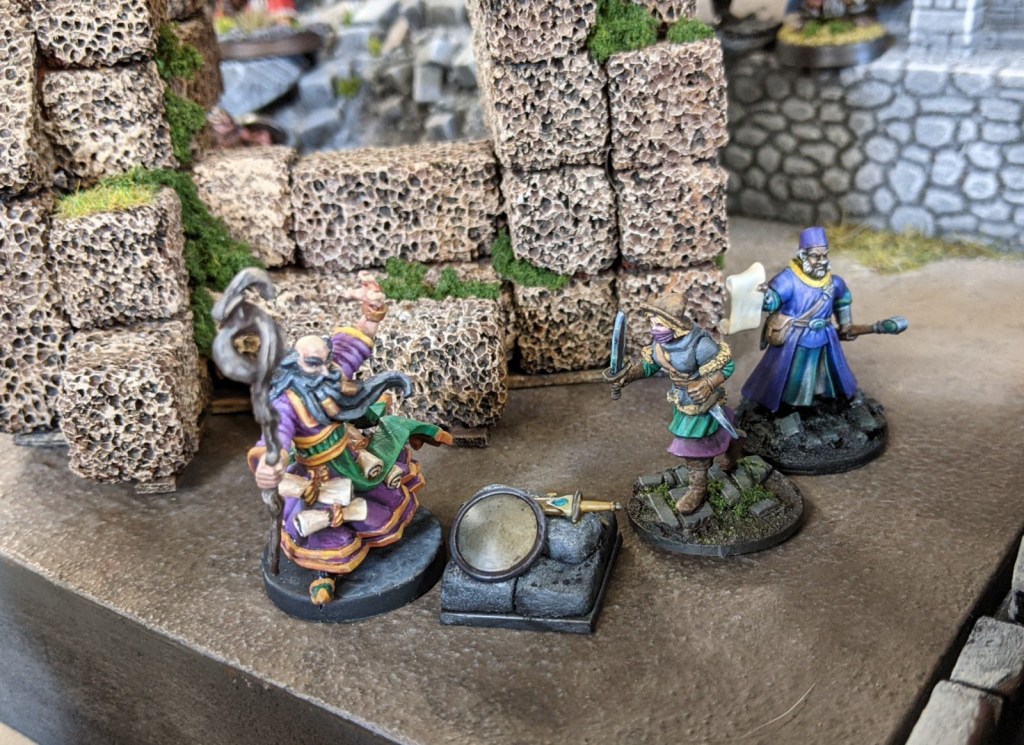
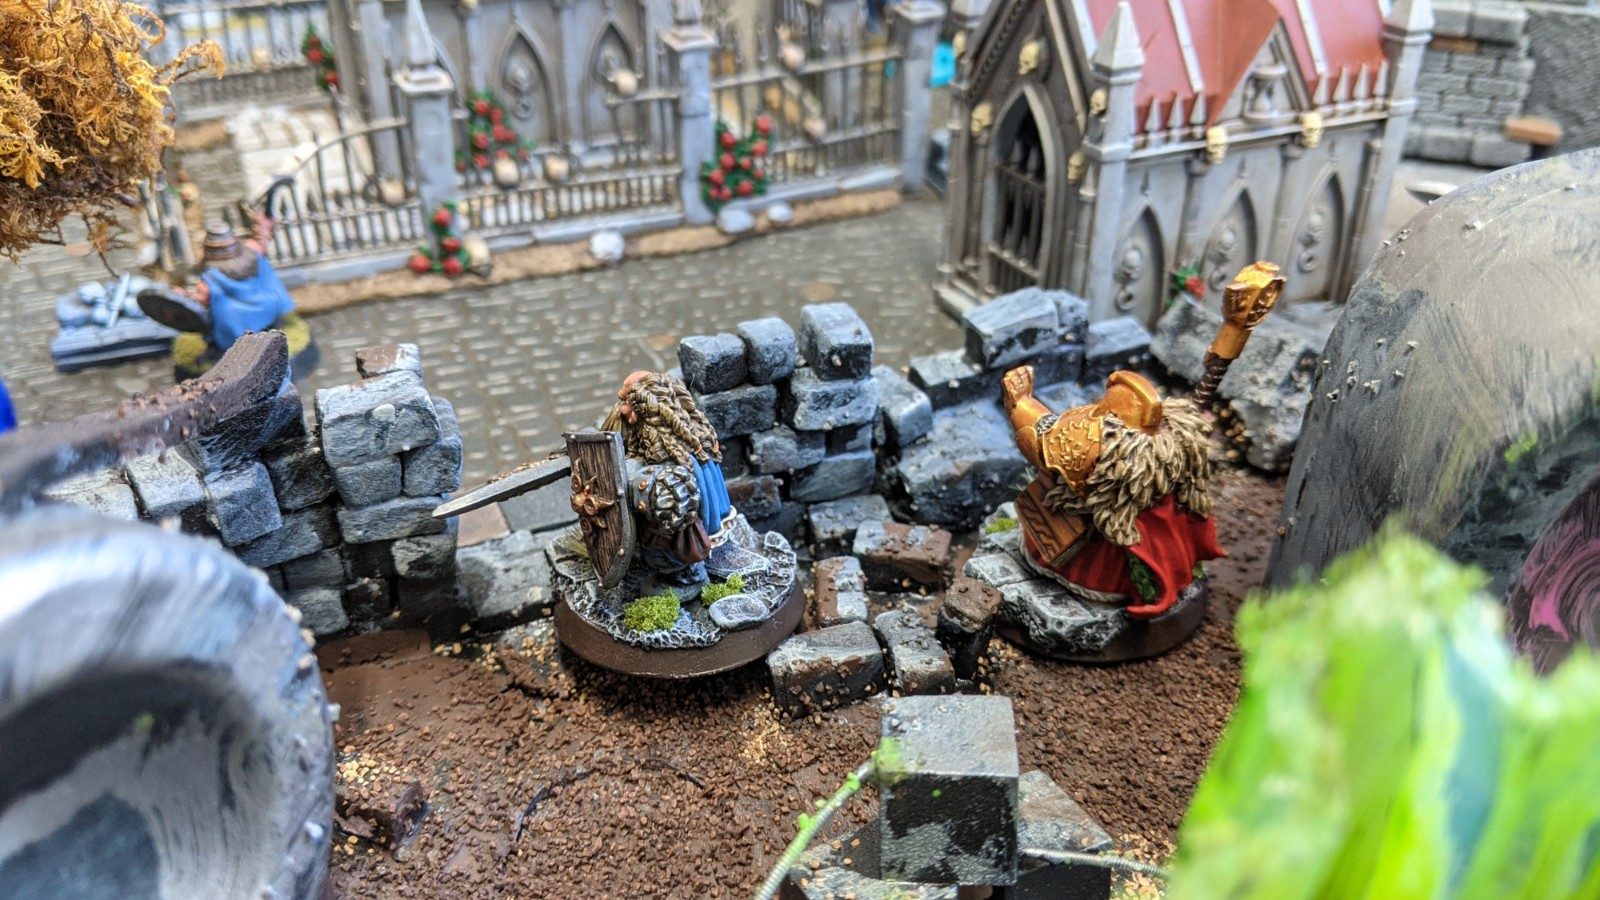
We had my dwarves, who were battle hardened from the last game and ready for more, led by Vauldric the Metalworker (front row, with staff; he’s an enchanter).

And lastly, we had the scrappy disciples of Elder Futhark, aka John’s sigilist warband from the first session.

With just three players, we found that the game moved along quite nicely. The warbands crept through the ruined city, casting various spells to buff their members and trying to steer clear of the skeletons that were shambling around the mausoleum.

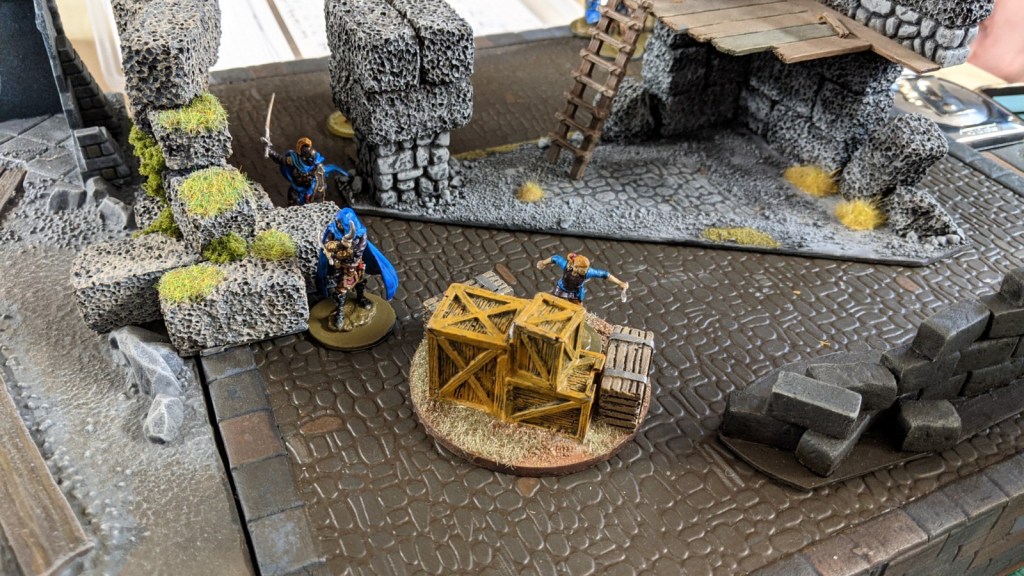
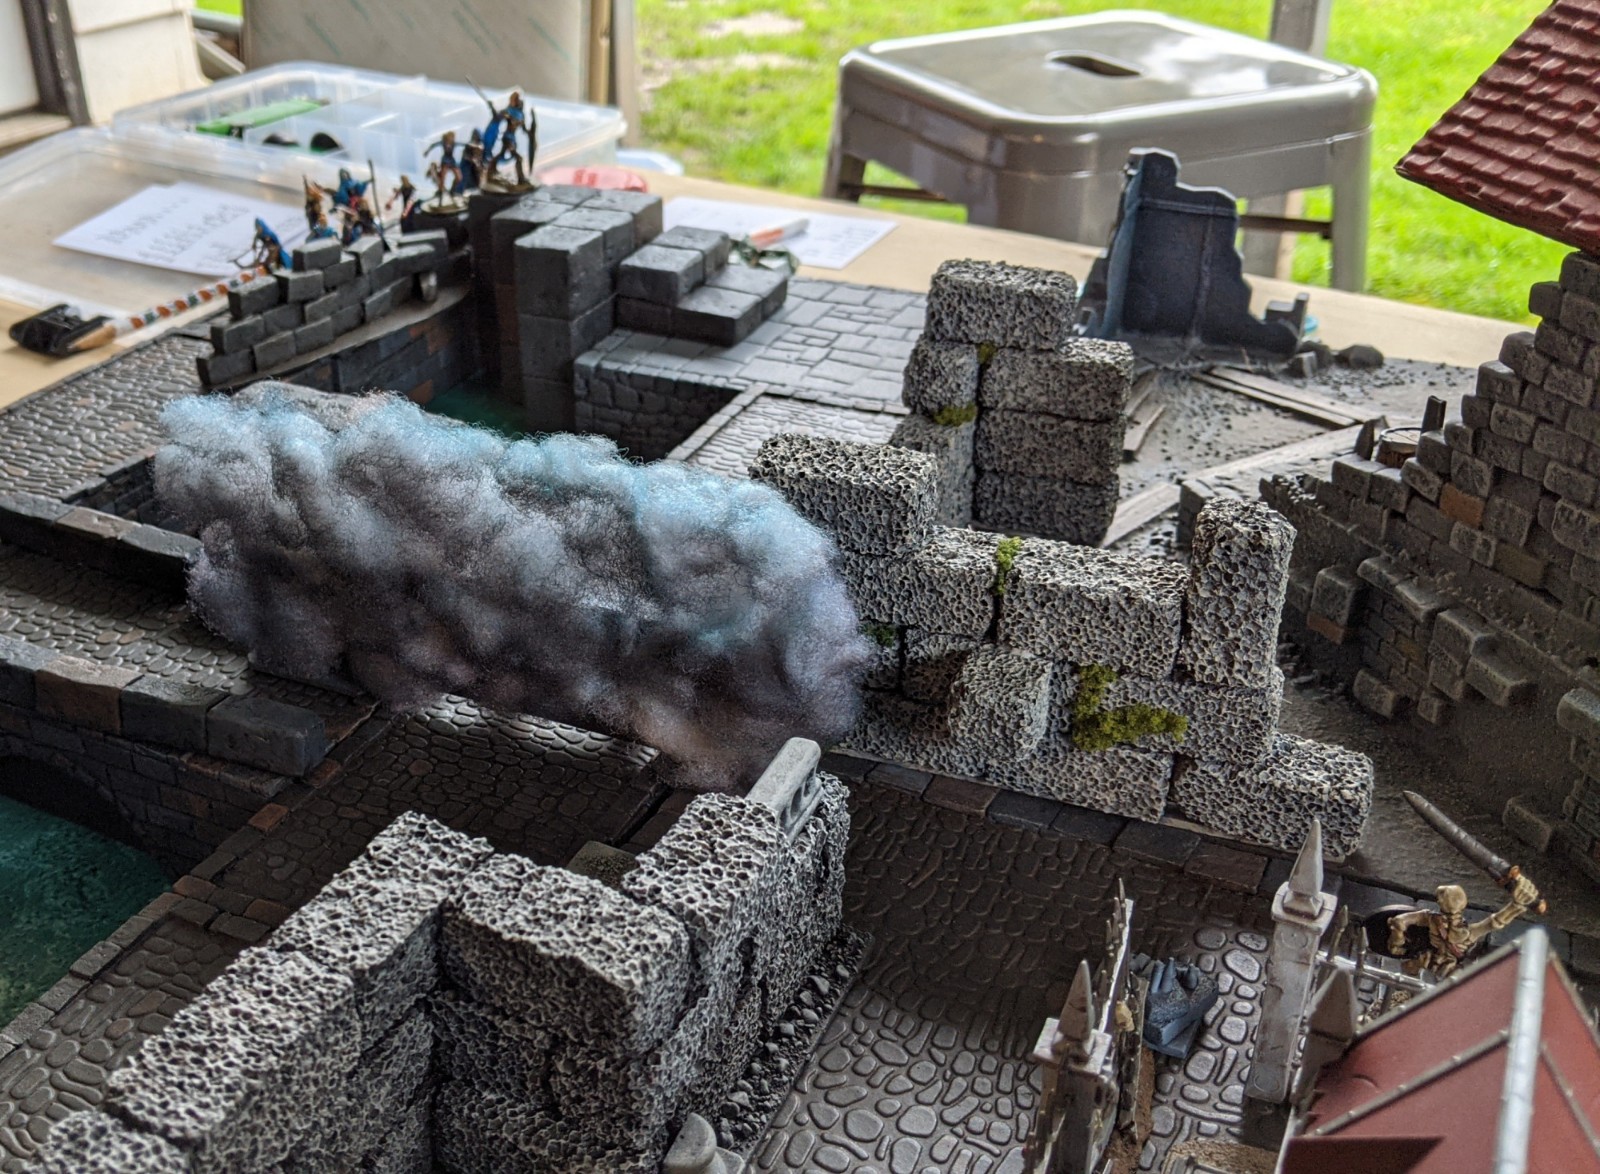
John’s first act of the game was to cast a wall spell to provide a convenient buffer between his warband and Mark’s warband. They agreed to an uneasy truce, as the wall removed the most direct route to confrontation.

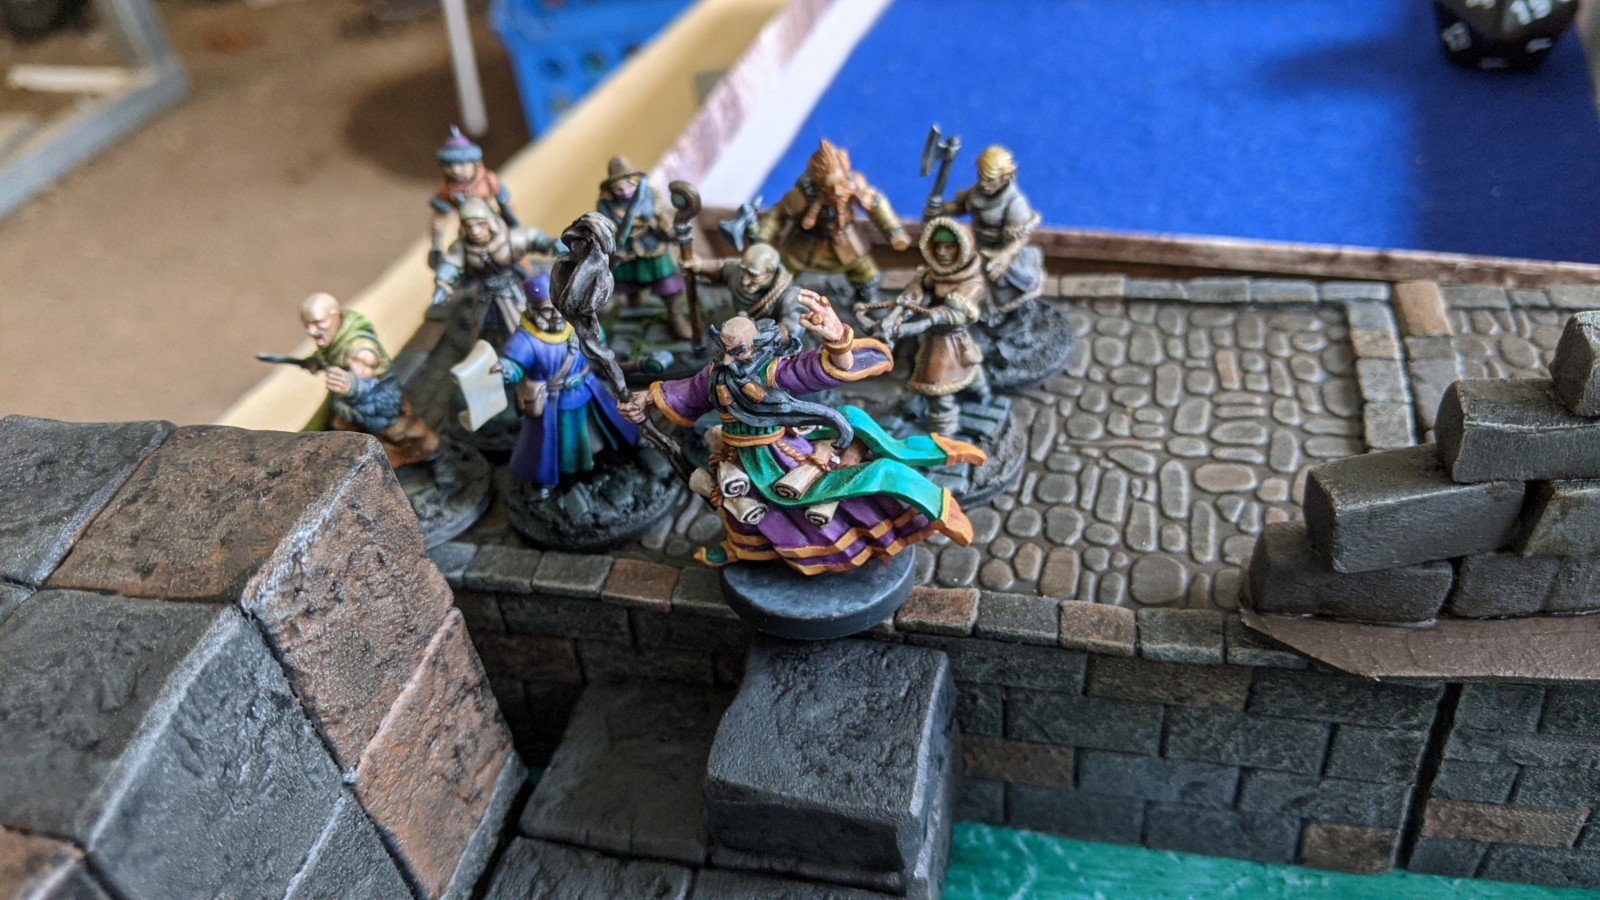
Over in the dwarves’ side of the board, things were progressing nicely. I had won the high roll and selected the most advantageous deployment area for my warband. I was close to a couple treasure tokens and also had a fairly clear route to get to the central mausoleum. Valdric the Metalworker used telekinesis to lasso a couple treasure tokens and drag them closer to my minions.

Eventually, the skeletons took notice of our intrusion and began advancing on the warbands. As monsters go, these guys were weak — just 1 hit point each! A stiff breeze would blow them over!

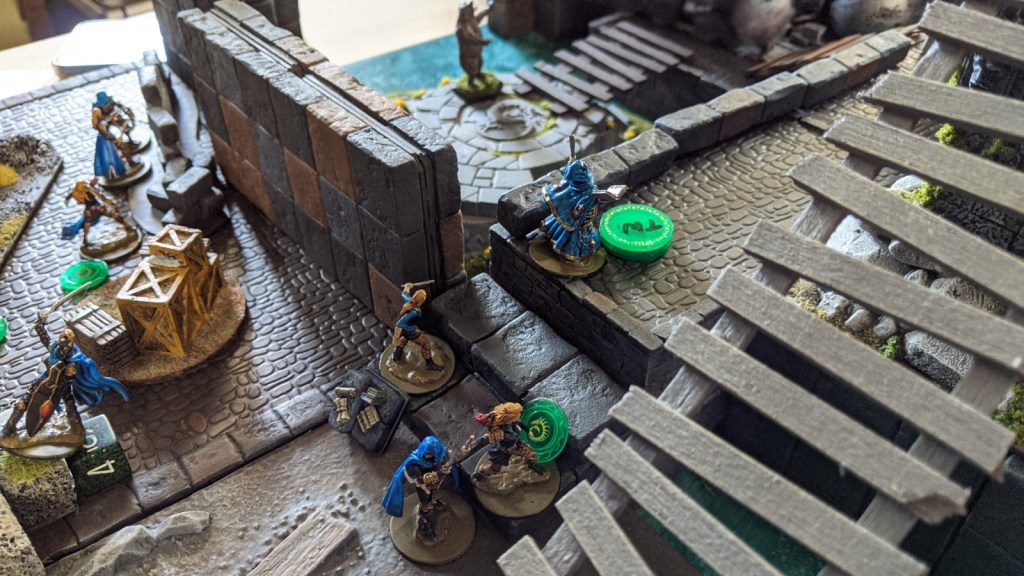
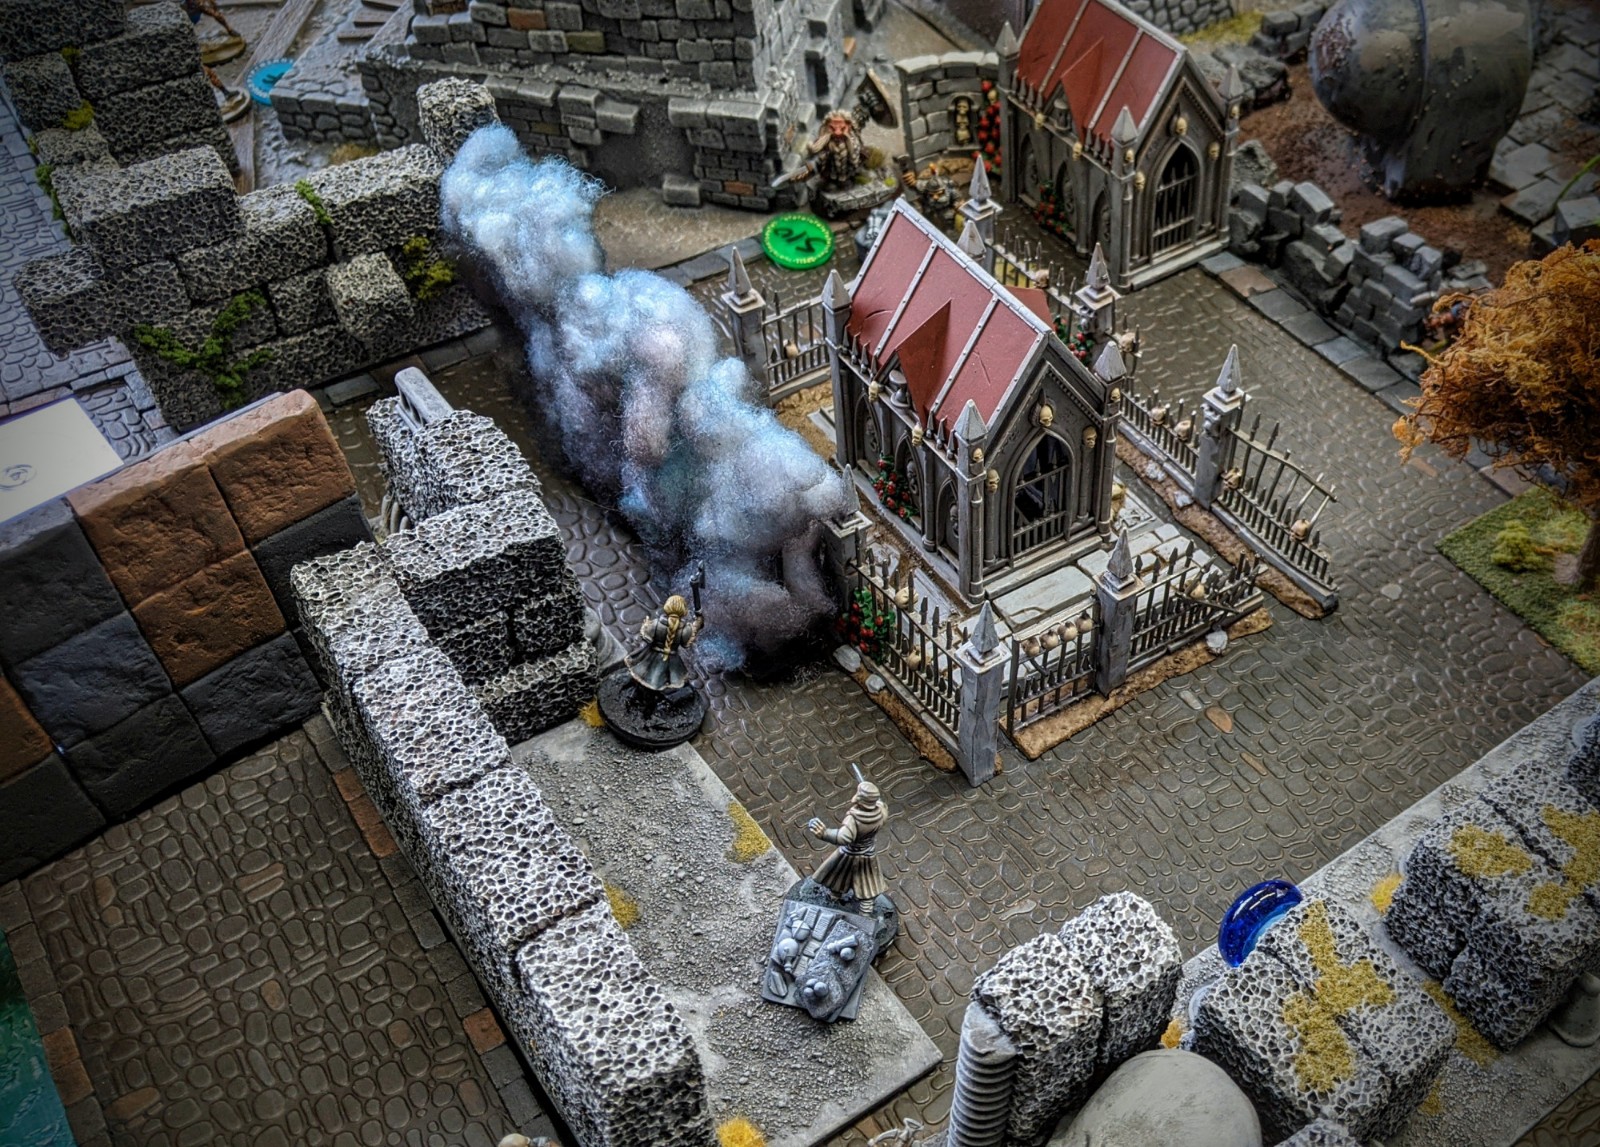
But, we quickly learned that in Frostgrave, with its rather swing d20-based combat system, even the lowliest enemy could prove dangerous. This burden fell most heavily upon John’s warband, which crossed swords with a pair of skeletons that combined to deal more than 10 points of damage to various members of his warband — killing a thug outright, as I recall, and wounding several others.

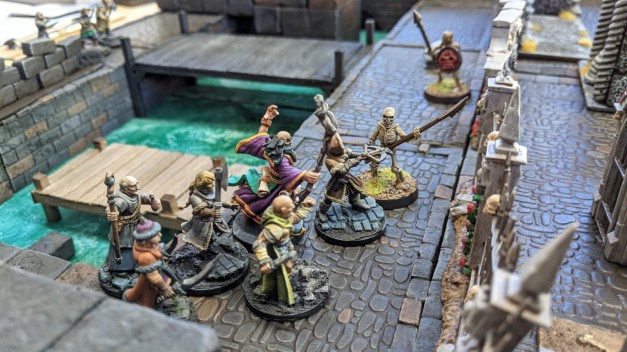
Here’s a look at the “folly on the wharf” as this bitter blunder became known. Elder Futhark is righteously pissed that his warband’s advance has been slowed!

Elsewhere, the dwarves were within sight of the central mausoleum. Skeletons kept popping out, and since the dwarves were now the closest target, they began a deadly dance with the undead warriors.

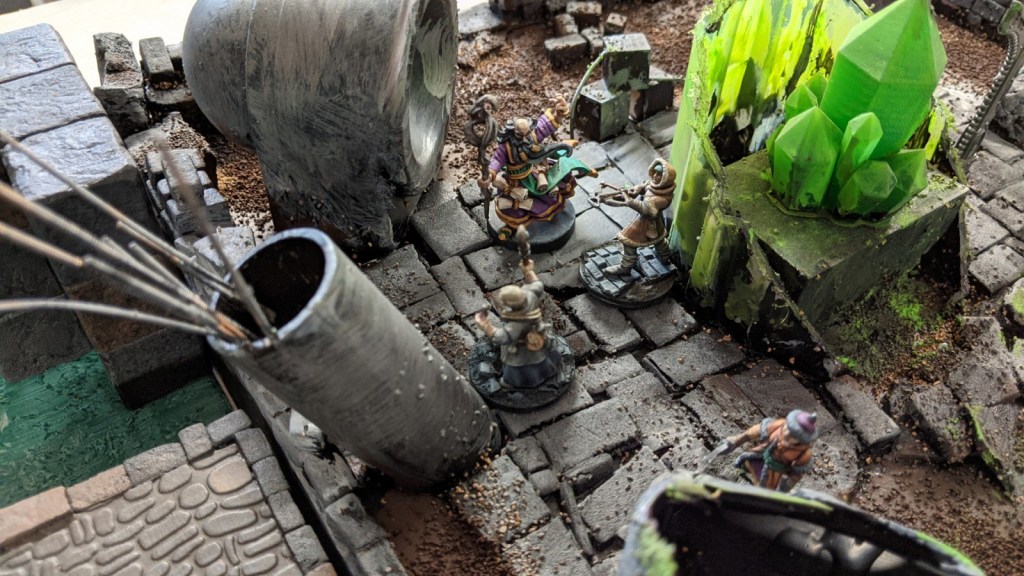
By this point, Mark had found a strategy that worked well for him. He lined the periphery of the battlefield with spellcasters and warriors armed with crossbows, then began taking potshots at any target that presented itself — skeleton or warband alike!

While this was happening, the rest of Mark’s warriors were snatching treasure and fleeing from pursuing skeletons, in true Frostgrave fashion. There were some, ah, casualties, but you can’t make an omelette without breaking a few eggs, right?

I’m pleased to report that Elder Futhark rallied his rabble and pushed past the skeletal guardsmen who were blocking his path. John’s crossbow-armed warrior picked up a few more scars and probably earned some hazard pay for singlehandedly dispatching a skeleton despite being armed with a long-ranged weapon totally unsuited for close combat.

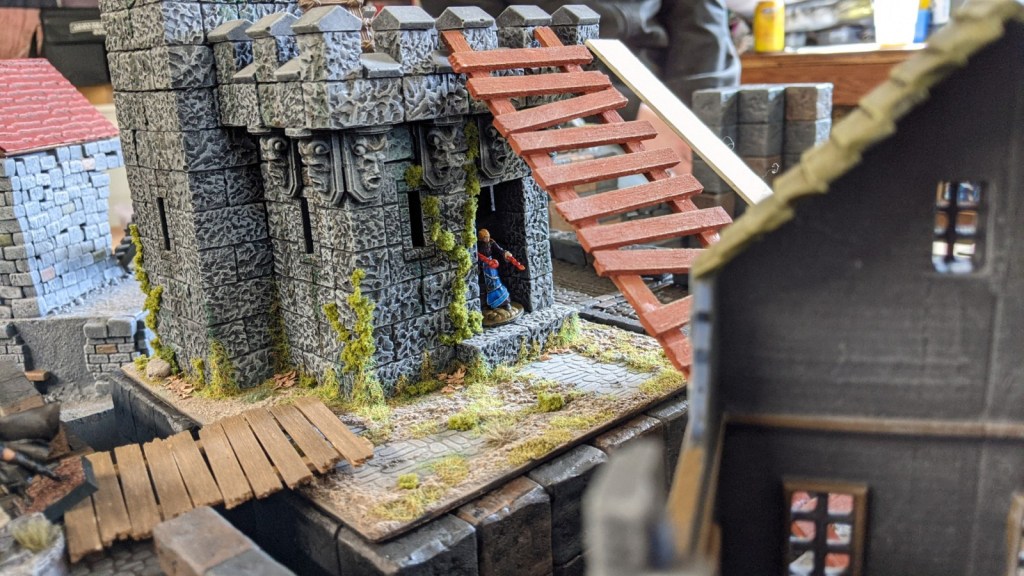
Here’s a look at the battlefield as we entered the final turns of the game. Everybody’s warband was in decent shape and most had already secured a treasure token (or two). However, the skeletons had mostly been dispatched. Now, the only enemies that remained were the opposing warbands. We had entered the endgame!

The dwarves took the initiative, breaking from cover and scampering toward the mausoleum and the treasure contained therein. A lone skeleton dared to stand in there way, and he got a sword to the ribcage for his trouble.

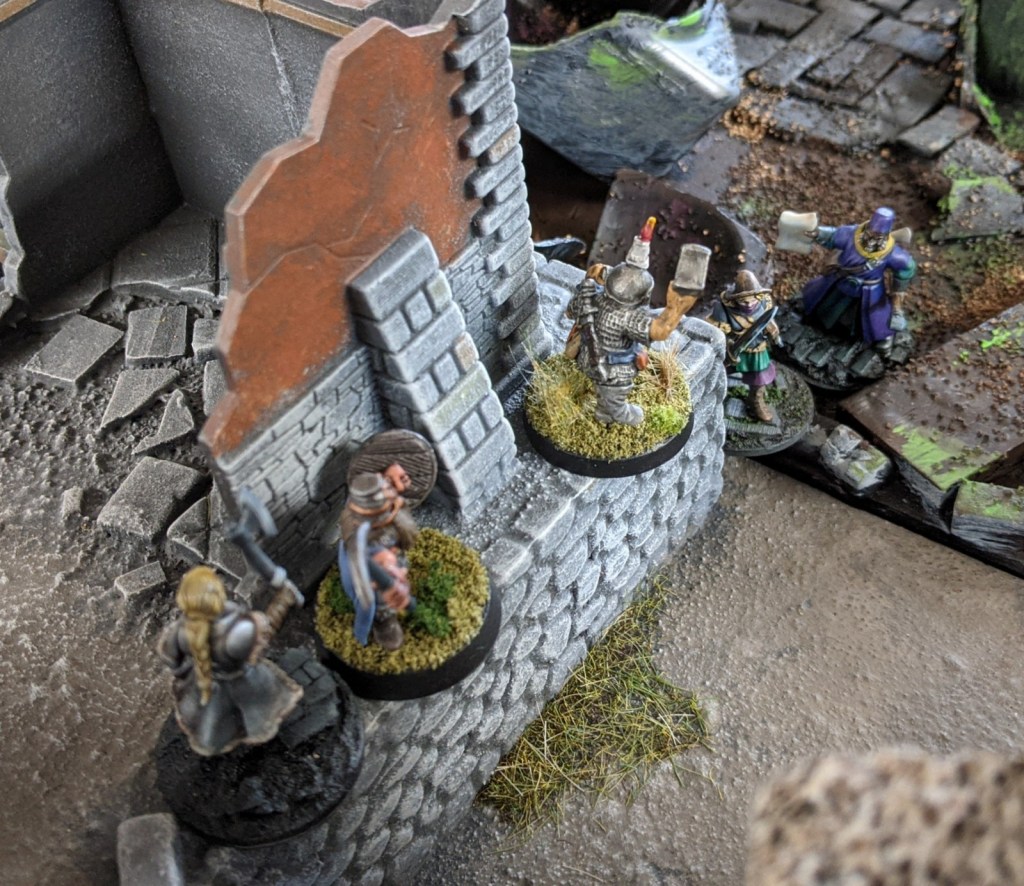
John and Mark found themselves toe-to-toe as their thugs and thieves approached the mausoleum from the other side. Battle was a foregone conclusion, and they clashed in the rubble-strewn streets of Felstad.

Their skirmish drew the attention of my dwarf armed with a crossbow (represented here by a pair of black powder pistols, for flavor reasons). The dwarf was ensconced high up in a ruined building, with an excellent line of sight to the melee. He was only too happy to contribute to the chaotic fight by shooting a few crossbow bolts into the swirling scrum.

This was to be the last substantive clash on the battlefield. By the end of this turn, we were nearing our time limit, and the warbands had each secured some loot without suffering horrendous casualties. By Felstad standards, that’s a great day in the office. As a final act of mediation (and to farm some XP) John again cast his wall spell, providing cover for his retreat, and then we all retired back to our hideouts to count our gold and lick our wounds.

With this being our second game of the current campaign, I was pretty impressed with our collective grasp of the rules and the relative speed of our gameplay. The game flowed really well and we tossed those dice with godlike confidence.

As in previous games, the post-game campaign step was an absolute joy. This is where you find out the extent of your warband’s injuries, and you roll randomly to determine what cool treasure you hauled out of the frozen city. This step was the source of plenty of whooping and hollering on the part of the players, as it should be.

All in all, this campaign is really humming along. Our next game is coming up in late March. Stay tuned for more!

Posts navigation

← Older Entries
Newer Entries →
  • Recent Posts

    • Building a Grimdark Battle Board
    • Hobgoblin: More Thoughts and Musings
    • Grimdark Future: The Scouring of Hundvolst
    • Shadow War: Armageddon Battle Report & Review
    • The Expedition Soldiers On
  • Follow Comrade's Wargames on WordPress.com
  • Tags

    28mm 40k army battle report caluphel campaign chaos club death guard dragon rampant dwarves fantasy game night grimdark hobby miniatures narrative nurgle painting post-apoc project saga sci-fi skaven skirmish terrain warbands wargames warhammer workshop
  • Archives

    • January 2026 (1)
    • November 2025 (1)
    • October 2025 (2)
    • September 2025 (1)
    • October 2023 (2)
    • September 2023 (1)
    • August 2023 (2)
    • July 2023 (3)
    • June 2023 (3)
    • May 2023 (4)
    • April 2023 (2)
    • March 2023 (5)
    • February 2023 (2)
    • January 2023 (2)
    • December 2022 (1)
    • November 2022 (1)
    • October 2022 (4)
    • August 2022 (2)
    • July 2022 (1)
    • June 2022 (2)
    • May 2022 (5)
    • March 2022 (1)
    • February 2022 (1)
    • January 2022 (3)
    • December 2021 (1)
    • November 2021 (2)
    • October 2021 (1)
    • September 2021 (2)
    • July 2021 (1)
    • June 2021 (1)
    • May 2021 (2)
    • March 2021 (3)
    • February 2021 (1)
    • January 2021 (3)
    • December 2020 (1)
    • October 2020 (1)
    • September 2020 (2)
    • August 2020 (1)
    • July 2020 (1)
    • June 2020 (1)
    • May 2020 (1)
    • April 2020 (1)
    • March 2020 (1)
    • February 2020 (2)
    • January 2020 (3)
    • December 2019 (5)
    • November 2019 (1)
    • October 2019 (1)
    • September 2019 (2)
    • August 2019 (2)
    • July 2019 (4)
    • June 2019 (3)
    • May 2019 (3)
    • April 2019 (1)
    • March 2019 (1)
    • February 2019 (2)
    • December 2018 (3)
    • November 2018 (3)
    • October 2018 (5)
    • September 2018 (5)
    • August 2018 (5)
    • July 2018 (5)
    • June 2018 (2)
    • May 2018 (1)
    • April 2018 (3)
    • March 2018 (1)
    • February 2018 (1)
    • January 2018 (1)
    • December 2017 (1)
    • November 2017 (5)
    • October 2017 (1)
    • September 2017 (2)
    • August 2017 (4)
    • July 2017 (4)
    • June 2017 (3)
    • May 2017 (4)
    • April 2017 (3)
    • March 2017 (7)
    • February 2017 (6)
    • January 2017 (2)
    • December 2016 (5)
    • November 2016 (2)
    • October 2016 (3)
    • September 2016 (4)
    • August 2016 (5)
    • July 2016 (6)
    • June 2016 (8)
    • May 2016 (2)
Create a website or blog at WordPress.com
Comrade's Wargames
Create a website or blog at WordPress.com
  • Subscribe Subscribed
    • Comrade's Wargames
    • Join 154 other subscribers
    • Already have a WordPress.com account? Log in now.
    • Comrade's Wargames
    • Subscribe Subscribed
    • Sign up
    • Log in
    • Report this content
    • View site in Reader
    • Manage subscriptions
    • Collapse this bar
 

Loading Comments...