Comrade's Wargames

Painting toy soldiers in Oregon

  • Home
  • Narrative Campaigns
    • The Cauldron: A Grimdark Sci-Fi Campaign
    • The Chronicles of Üthdyn: A Fantasy Tabletop Campaign Setting
    • Nightwatch: Beyond the Borderlands
    • Frostgrave: Mystery of the Night-Haunted City
  • About Comrade’s Wargames

Dragon Rampant: Hamlet Raid in the Hinterlands

Posted by Comrade on April 5, 2019
Posted in: Posts. Tagged: dragon rampant, fantasy, game night, narrative, skaven, skirmish, uthdyn. 1 Comment

IMG_20190324_202022.jpg

This is the first in a series of battle reports exploring Üthdyn, our homebrew fantasy setting. Üthdyn was developed collaboratively using Microscope with the idea that it it would be a shared fantasy setting, not tied to any one particular game or rule set, that we can use to play out all manner of tabletop games, from small skirmishes to grand battles to RPG adventures, and more! It’s a genre mashup that combines our favorite parts of Warhammer, D&D, Game of Thrones, Tolkien, plus a bunch of other sources.

(Sidenote: If you’ve not played Microscope before, give it a shot. It’s an absolutely stellar way to sit down with your friends and engage in some collaborative worldbuilding. There’s enough structure to provide a basic framework, but there’s also a lot of emphasis on creativity and free form exposition. I guarantee you’ll be surprised at what you come up with after your first session.)

Anyway, this game was set during a period referred to as The Famines, when the small baronies and fiefdoms of Glostmurk were weakened by years of successive crop failures and economic woes. Think of Glostmurk like Eastern Europe … lots of small regions, all jammed together side-by-side and forced to deal with increasingly chaotic situations.

In our storyline, The Famines period leads directly into a period called the War of the Coins, which resulted in the collapse of the dwarven city-state of Miravec, so you can see where this is all going. As we imagined it, games set in The Famines will often focus on border raids and mercenary actions, rather than full-blown armed conflict.

IMG_20190324_193356.jpg

In this game, foul ratmen raiders from beyond the borders of Glostmurk swept into the small hamlet of Glodd to carry off the grain stores and livestock that the pitiful villagers were counting on to see them through the winter. Luckily for them, the Wealth of Begovich (the main noble house in the region) anticipated this move and was able to muster a motley collection of militia and elite house guard to stymie the raid.

IMG_20190324_194115.jpg

We used this game as an excuse to try out Dragon Rampant, which is quickly becoming our go-to game for medium-sized fantasy skirmish. I have played a few games recently, but this was to be John’s first game. He was commanding the Wealth of Begovich army, featuring some of his newly painted spearmen from RuneWars.

We used the “Crystal Gale” scenario from the Dragon Rampant rulebook, only instead of crystal shards, we were competing to seize livestock and barrels of supplies. This was a fun opportunity to use some of my livestock models that I’ve had bouncing around in my scatter terrain box for the better part of a decade.

The center of the battlefield was dominated by a few rude huts — all that remained of the hamlet of Glodd. The barrels and livestock represent the objectives.

As the game got underway, we realized that I was at a significant advantage, because my army had a number of units that moved 8 inches per turn, whereas John had none. I quickly pounced on a few objectives and it became clear that the odds were in my favor to win the scenario. But! There’s more to the game than just winning the scenario. We decided to play it out to see if the Wealth of Begovich could deliver a sting to the raiders.

IMG_20190324_200259.jpg

Even as my ratmen were butchering cattle in the fields and quartering the carcasses for easy transport, John’s scouts and militia were creeping forward to ambush the attackers. Over in a copse of woods on the right side of the battlefield, a squad of infantry (light foot, in the parlance of Dragon Rampant) drew their sabers and pistols as they faced off against a pack of were-rats (lesser warbeasts in Dragon Rampant).

IMG_20190324_201453.jpg

IMG_20190324_204352.jpg

The giant rats gave as good as they got, and although they didn’t destroy any complete units, they definitely kept pressure on John’s flank. He could never completely ignore them, and at times he faced some tough decisions about where to commit his reserves, knowing that giant rats were scurrying around the backfield.

The main clash came down in the center of Glodd, which was home to several objectives. My newly painted Skaven slaves (vintage metal, baby!) swarmed over a barrel of jellied fish heads, carrying off the pungent prize and then vaulting the low stone wall to advance further into the village.

Meanwhile, John’s advance ran right up against an interesting rule in the Dragon Rampant rulebook, which states that no unit can be closer than 3 inches to another unit. I’ve always casually brushed that rule aside, as it seems needlessly strict and doesn’t seem tied to any particular game mechanic. But we decided to play it as written this time.

For John, that meant his units had a hard time converging on the barrels in the center of Glodd, because they had to carefully maneuver around each other to stay 3 inches away. Here’s a look at his determined advance.


The leader of my warband and his foul retinue (elite foot in Dragon Rampant) stuck to the shadows, allowing their massed infantry to do the dirty work. This was for good reason — before the game began, we rolled randomly to select a unique trait for our leaders. My poor ratman rolled “Weakness” as his trait (yes, a few are negative, though most are positive). We interpreted this to mean he was HUNGRY and weakened from lack of food.

In game terms, his unit rolled one less dice in combat, so I wisely tried to keep him away from the front lines.

Meanwhile, John’s skirmishers continued to pepper the ravenous ratmen with arrows as they lurked near a low stone wall. These guys were able to use their “skirmisher” ability to move and shoot a few times during the game — once actually evading combat entirely by melting into the trees when the ratmen slaves tried to charge in!

When the slave finally reached combat, it was against a vastly superior unit — John’s elite foot, which included his leader, Lady Almira Begovic! Oops…that was not the matchup I was seeking with my lowly unit of slaves. So we clashed, with predictable results. The slaves were beaten badly and forced to flee, where they stayed for most of the rest of the game, doing a whole lot of nothing while the game was decided elsewhere.

Here’s an overhead look at the battlefield shortly after the slaves fled. You can see the they have far fewer models now, and a red marker indicating their “battered” status in the game. Battered is Not Good and typically results in the unit continuing to bleed casualties and/or flee until it is annihilated.

After a couple turns maneuvering and fighting on the flanks, the armies finally positioned themselves for a decisive clash in the center of the hamlet. John managed to bait my plague monks (bellicose foot in Dragon Rampant) into charging his light infantry due to the monks’ wild charge ability, which meant that they had to charge the closest unit in range. This ability is intended as a drawback, but it’s balanced out because bellicose foot are quite good in close combat, and they can charge through rough terrain without a penalty.

Here are the monks emerging from a small wooded area, hoisting their rusty, filth-encrusted weapons.

I had give these plague monks the Venomous special rule to reflect their plague-drenched weapons. That made them cost 7 points — easily the most expensive unit on the battlefield for our game. I like that special abilities like this in Dragon Rampant are flavorful but not unbalancing. Nothing is cheap enough that you’d want to take it by default — for example, if I gave every unit in my army the Venomous ability, I’d only be able to field half as many models.

Anyway, Venomous means that any sixes I roll when attacking count as two hits, rather than just one. Combined with the already-great combat abilities of bellicose foot, that meant I was expecting a lot from my plague monks!

And they delivered. Here’s the epic clash with John’s newly painted spearmen.

I ended up rolling four (4) sixes in that combat, inflicting 8 automatic hits in addition to a handful of additional dice that scored hits. The result was a near-rout for the spearmen. With that, we proceeded to declare victory for the ratmen.

In the narrative, the ratmen slaughtered the livestock and stole the food stores and torched the huts and poisoned the wells and salted the fields and basically behaved very badly, before slinking off to their hideout in the hills and leaving Glodd to rot.

Of course, we’ll need to schedule some subsequent games to see where this narrative thread goes. Maybe the ratmen muster a larger horde and press their advance by besieging a fortified Begovic border stronghold? Maybe Lady Almira recruits a few of her family’s clanking, steam-powered war machines and employs them root out the squeaking menace that plagues their lands? Leave a comment and tell me what you’d like to see!

40k Battle Report: Backs to the Wall

Posted by Comrade on March 12, 2019
Posted in: Posts. Tagged: 40k, battle report, caluphel, campaign, chaos, game night, wargames, warhammer. 2 Comments

IMG_20190302_193506.jpg

Paul and I got together earlier this month for a game of Warhammer 40,000, and we set up a fun narrative scenario with a twist — he would be horribly outnumbered, with defeat all but guaranteed, and the game outcome would instead be determined by the margin of his defeat.

For this game, Paul was running his relatively small Sisters of Battle force, as he wanted to get some more experience with the “beta” codex rules. These are the vanguard elements of what we hope will become a full-sized Adeptus Sororitas army, once the eagerly anticipated plastic kits get released later this (?) year.

On the other side of the table, I wanted to get some action with my Night Lords Chaos Space Marine army. You might have noticed that these fellows haven’t been featured on Comrade’s Wargames in at least a year or so. I haven’t been extremely satisfied with the paint jobs I gave them long ago, but recently I pulled them out of their foam and began a paint touch-up project: highlights, improved lightning bolts, better metallics, maybe even a splash of blood here and there.

IMG_20190227_210808.jpg

I’m nowhere near done, but I’ve made enough progress that I was eager to get them on the battlefield and see how they look “en masse.”

With Paul’s rather small force of Sororitas and my large, newly updated Night Lords army, we decided on a “last stand” scenario set on Koffa, one of the fringe worlds of the Ianthe Sub-Sector. That area is the home base for Paul’s nascent Sororitas army, and we decided that a small scouting party was following up on rumors that a saint’s relic — the knuckle bone of St. Theodosius the Spiteful, perhaps, or a scrap of vellum from St. Euphrati’s Litany of Redemption — had been found in the hinterlands of Koffa Proxima.

To wit: Paul plunked down 35 Power Level of Sororitas, and I dropped a sledgehammer consisting of 75+ Power Level of Night Lords. If Paul survived to turn 3, the outcome would be that his Sisters of Battle covered themselves in glory as they died defending the saint’s relic. It would be a last stand worthy of a codex book cover illustration. If Paul survived to turn 4, the outcome would be that a small force of Sororitas escaped the slaughter on Koffa, carrying word that the fearsome Night Lords were once again on the move in the Caluphel sector. The rest of the Sisters would, of course, be butchered.

IMG_20190302_193506.jpg

Note that there was no outcome that meant defeat for the forces of Chaos — the structure of our game had ensured victory for them, and defeat (in one shape or another) for the Imperium.

At this point I want to pause and note just how magnanimous Paul was as we developed this scenario. He knew he was facing defeat, and he also knew that we’d be creating a beautiful tabletop experience as the Night Lords enveloped the Sisters of Battle. I pledged to him that I would return the favor and serve as a punching bag for him if he wished to do a similar game, with an outsized force of Imperium attackers falling upon a much smaller force of Chaos baddies.

The game got underway with a massive advance by the Night Lords. Vath’Shuga the Cauldron of Rage, my daemon prince, led the way, alongside a Rhino and a Land Raider stuffed with murderous Night Lords.

IMG_20190302_195545.jpg

The resolute defenders were entrenched in craters and behind sandbags, awaiting the onslaught. The forces of Chaos broke like a wave upon the defenders, pouring a fusillade of devastating firepower as the tanks and infantry closed in.

IMG_20190302_203301.jpg

Paul’s defenders took heart when the Canoness of the Adeptus Sororitas met Vath’Shuga in single combat. Against a backdrop of sonorous chanting provided by the Bishop, the Canoness smote Vath’Shuga upon his pink little head, banishing the foul daemon to the warp and ending (temporarily) his reign in the mortal realms.

IMG_20190302_203205.jpg

Alas, it was but a pyrrhic victory. Within moments of Vath’Shuga’s demise, the Night Lords had breached the Sororitas’s lines, sending fearsome war machines and tanks full of infantry rampaging into the backfield.

IMG_20190302_205817.jpg

(The helbrute was one model that I hadn’t gotten to in my painting touch-up project, I must confess.)

IMG_20190302_204454.jpg

By now, the Sisters of Battle were starting to drop left and right, and the defenders were falling back to the landing zone on the other side of the big ruined building. And the Night Lords had one last card to play. Even as the Chaos infantry deployed from their Rhino and Land Raider, a flight of Raptors swooped in on jump packs and engaged the defenders in a swirling, brutal melee.

IMG_20190302_202349.jpg

The walls were closing in for the Sisters of Battle. As the final few defenders hoisted their swords and charged into melee with the rampaging Night Lords, we checked the turn clock. It was turn 3! That meant the Adeptus Sororitas had indeed managed to force a glorious, book-cover-worthy demise by holding out in the face of overwhelming odds.

The Night Lords noted this achievement as they dismembered the corpses of the slain to add new skulls to their gruesome trophy racks.

IMG_20190302_205802.jpg

And so we concluded a fun and climactic game where the overall outcome was never in doubt, but where the Sisters were able to achieve a backs-to-the-wall demise worthy of song.

Paul had a chance to explore some of the new Sisters of Battle rules, including the Rites of Faith — a sort of pseudo psychic power that functioned slightly differently. Faith points are given out whenever a Sororitas unit takes wounds, and each Rite can only be attempted once per turn. This really encourages you to use all of the different Rites of Faith each turn, rather than relying on just one or two powers. I like this, as it prevents players from just spamming the very best abilities over and over again, thereby skipping over the slightly less optimized (but still fun and flavorful) abilities.

Paul is certainly set up to exact his revenge upon my Night Lords. He just needs some new plastic Sisters of Battle to make it happen!

Wheelin’ and Dealin’: The Saga of My Doomwheel

Posted by Comrade on February 15, 2019
Posted in: Posts. Tagged: fantasy, miniatures, painting, project, skaven. 3 Comments

You may have noticed my new Skaven Doomwheel in action earlier this month in our game of Dragon Rampant. This was a model I’ve coveted since the old, clunky metal version debuted in White Dwarf decades ago.

I hadn’t intended to acquire one for my all-metal Skaven army project, but I stumbled across an assembled Doomwheel on sale for a mere $16 from the good folks at Mindtaker Miniatures. At that price, I couldn’t say no.

Now, acquiring it pre-assembled was both a blessing and a curse. Assembly and model-building is one of my least favorite tasks (as I noted in my Six Pillars of the Hobby post from last year) so I always try to outsource it whenever possible. But the Skaven Doomwheel is such an intricate model that I probably would have opted for sub-assemblies if doing it from the box. Oh well! Restriction breeds creativity, as I always say.

With that, I rolled up my hands and got to work. I started by spraying the whole thing a rusty brown — with so much rusted metal and exposed wood, I figured rusty brown would be a good starting point. I followed that up with metal for the blades, gears, and other metallic bits. After that, a bit of detail work and weathering (not too much — after all, my goal was to get this thing finished in time for our Dragon Rampant game, and the fact that I’d acquired the model pre-assembled meant that there was a limit on how much interior detail work I could realistically accomplish).

Here’s what I came up with.

It’s a really cool model, but I really manhandled it over the course of the painting process. I ended up pausing to spray it with clear matte varnish no fewer than 5 times to keep the painted parts safe from repeated handling and touching.

In general, I’ve found that these new-generation Skaven war machines represent big improvements over the older metal models. I can get away with having a few larger plastic models alongside my metal infantry hordes, right?

And here’s a look at the Doomwheel in action (before I’d attached the banner, oops!) from our Dragon Rampant game.

It’s a basic and serviceable paint job, I think, which is great, and the price was right.

I’m already moving on to the next unit on the list for my vintage metal Skaven army. Up next: Skaven slaves! Stay tuned for more…

Dragon Rampant: Skirmish at the Manor

Posted by Comrade on February 8, 2019
Posted in: Posts. Tagged: battle report, dragon rampant, fantasy, game night, skaven, skirmish. 6 Comments

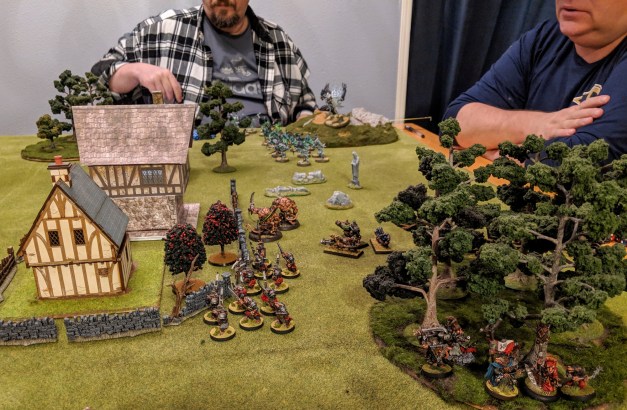
After a pursuit that stretched for nearly a week, a veteran expeditionary force from the Empire, led by the magic-user known as Razmina the Yellow, had nearly caught up with Snik Soot-Fang and his cadre of skittering Skaven fighters. Determined to bring the ratmen to battle in proper fashion, Razmina took a small band of outriders, backed up by Blue Wing, a noble dragon, and placed them athwart the burnt-out ruins of Felstaff Manor — itself a victim to the Skaven’s plunderings earlier in the year.

IMG_20190202_192305.jpg

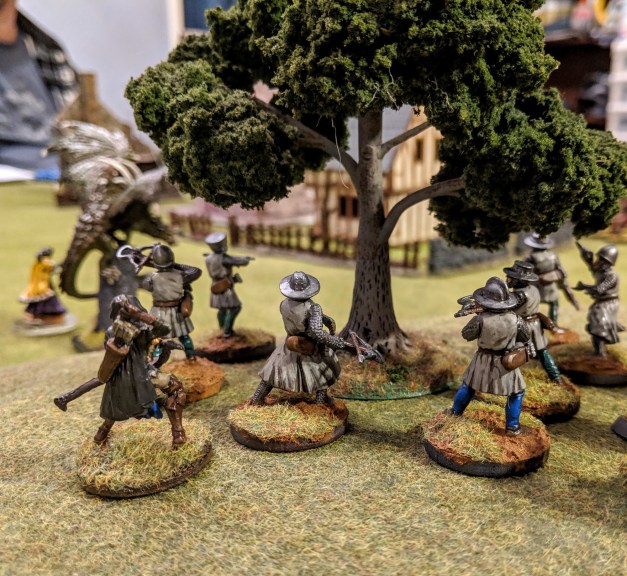
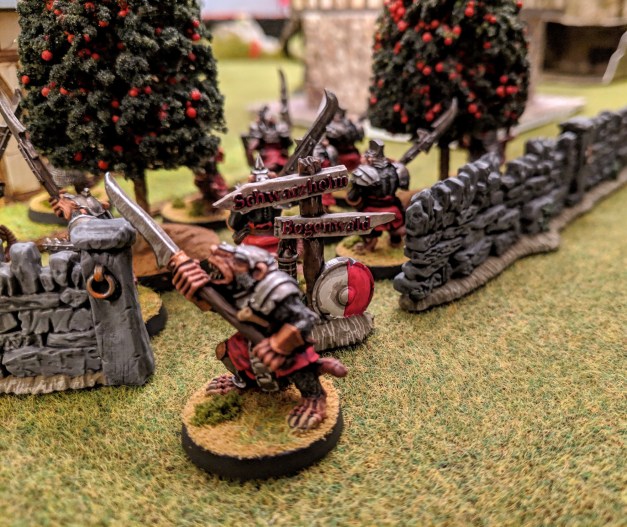
As the apples on the few remaining trees in Felstaff’s orchard ripened in the autumn sun, the Snik Soot-Fang and his warriors emerged from a copse of trees and prepared to face the Razmina’s warband, including the King’s Own Crossbowmen and the fearsome Knights of Tralain.

IMG_20190202_193817.jpg

IMG_20190202_190350.jpg

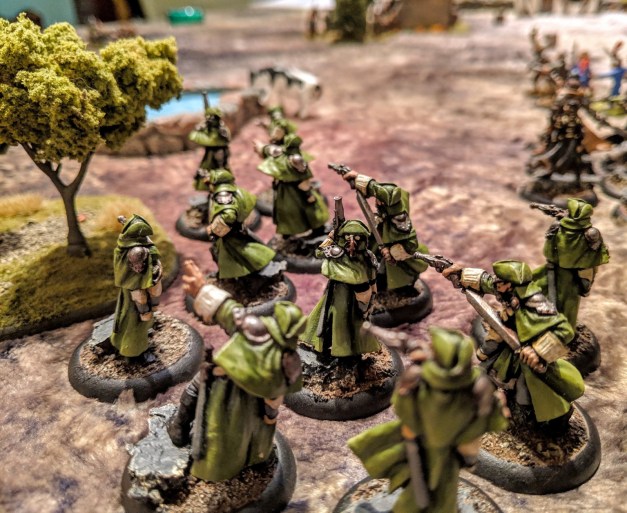
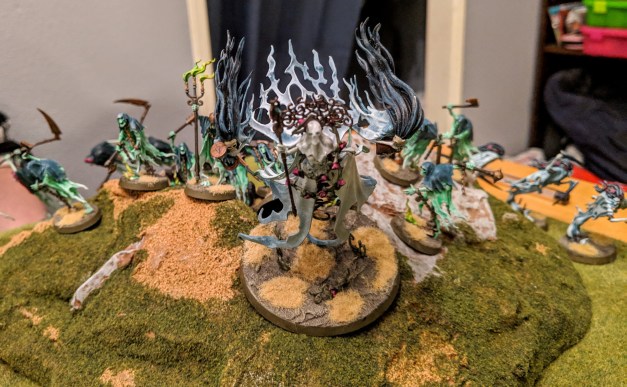
But their pending clash was cut short by the arrival of a new and ghastly enemy. Surging over the hills to the east came an ethereal spirit host. With a chorus of flapping robes and jangling chains, the Nighthaunts swept onto the battlefield to slaughter man and Skaven alike.

IMG_20190202_191554.jpg

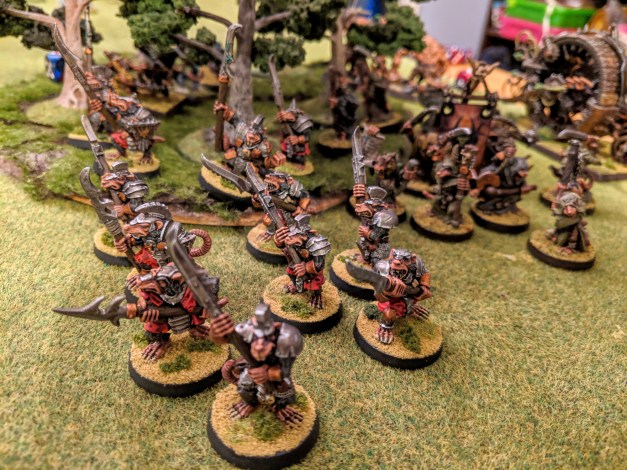
Thus, the stage was set for a three-player game of Dragon Rampant earlier this month between me, Vincent, and Oliver. For me, this was an opportunity to get my new, as-yet-unblooded Skaven army on the battlefield. Likewise, Oliver was fielding his newly painted Nighthaunt army.

Dragon Rampant is a medium-sized skirmish game with fairly flexible unit composition rules. As written, a typical army would consist of 30 to 40 figures per side. But DR has a nicely developed set of rules for larger monsters and war machines, so players can certainly field armies consisting of almost any combination of models from their fantasy collection.

IMG_20190202_191725.jpg

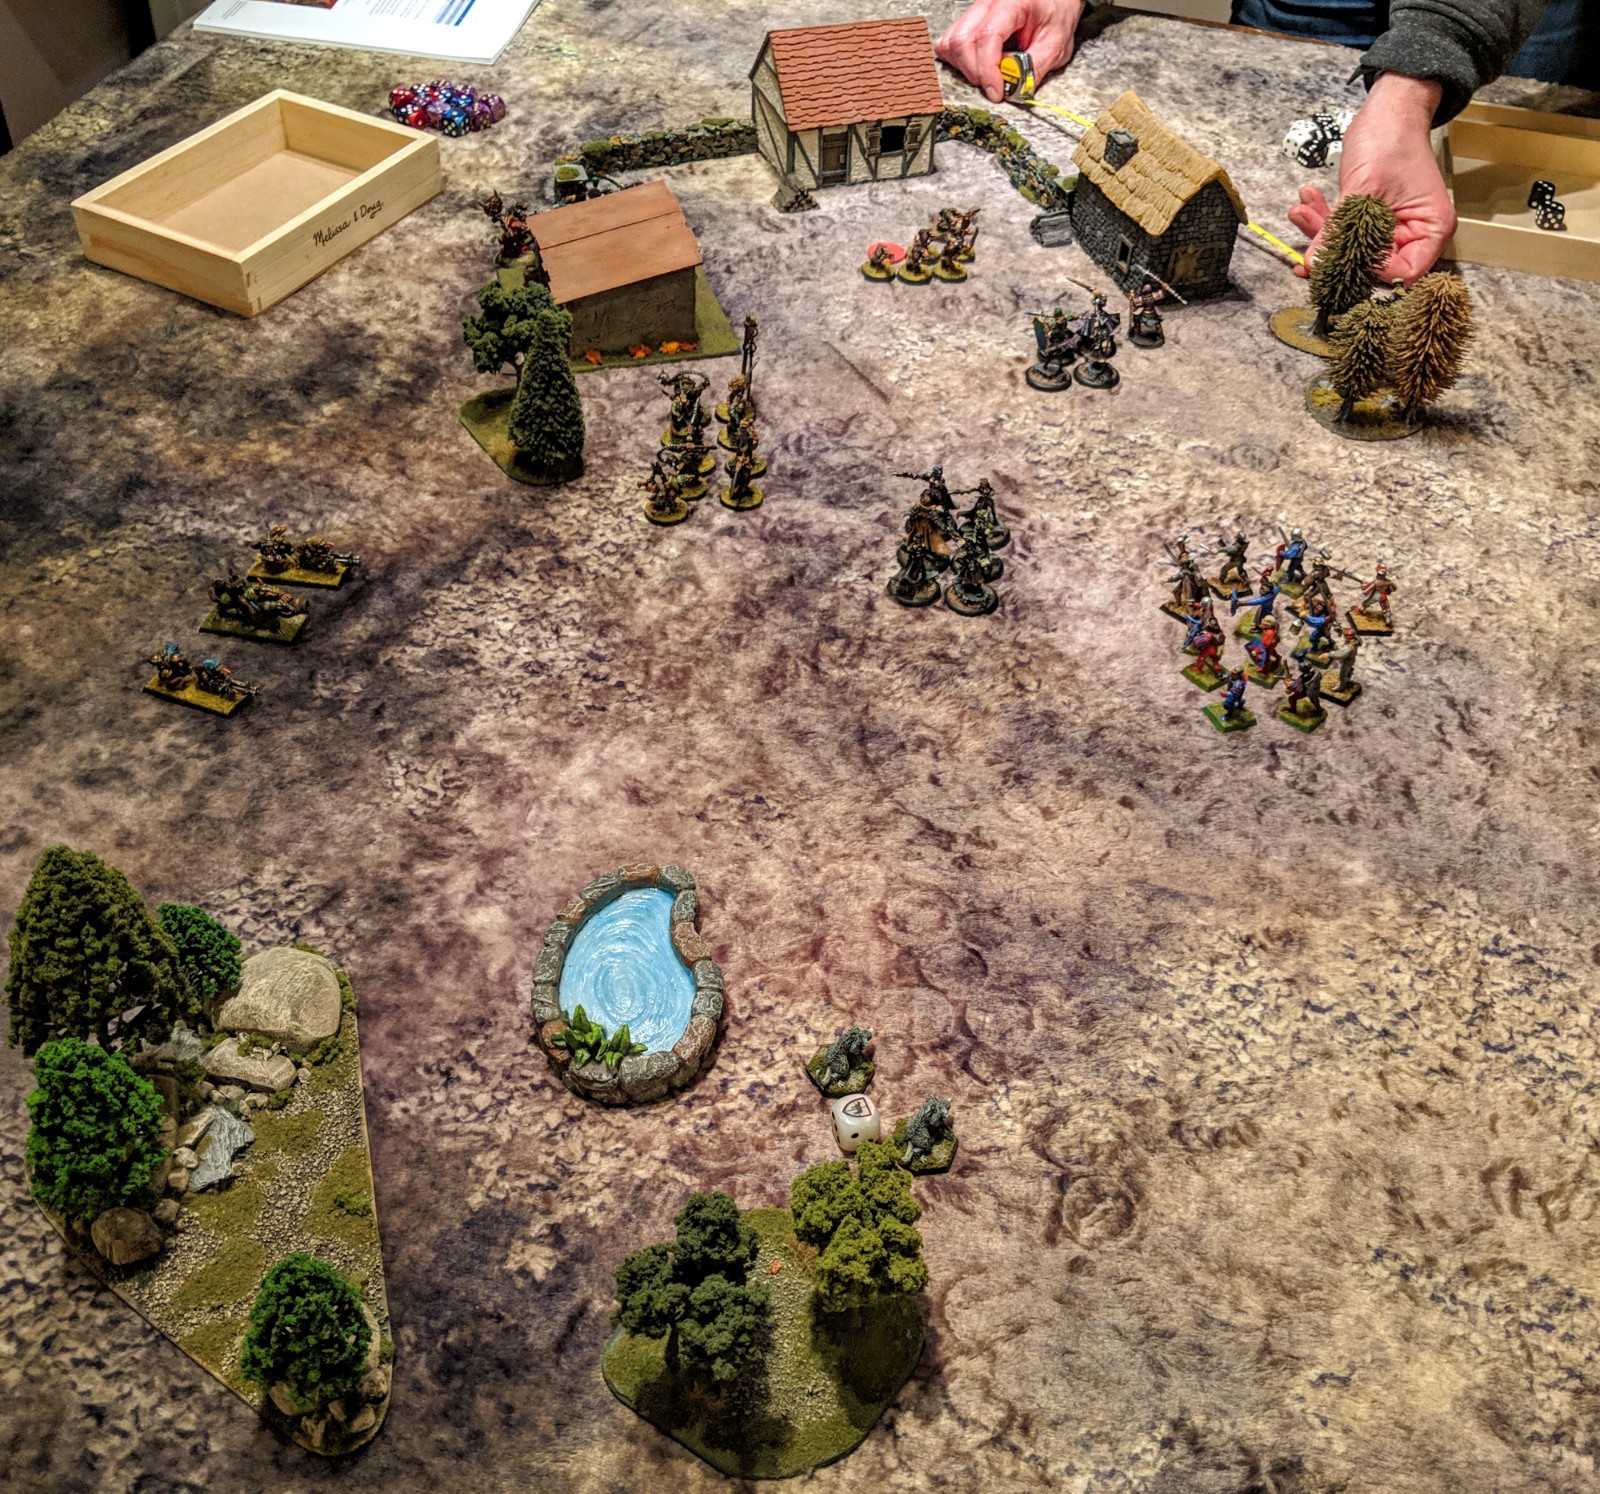
We opted for the Bloodbath scenario — the simplest option that would let us come to blows quickly. I deployed my Skaven in a small wood (surmising, I suppose, that they were lying in wait to ambush the Razmina’s warband). Oliver deployed his Nighthaunts on a low moor, from whence they would swoop down onto the unsuspecting combatants. And Vince mustered his knights and retainers and their fearsome dragon ally in a clearing to the north of the manor.

Our first turns were focused on establishing command and control — by that, I mean re-learning the Dragon Rampant rules! We’d all played before, but years ago, and we were a bit rusty.

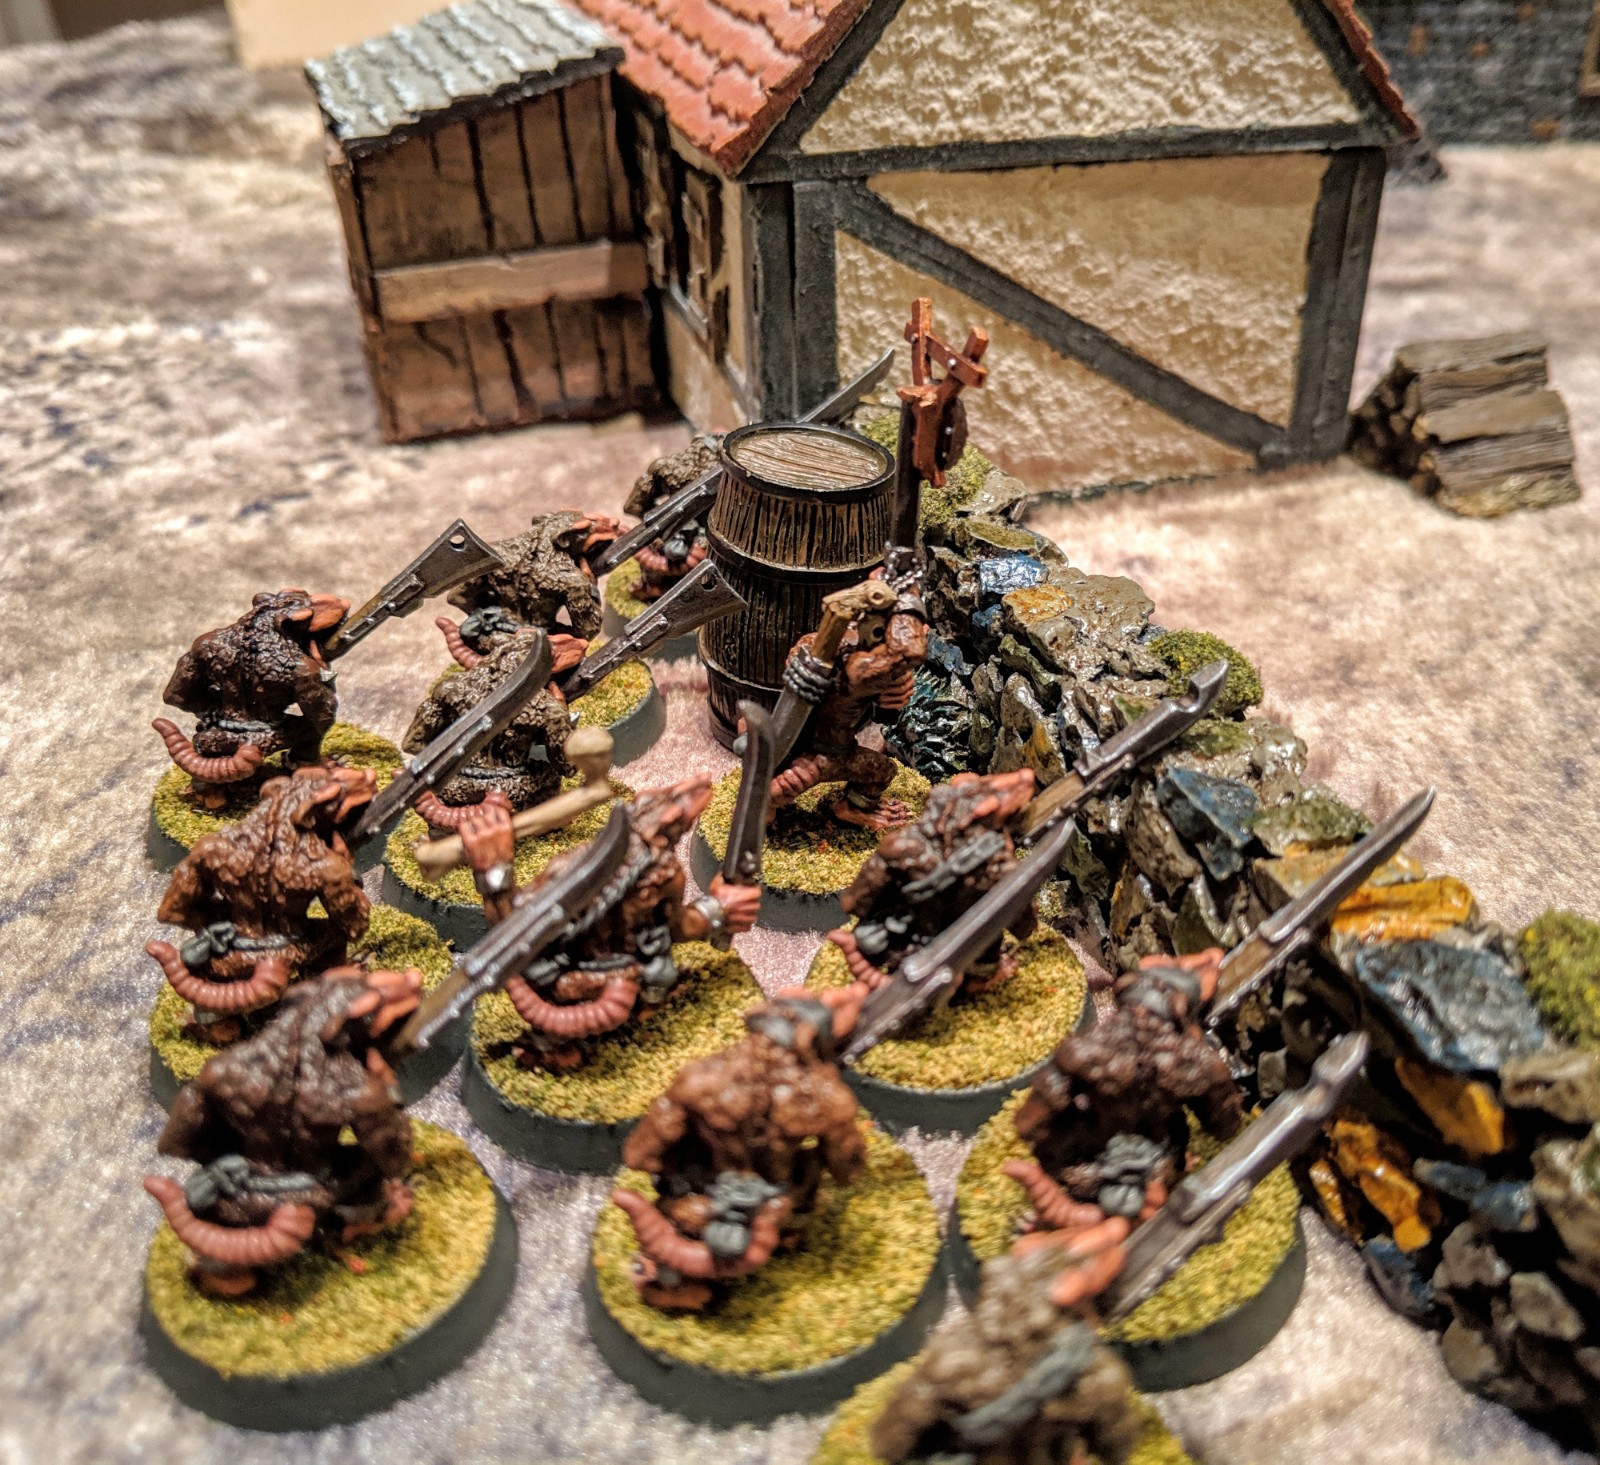
I tried my darnedest to mobilize my Plague Monks, though I’m sorry to say they mostly stayed put for the entirety of the game, preferring to stay lurk near the trees until the final turn.

IMG_20190202_191541.jpg

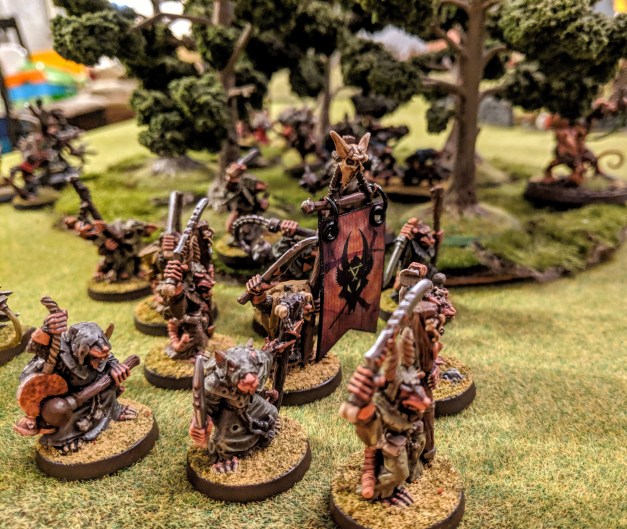
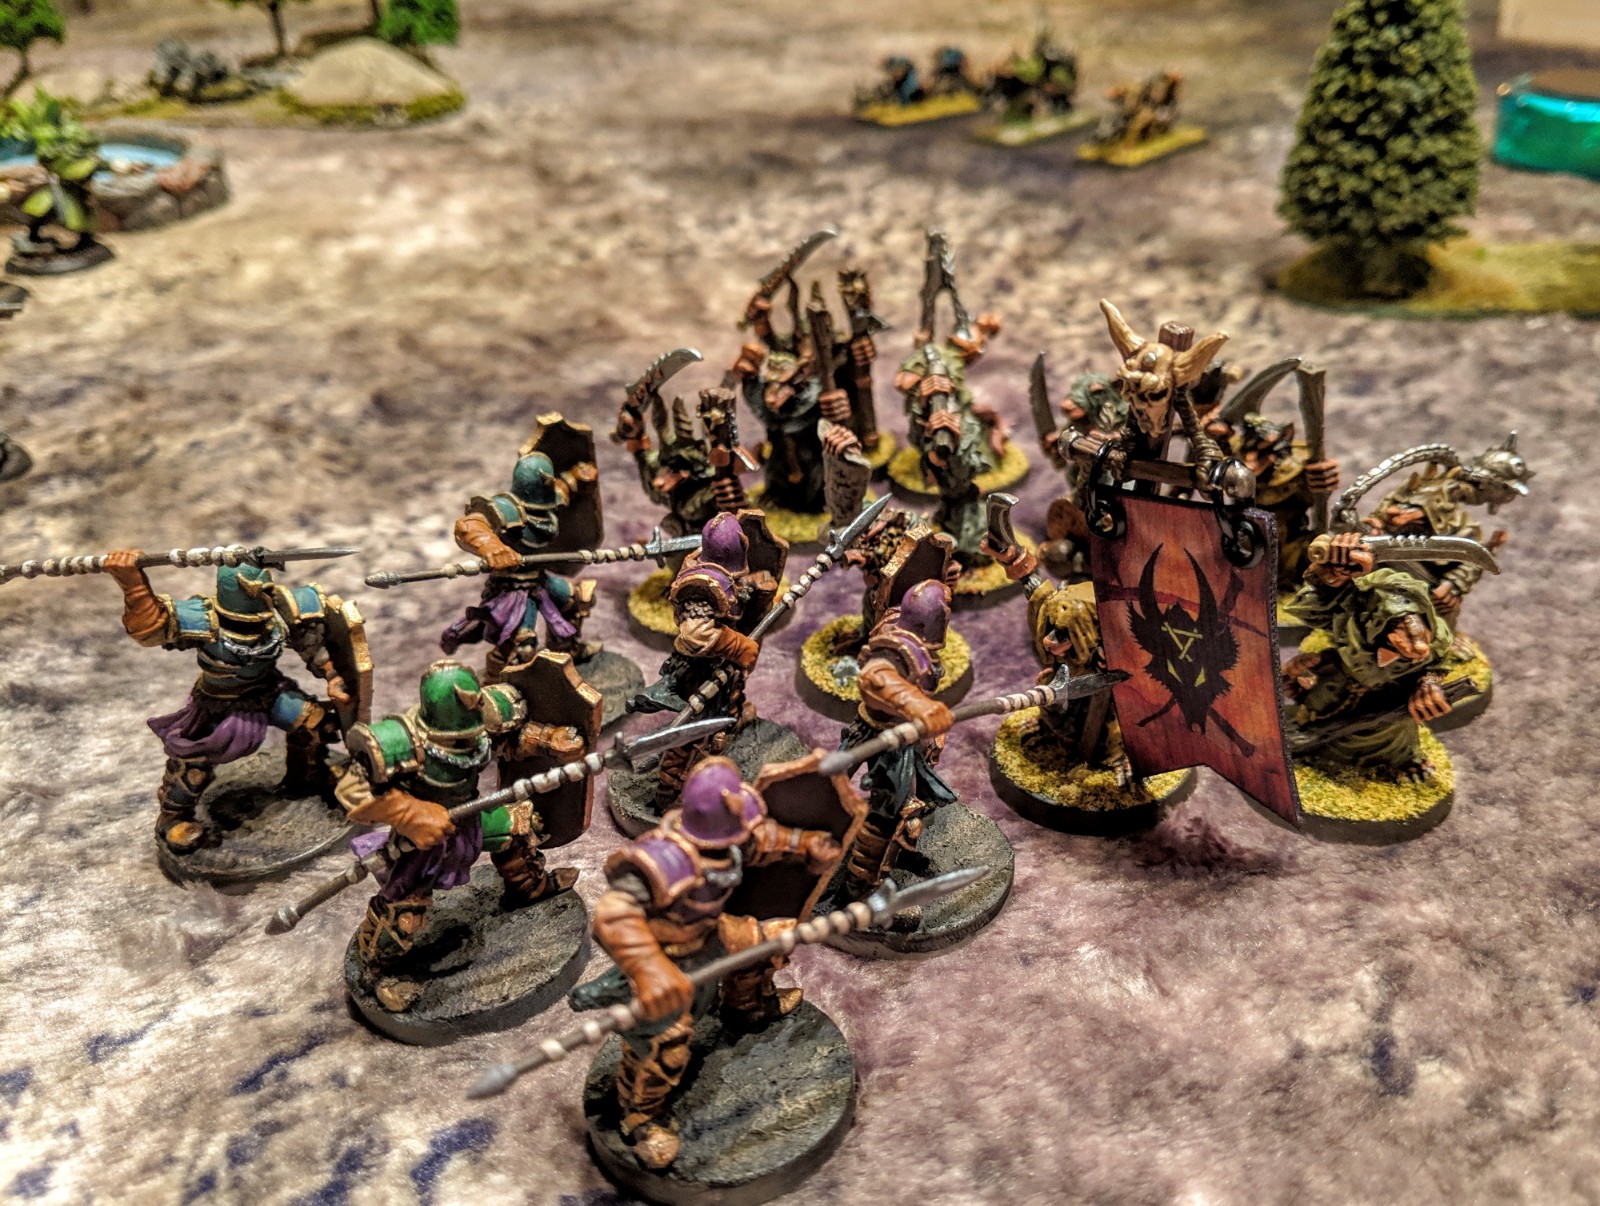
In the photo above, you can see the snazzy custom vinyl banner that I commissioned from a guy on Facebook for my Plague Monk unit. It’s really sharp looking!

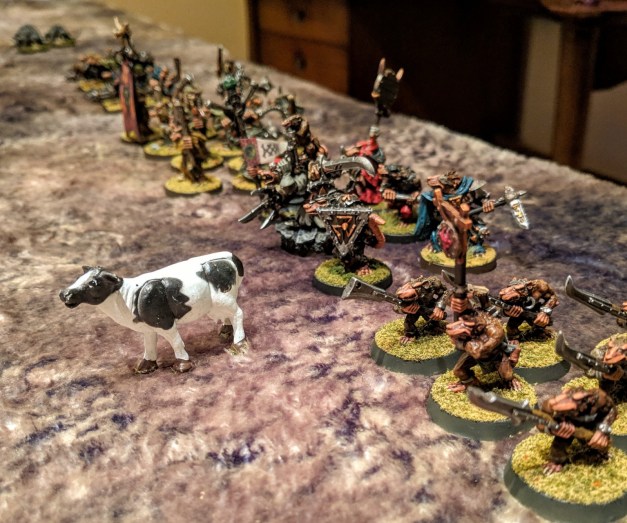
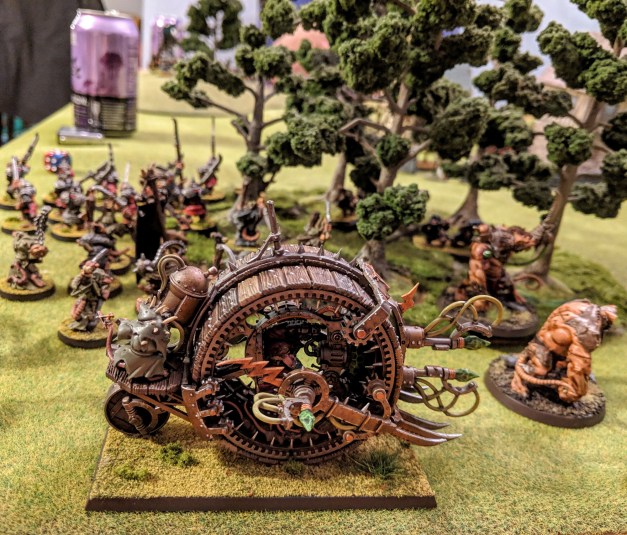
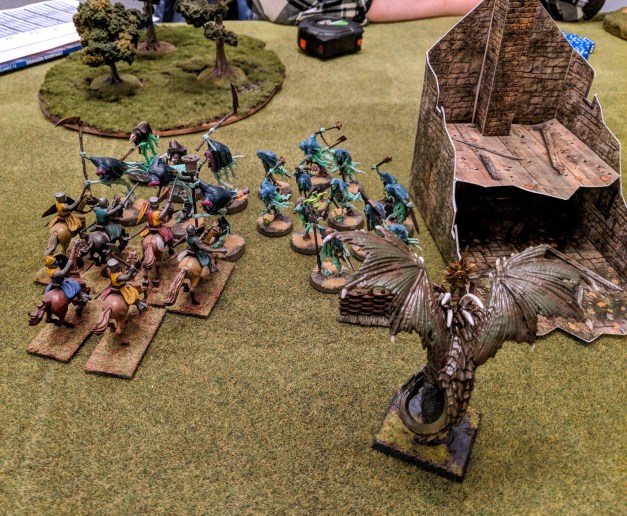
Elsewhere, I managed to get my Doomwheel and two Rat Ogres moving. The Rat Ogres lumbered toward the incoming Nighthaunt host, and the Doomwheel pivoted and began maneuvering around the copse of trees, angling toward Vince’s warband.

IMG_20190202_190416.jpg

Activating units in DR is risky, and not a sure thing. The game has a “turnover” mechanic similar to Song of Blades & Heroes, where there’s always a risk that your turn will end prematurely if you flub an activation roll. I appreciate mechanics like that because they do a nice job of modeling all of the various unknowns that can befall an army in the field (bad communication, troops balking at orders, infighting, exhaustion, bad weather, etc), without having to resort to a super granular rule system where you’re rolling a million dice to see which direction the wind is coming from, or to see if some dude’s sword broke during his attack.

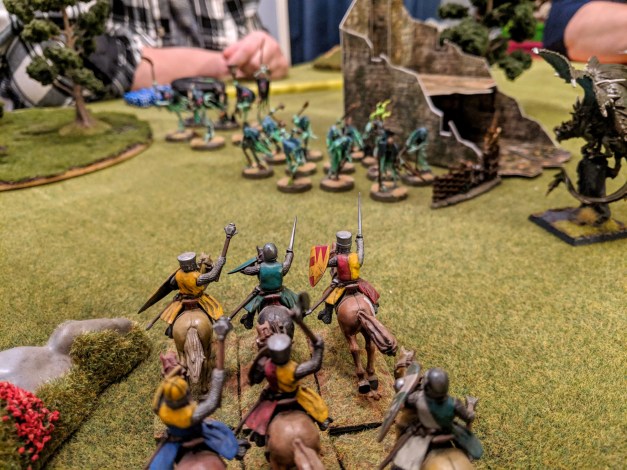
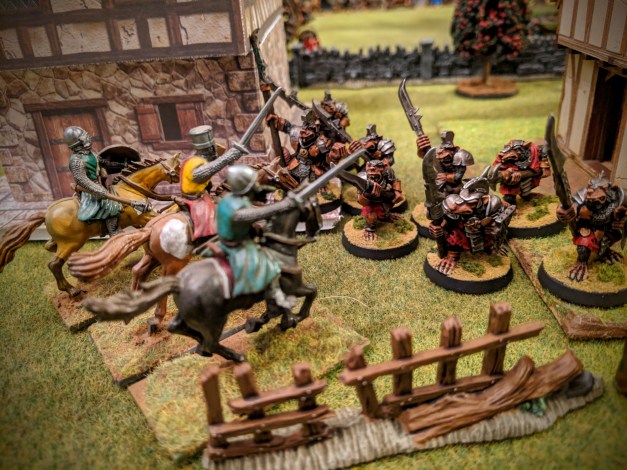
Speaking of swords … over on the northern flank, Vincent managed to activate one of the most notoriously fickle units in the entire game — his elite knights! These guys hit hard, but they’re difficult to activate and they’ll occasionally charge without warning at the closest enemy model.

IMG_20190202_191612.jpg

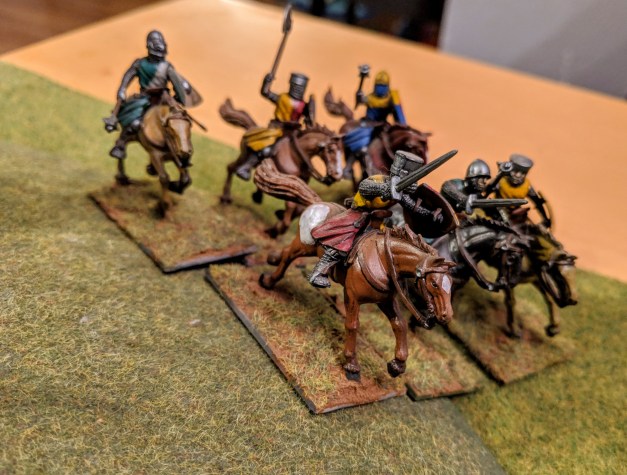
Still, seeing those thundering hooves is enough to send shivers down anyone’s spine…unless you’re Oliver’s undead army! Ha!

We chuckled throughout the game about how Oliver’s Nighthaunts “feel nothing,” which means they’re immune to fear and can’t receive battered results after losing combat. They also crumple like paper if they take casualties, though, so it’s a trade-off.

IMG_20190202_193931.jpg

IMG_20190202_193834.jpg

It’s fair to say that Oliver had his choice of targets as he mobilized his army and swooped down off the hill. On his right, the Knights of Tralain were thundering toward his undead legions. On his left, he saw lumbering Rat Ogres followed by the ratmen beyond measure.

The first clash came when Oliver’s undead infantry wheeled around the corner of the ruined manor and crashed headline into Vincent’s knights and dragon. Savage, no quarter close combat ensued for several turns, but ultimately the knights prevailed, hacking their way through the brittle husks of the Nighthaunts.

IMG_20190202_201722.jpg

IMG_20190202_202128.jpg

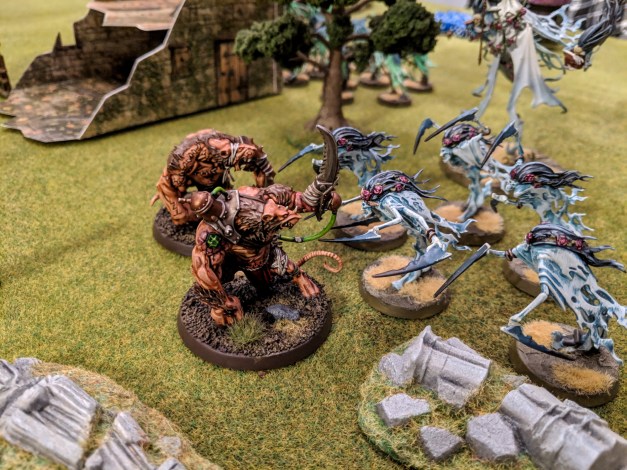
Oliver fared better against the Skaven when his wraiths charged into the Rat Ogres, carving up the loathsome mutants and scattering their remains across the grassy field. At this point, I was reminded of the game’s brutal morale mechanic. For most units, once you fail a courage test and become “battered,” it’s difficult to rally and become an effective fighting force, at least in a typical game. It’s more likely that your battered unit will continue to retreat and bleed casualties for the rest of the game. This does a decent job of pushing the game toward an inevitable conclusion — once a player has several battered units, it’s clear that the endgame is approaching, which is nice because nobody wants to play a 4-hour skirmish game!

In the case of the Rat Ogres, these guys were my first two casualties, and they died without doing much of anything!

IMG_20190202_200207.jpg

My strategy at this point was to seize the manor and orchard in the center of the table and hopefully improve my defensive position. My Stormvermin (“heavy foot” in the parlance of Dragon Rampant) were fairly good on the defense, so I figured I’d have have a good chance of surviving if I could make my way to the manor. So that’s what I did.

It took my guys a fair few turns to vault the gate and occupy the manor, though, because Razmina the Yellow kept casting a spell on them that imposed a movement penalty. But we made it! Next stop – Schwarzholm. Or will we go to Rogenwald?!

IMG_20190202_195539.jpg

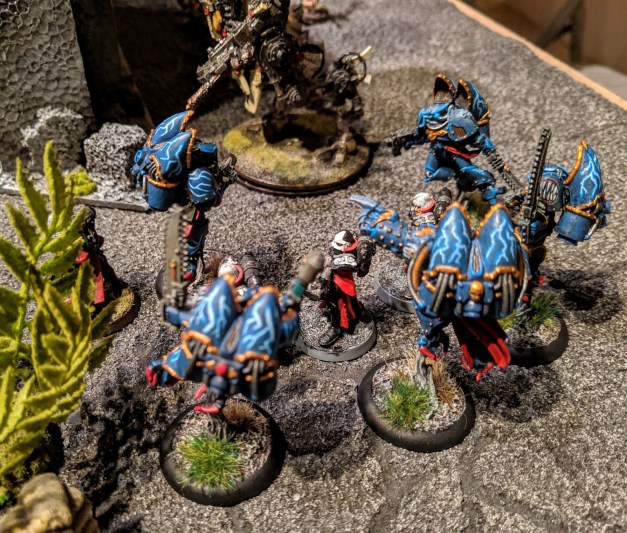
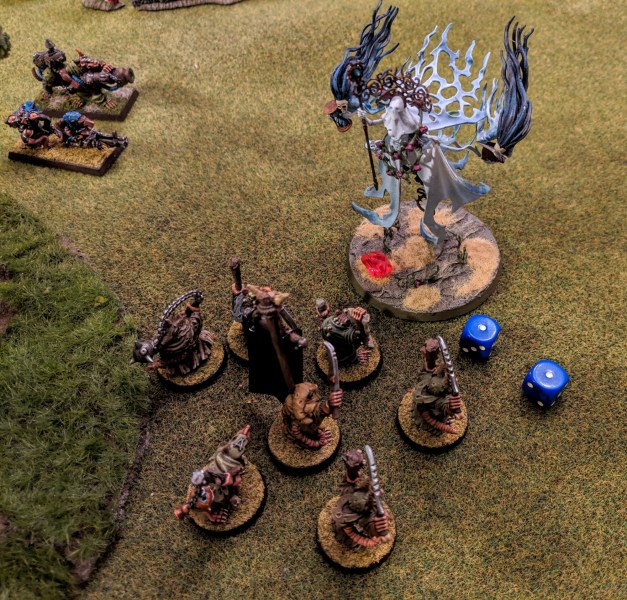
It couldn’t have happened soon enough, because Oliver’s fearsome leader — Lady Olynder, the Mortarch of Grief — was bearing down on my flank. Remember those Plague Monks who refused to move? Yeah they got slaughtered to a rat when she crashed in.

IMG_20190202_202141.jpg

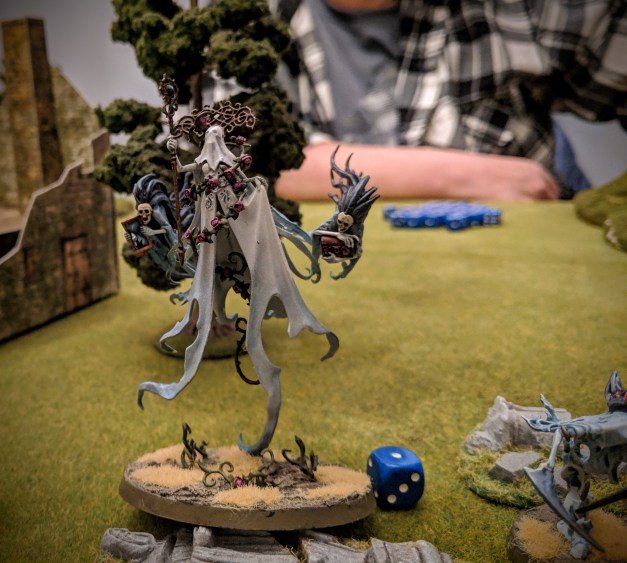
They dealt a few points of paltry damage to Lady Olynder in response, barely enough to warrant a courage test, but then, to Oliver’s utter shock and horror, Lady Olynder FAILED HER COURAGE TEST with such a terrible result that she actually fled the battlefield. Wow! We immortalized the moment when the dice rolled snake eyes and we knew her fate was sealed.

IMG_20190202_204958.jpg

With the departure of Lady Olynder and the losses against the knights, Oliver had been defeated, which left Vincent free to bring the full force of his knights and dragon and skirmishes to bear on the depleted Skaven forces.

But — remember my clever strategy of seizing the manor house? Well, it finally paid off! My Stormvermin were able to form up into a “wall of spears” formation (this is actually a thing in Dragon Rampant) and withstand a charge by the knights!

IMG_20190202_212757.jpg

That left Vincent with Blue Wing the dragon, who at this point had been badly mauled by its prior engagements with Oliver’s wraiths. I peppered him with fire from my three Skaven weapon teams (defined as “heavy missiles” in Dragon Rampant) as he maneuvered for a final charge. Before Blue Wing could activate, though, I finally managed to mobilize my Doomwheel, sending the cranking, clattering contraption hurtling toward the dragon at full speed. In one cataclysmic round of combat, the game was over for Vince.

IMG_20190202_212518.jpg

And so the rats emerged triumphant! But honor demands that I tell you that this game requires an asterisk (*) in my victory column. You see, I had a string of absolutely terrible activation rolls earlier in the game — literally two or three turns where I was able to activate zero or one units. Vince and Oliver both very graciously decreed that, because I had brought tasty marionberry cider for everyone to enjoy, that I could have two re-rolls to salvage my horrible activations. So I proceeded to use these, and I’m certain that my victory is due only to their generosity and sportsmanship. I doff my cap to their magnanimity.

All in all, we enjoyed the hell out of Dragon Rampant this time around. One thing that crystallized for me this time was how much I enjoy the fact that everyone plays from the same basic army list and has access to the same roster of units (with a few tweaks here and there). That removes a lot of the “gotcha” moments that tend to arise in games like Warhammer 40k, where there’s so much semi-hidden knowledge that you reveal at decisive moments (like a well-time power or strategem that your opponent didn’t know about).

In DR, everyone knows what everything can do, so the game is instead decided by battlefield tactics, tough decisions, maneuvering, and a bit of luck. That’s probably my platonic ideal for wargaming — a game that is tactically deep, but easy enough for both players to follow the action and understand the stakes as they unfold. We’ll be playing this one again soon!

Starting an All-Metal Skaven Army, Part II

Posted by Comrade on December 28, 2018
Posted in: Posts. Tagged: army, dragon rampant, fantasy, open combat, project, skirmish, song of blades. 6 Comments

With 2018 coming to a close, I’m looking back on the progress I made toward my goal (announced in August, oops!) of starting an all-metal Skaven army featuring some of the old-school figures I coveted in the pages of White Dwarf when I was a kid.

IMG_20180803_210310.jpg

Of course, the project has caveats — namely, I was building the army for Dragon Rampant, not Warhammer Fantasy, so I could get away with a lot fewer figures, probably something on the order of 50 or 60 total dudes (instead of the 150+ models that are typical for Skaven hordes).

And today I’m announcing another caveat — one that you probably saw coming. I have decided that I will be including plastic models where appropriate, particularly for large-scale monsters or war machines.

With that, here’s a look at the progress I’ve made to date. First up, a nearly completed unit of 12 Plague Monks, featuring some of the old-school Marauder Miniatures Plague Monks and Censer Bearers.

IMG_20181225_202722.jpg

IMG_20181215_221710.jpg

IMG_20181202_195847.jpg

(I’ve got a custom-printed vinyl banner on the way for that standard bearer.)

I did a few basic weapon swaps and gentle arm manipulations to add some variety, but for the most part these guys are stock. I really enjoyed coming up with the drab-yet-varied colors for their cloaks and robes. I’ve got three more Plague Monks to go before this unit is complete! They’ll be represented by the Elite Foot profile in Dragon Rampant, with some special rules to model their overall nastiness on the battlefield.

Moving on, I completed a couple more character models: a warlord and a warlock engineer. Both have already seen action in the Mayhem at the Stoic Arms battle report from last month.

IMG_20181202_194733.jpg

This figure is absolutely ridiculous with detail. The little rat buddy perched on his backpack is actually re-loading his warplock pistol!

IMG_20181202_194746.jpg

And then here’s this warlord. He was missing his rather cool tail/banner pole piece, so I had to replace it with a much less awesome tail. But he’s done, and ready for battle!

IMG_20181202_194833.jpg

IMG_20181202_194852.jpg

Hmmm, that blue is looking a little too electric and bright. In reality it’s rather dull, which I like. Maybe it’s the fluorescent lights in my workshop? The blue is really noticeable on this ratling gun team, which is the last of the Skaven figures I painted up this year.

IMG_20181202_194931.jpg

IMG_20181202_194913.jpg

Again, the blue really isn’t that bright. It’s just the lighting. I’m actually pleased with how the blue turned out in real life, so much so that I’m going to be using it for my (eventual) unit of 12 Gutter Runners.

Anyway, that’s where I stand on this particular project as 2018 comes to a close. In addition to painting, I was very successful in acquiring a lot of the old minis I’ll need to complete this project. Ebay and Facebook are great for scooping up random lots of vintage metal Skaven! Here’s what remains on my back-of-the-napkin army list for this Skaven project:

  • 12 Skaven Slaves (to be speedpainted in an assembly line)
  • 12 Clanrats (possibly 12 more on top of this; I acquired a nice pile of the old monopose plastics to go along with the metal figures)
  • 12 Gutter Runners
  • 6 giant rats
  • Doomwheel (plastic)
  • An assortment of weapons teams and character models

Seems totally achievable in 2019, right? The best part about this project is that I’ve been able to use the individual models I’ve been completing throughout the year in a variety of small-scale skirmish games, such as Song of Blades & Heroes and Open Combat. Look for more of that in 2019!

This year I also knocked out quite a bit for my Death Guard 40k army, too. All in all, 2018 was a fairly productive year, particularly when you consider that my son was born in January, so I spent the entire year parenting a newborn!

And 2018 was also the year that my 3-year-old son started to become … intensely … interested in my hobby stuff. He began identifying everything on my workbench as “goblins” and quickly learned the phrase that has become his mantra of patience: “One day I’ll get to play with those!” He’s a good kid, but he’s also in that little boy phase where everything he does is inadvertently destructive. Hopefully that one day will come sooner rather than later!

Posts navigation

← Older Entries
Newer Entries →
  • Recent Posts

    • Building a Grimdark Battle Board
    • Hobgoblin: More Thoughts and Musings
    • Grimdark Future: The Scouring of Hundvolst
    • Shadow War: Armageddon Battle Report & Review
    • The Expedition Soldiers On
  • Follow Comrade's Wargames on WordPress.com
  • Tags

    28mm 40k army battle report caluphel campaign chaos club death guard dragon rampant dwarves fantasy game night grimdark hobby miniatures narrative nurgle painting post-apoc project saga sci-fi skaven skirmish terrain warbands wargames warhammer workshop
  • Archives

    • January 2026 (1)
    • November 2025 (1)
    • October 2025 (2)
    • September 2025 (1)
    • October 2023 (2)
    • September 2023 (1)
    • August 2023 (2)
    • July 2023 (3)
    • June 2023 (3)
    • May 2023 (4)
    • April 2023 (2)
    • March 2023 (5)
    • February 2023 (2)
    • January 2023 (2)
    • December 2022 (1)
    • November 2022 (1)
    • October 2022 (4)
    • August 2022 (2)
    • July 2022 (1)
    • June 2022 (2)
    • May 2022 (5)
    • March 2022 (1)
    • February 2022 (1)
    • January 2022 (3)
    • December 2021 (1)
    • November 2021 (2)
    • October 2021 (1)
    • September 2021 (2)
    • July 2021 (1)
    • June 2021 (1)
    • May 2021 (2)
    • March 2021 (3)
    • February 2021 (1)
    • January 2021 (3)
    • December 2020 (1)
    • October 2020 (1)
    • September 2020 (2)
    • August 2020 (1)
    • July 2020 (1)
    • June 2020 (1)
    • May 2020 (1)
    • April 2020 (1)
    • March 2020 (1)
    • February 2020 (2)
    • January 2020 (3)
    • December 2019 (5)
    • November 2019 (1)
    • October 2019 (1)
    • September 2019 (2)
    • August 2019 (2)
    • July 2019 (4)
    • June 2019 (3)
    • May 2019 (3)
    • April 2019 (1)
    • March 2019 (1)
    • February 2019 (2)
    • December 2018 (3)
    • November 2018 (3)
    • October 2018 (5)
    • September 2018 (5)
    • August 2018 (5)
    • July 2018 (5)
    • June 2018 (2)
    • May 2018 (1)
    • April 2018 (3)
    • March 2018 (1)
    • February 2018 (1)
    • January 2018 (1)
    • December 2017 (1)
    • November 2017 (5)
    • October 2017 (1)
    • September 2017 (2)
    • August 2017 (4)
    • July 2017 (4)
    • June 2017 (3)
    • May 2017 (4)
    • April 2017 (3)
    • March 2017 (7)
    • February 2017 (6)
    • January 2017 (2)
    • December 2016 (5)
    • November 2016 (2)
    • October 2016 (3)
    • September 2016 (4)
    • August 2016 (5)
    • July 2016 (6)
    • June 2016 (8)
    • May 2016 (2)
Create a website or blog at WordPress.com
Comrade's Wargames
Create a website or blog at WordPress.com
  • Subscribe Subscribed
    • Comrade's Wargames
    • Join 154 other subscribers
    • Already have a WordPress.com account? Log in now.
    • Comrade's Wargames
    • Subscribe Subscribed
    • Sign up
    • Log in
    • Report this content
    • View site in Reader
    • Manage subscriptions
    • Collapse this bar
 

Loading Comments...