Comrade's Wargames

Painting toy soldiers in Oregon

  • Home
  • Narrative Campaigns
    • The Cauldron: A Grimdark Sci-Fi Campaign
    • The Chronicles of Üthdyn: A Fantasy Tabletop Campaign Setting
    • Nightwatch: Beyond the Borderlands
    • Frostgrave: Mystery of the Night-Haunted City
  • About Comrade’s Wargames

Caluphel Awakenings: Cloudburst (Campaign Finale)

Posted by Comrade on December 16, 2018
Posted in: Posts. Tagged: 40k, apocalypse, battle report, caluphel, campaign, club, game night, narrative, sci-fi, wargames, warhammer. 7 Comments
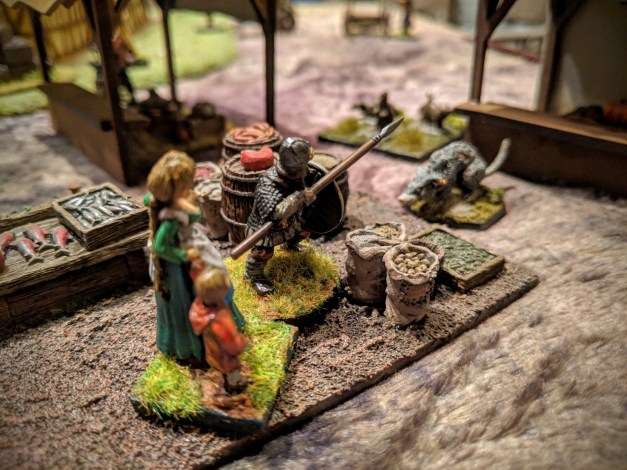
Nightfall on Caluphel Prime. But it was not true night, as the darkening sky was scored by thousands of beam weapons and missile trails. A mighty naval clash was taking place in low orbit, pitting the Imperial Navy’s ships of the line against a Death Guard battlegroup commanded by Typhus himself from the bridge of his fearsome battleship Terminus Est. The Imperial ships were struggling to land men and materiel to Outpost Omicron — a frontier settlement currently held by the Maggot Magnates. The venerable Chaos Space Marines had been hand-picked by Mortarion to implement the final endgame on Caluphel Prime. Opposing them at the Outpost were the advance elements of the Bareaga 402nd and a contingent of Adeptus Astartes from the Salamanders chapter. After days of constant, grinding combat at Outpost Omicron, both opposing factions were caught off guard by the arrival of Hive Fleet Tiamat. The sudden appearance of the Tyranids opened up a new front in the desperate battle to save Caluphel and prevent the Death Guard’s diabolical machinations from coming to pass. The Imperium’s defenders were stretched thin as they were forced to pivot and respond to a new Tyranid threat surging up from the subterranean spawning pits outside the Outpost. The dormant xenos under the planet’s surface were on the move, evidently drawn to the sudden arrival of Hive Fleet Tiamat in orbit. A two-front war was developing in the grim, waning days of the campaign on Caluphel Prime…
So that’s the setup for “Cloudburst,” the final chapter in our Caluphel Awakenings campaign. Paul, our stalwart GM for this campaign, really pulled out all the stops for this game. As before, we structured it as an Apoc-Luck game day, where we rented out a local rec center, brought food to share, and played out a massive 40k apocalypse-sized game to determine the narrative outcome of our campaign. 
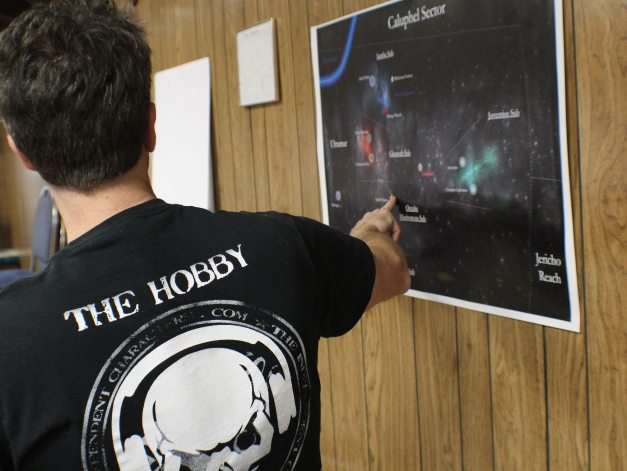
At the outset of our apocalypse game, Paul walked us through some of the major plot points that had developed over the course of the 6-month campaign. He even brought visual aids — what fun! IMG_6648.jpg If you’ve not caught up on Caluphel Awakenings, please do check out everything we’ve been up to since July. The goal of the campaign had been for us to further develop the lore, factions, backstories, and maps for the entire Caluphel sector. This we achieved with great aplomb — check out the sub-sector writeups that were contributed by the campaign players! 
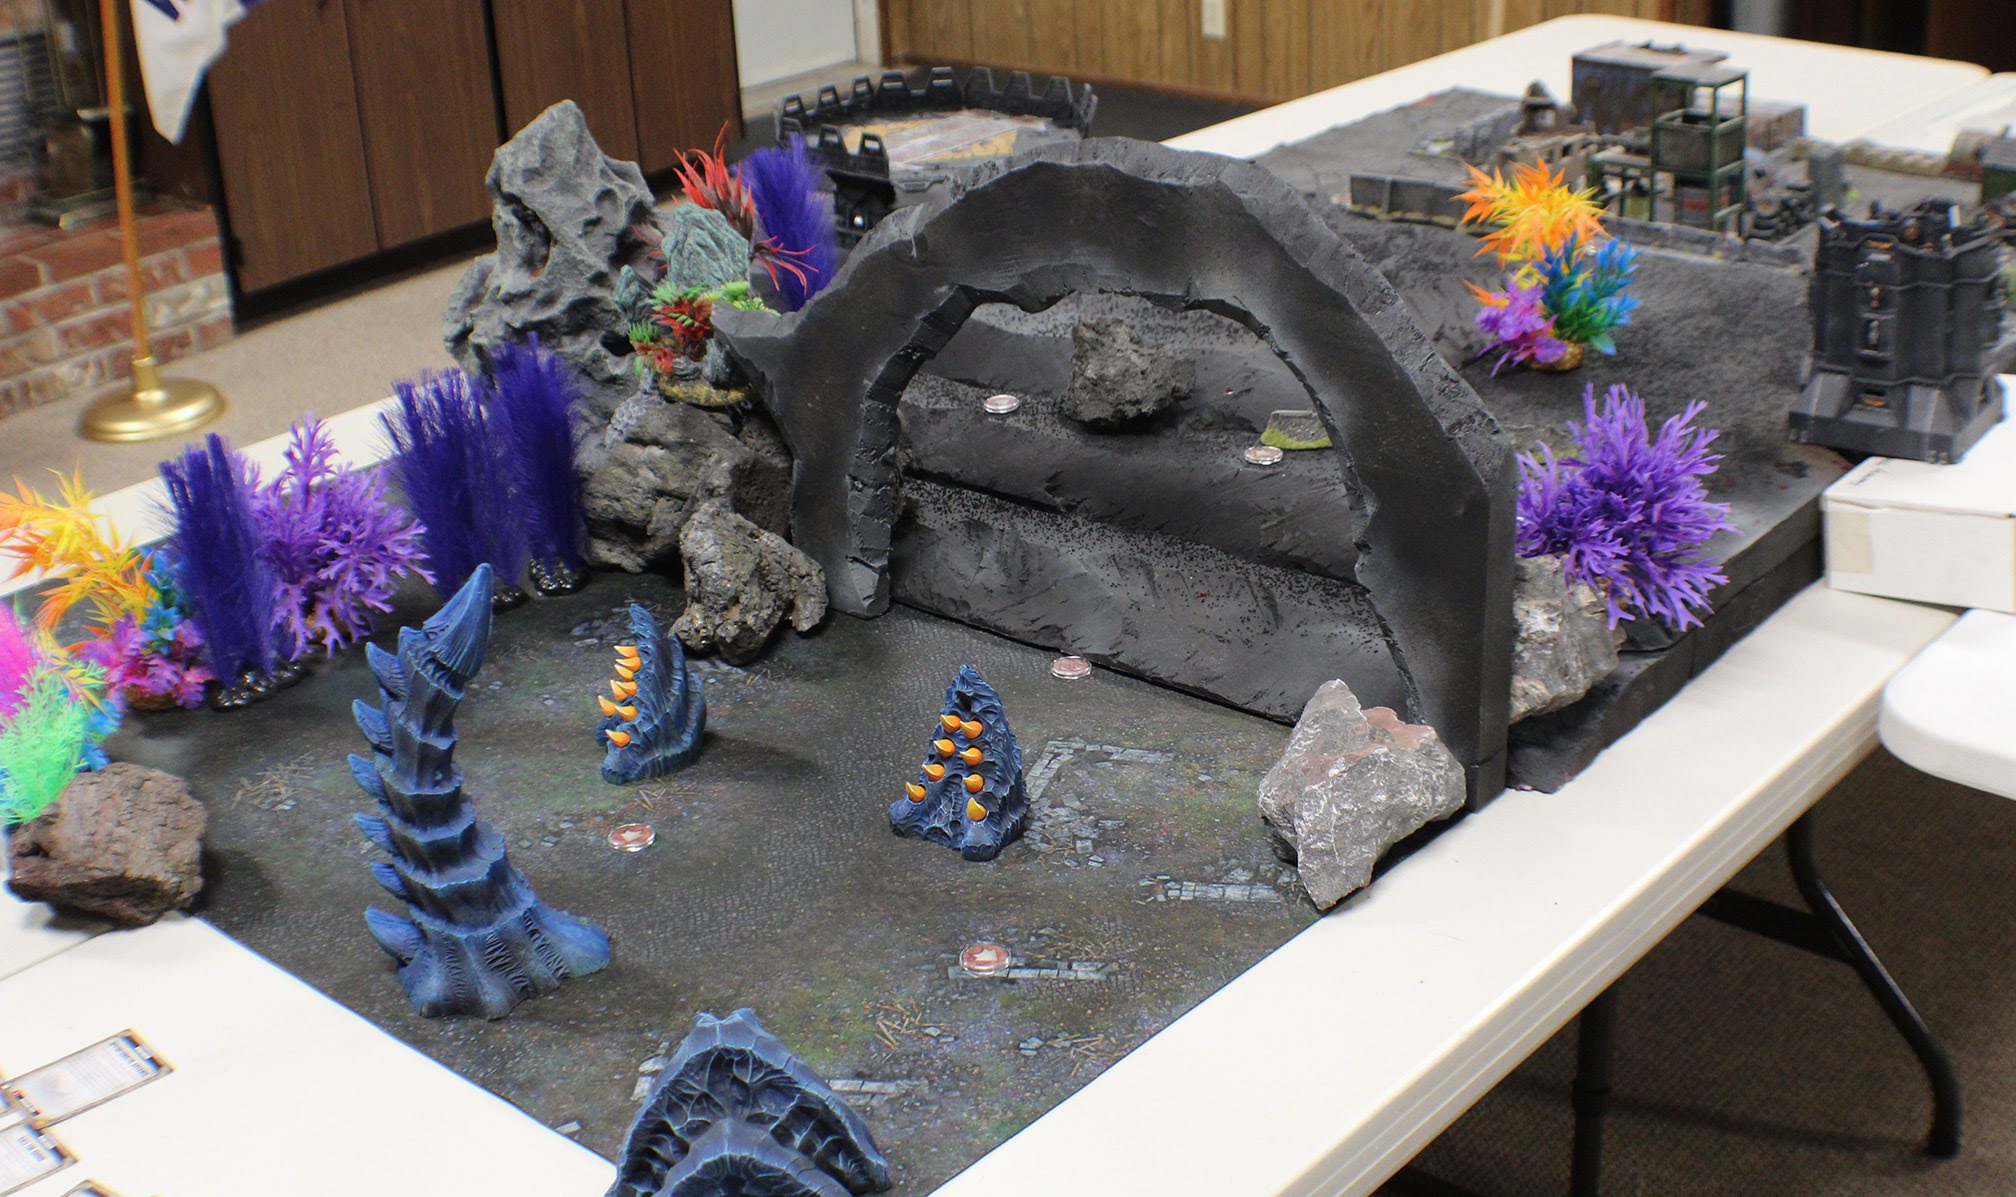
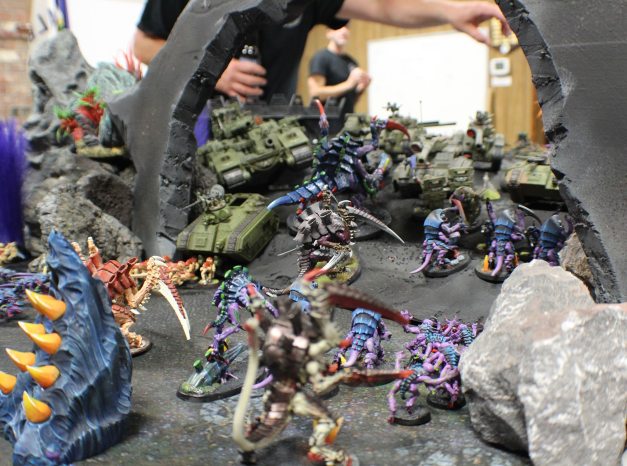
Paul had set up a massive two-front game. The Imperial defenders would deploy on a central hilltop dominated by a landing zone and some basic fortifications. They would be tasked with holding the Tyranids within their cavern strongholds, lest their feeding pits link up with the Hive Fleet in orbit (the large stone archway denotes the entrance to the subterranean battlefield). In addition, the Imperial players must also duel with the Death Guard in the narrow streets of Outpost Omicron, in a desperate attempt to prevent the Chaos Space Marines from releasing the Chaos God Malice from his prison. So you know, just another day in the office, no big deal. 
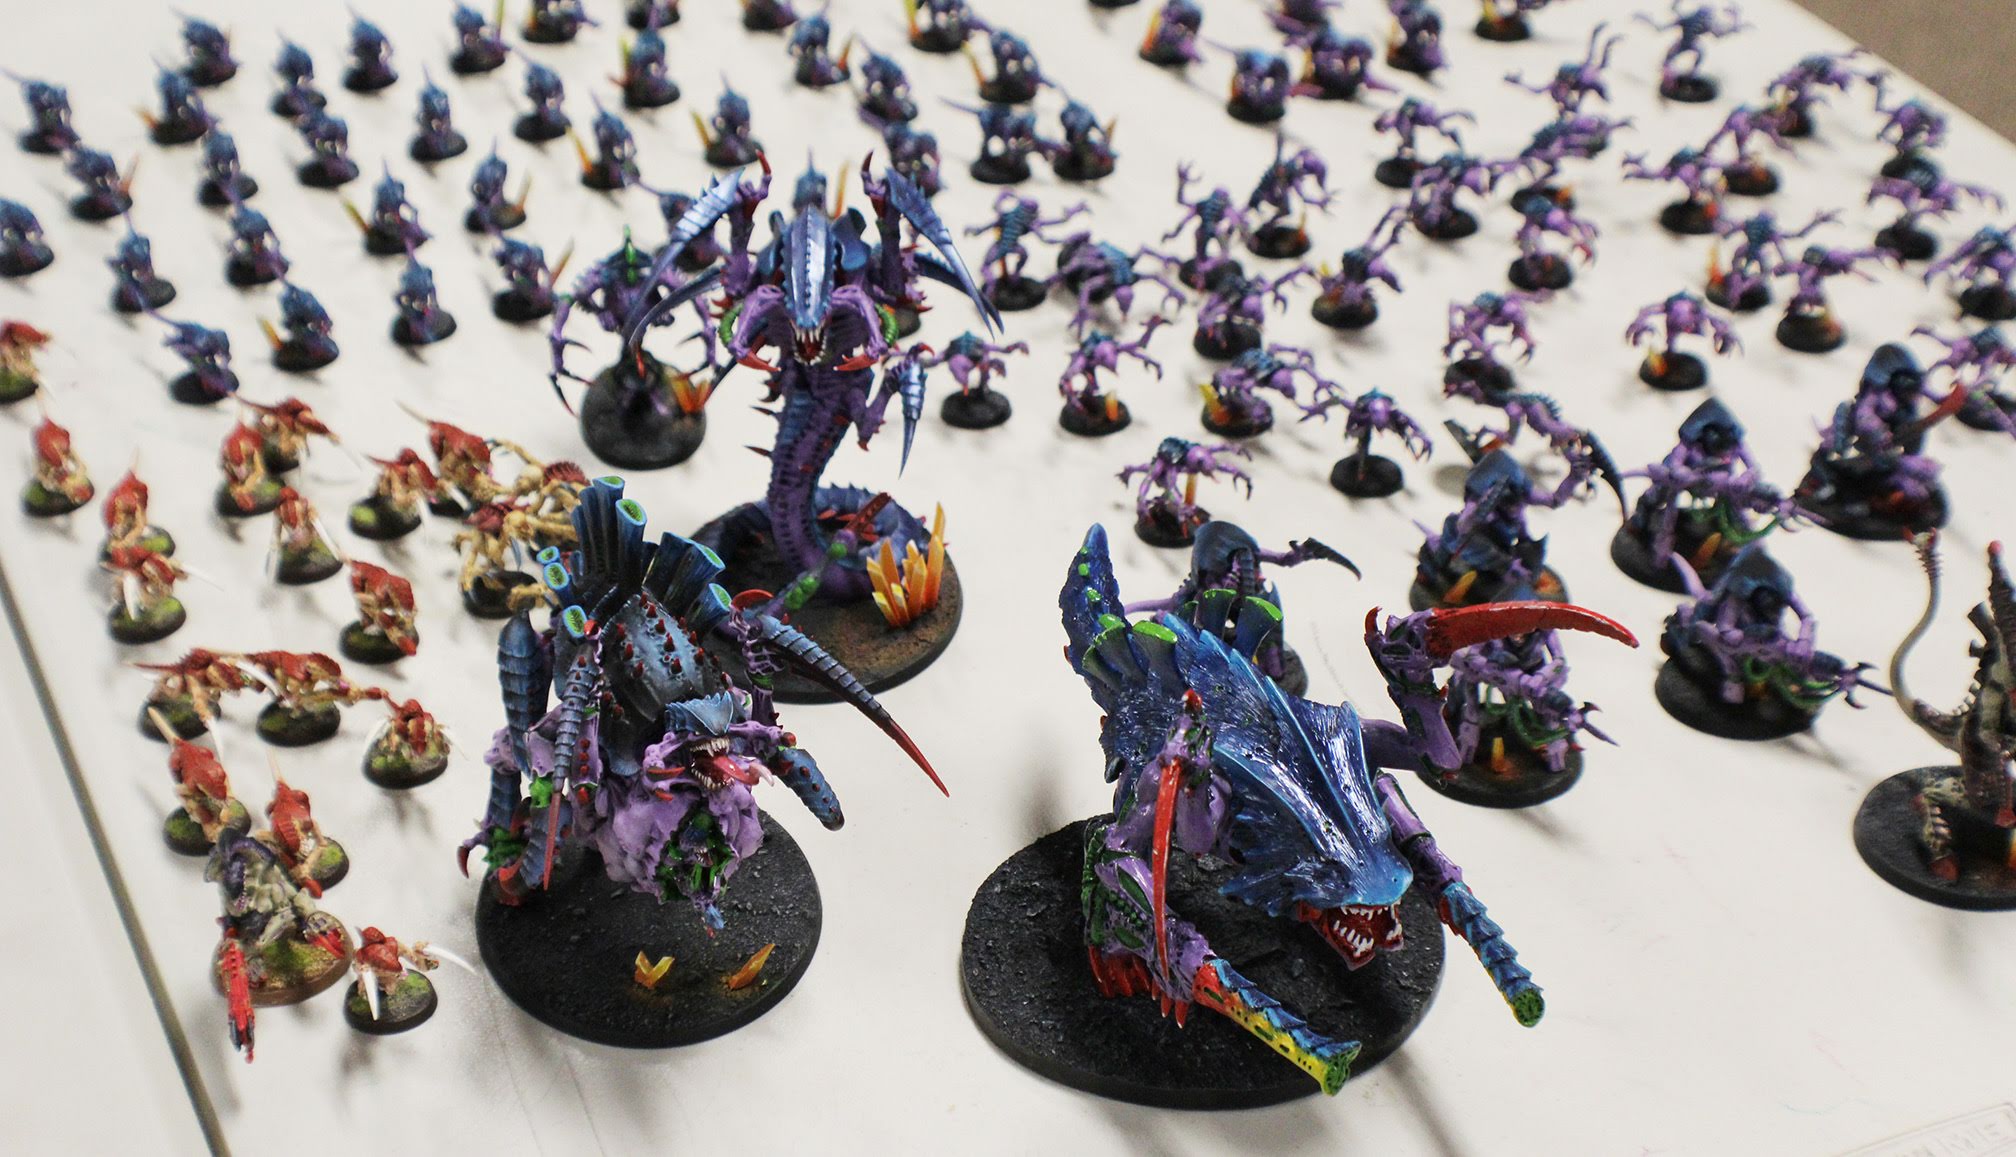
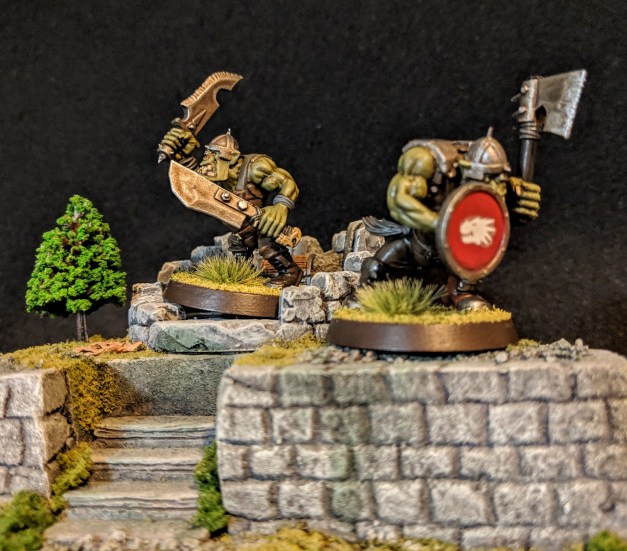
This game (like all of our games) used only painted models. As always, we were floored by the visual spectacle of beautifully painted armies clashing on a battlefield of gorgeous terrain. Here’s a look at the battlefield at the outset of the game.
We had a third game set up — a covert operation by the Adeptes Astartes Forgotten Suns chapter to thwart a Genestealer Cult who strive to birth an evil almost as dangerous as Malice. We’d planned to run it as a Kill Team game concurrent with the main apocalypse game, with subsequent impacts on the narrative outcome. Alas, Vincent wasn’t able to join us to Paul reconfigured the game to focus solely on the apocalypse game.
IMG_6655.jpg 
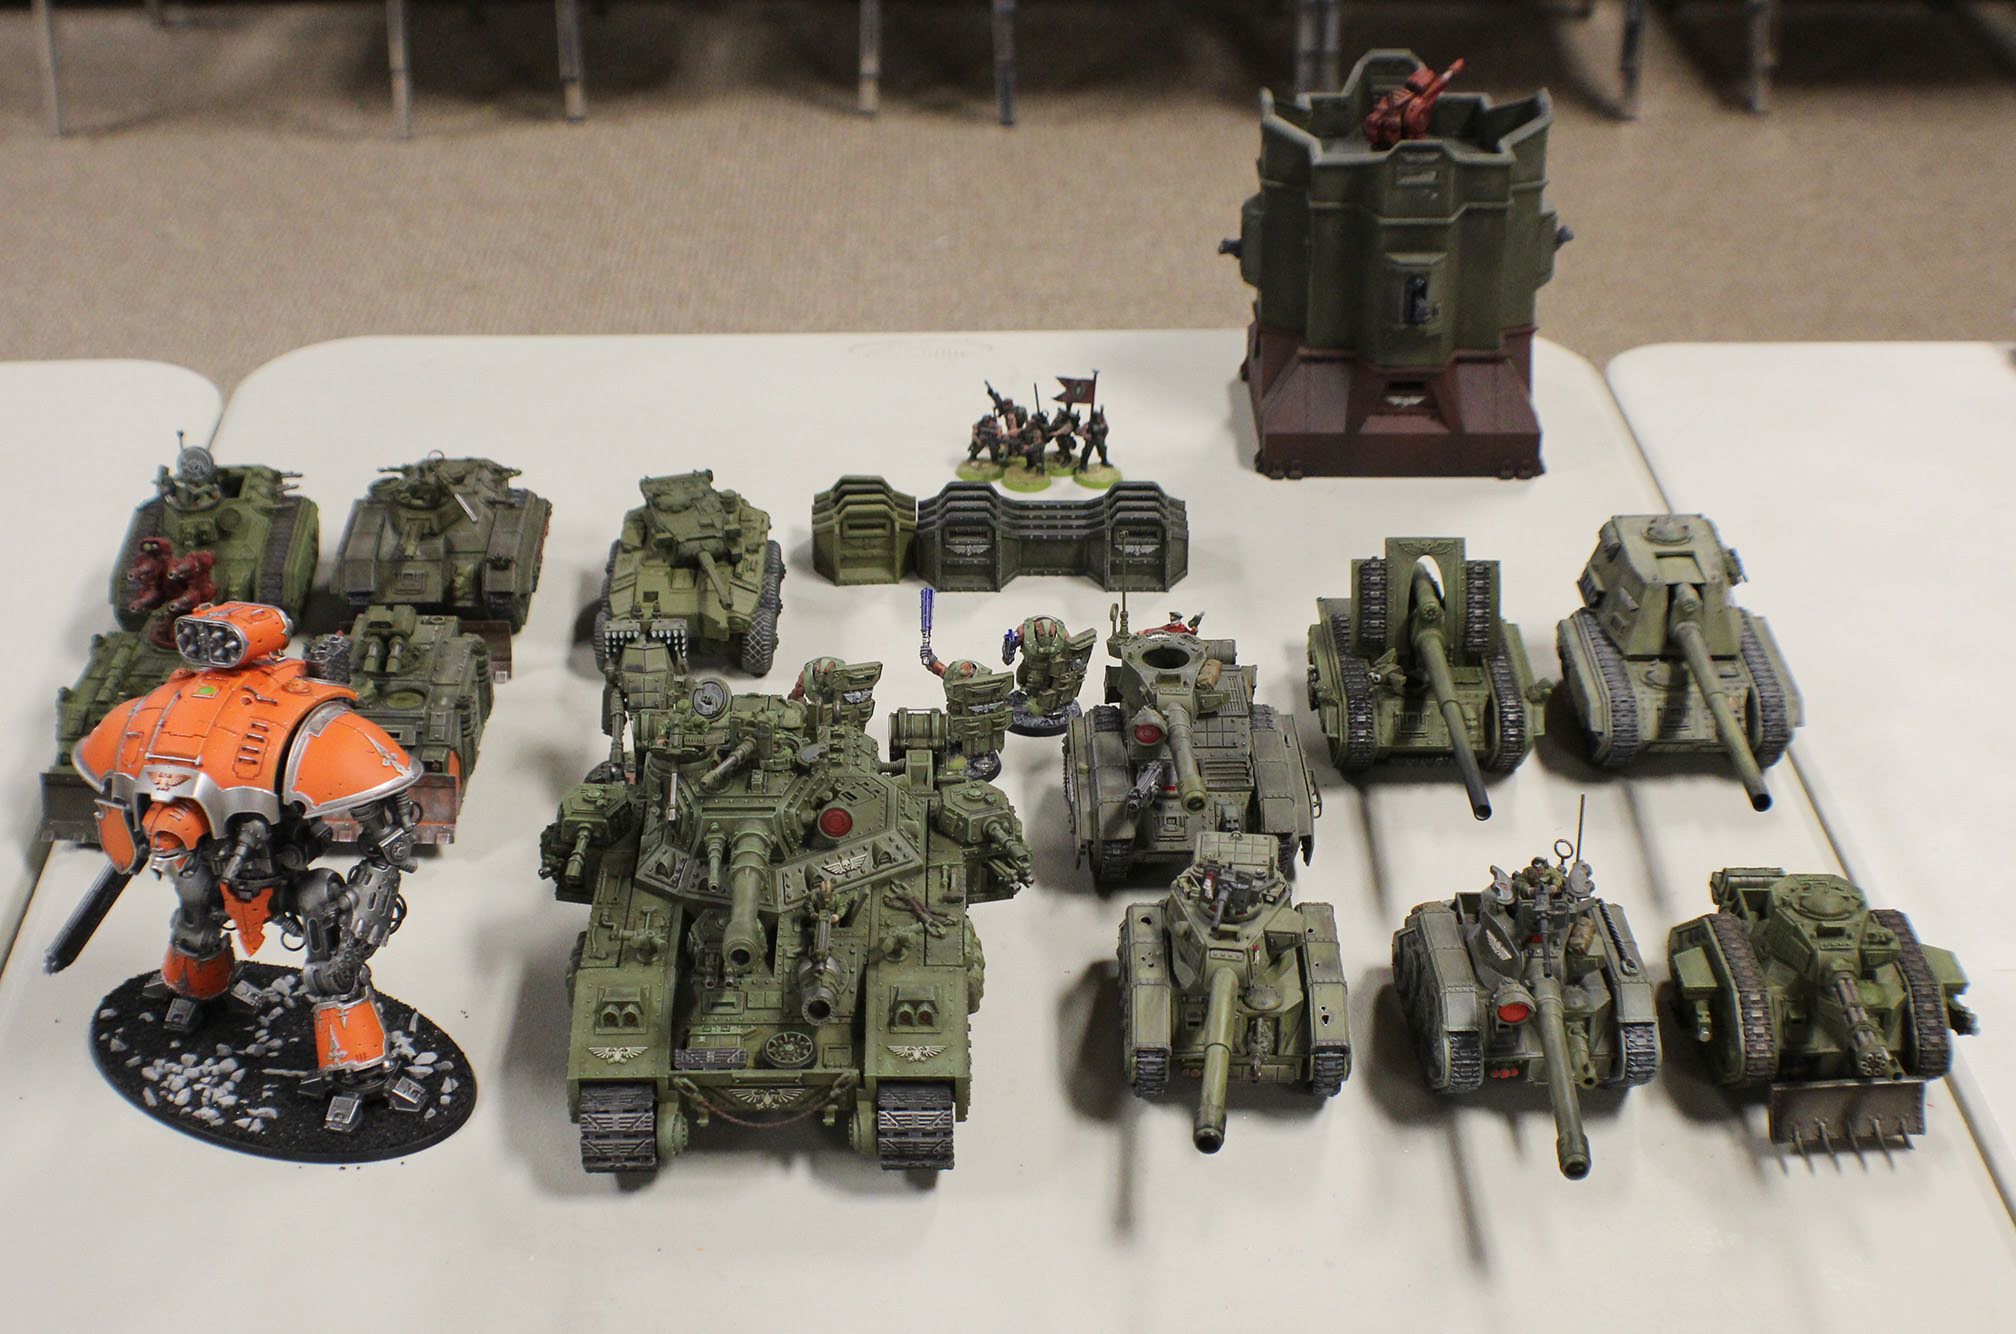
With that settled, we began unpacking our armies and munching on some of the snacks scattered around the room. Here’s a look at the “armies on parade” at the outset of the game.

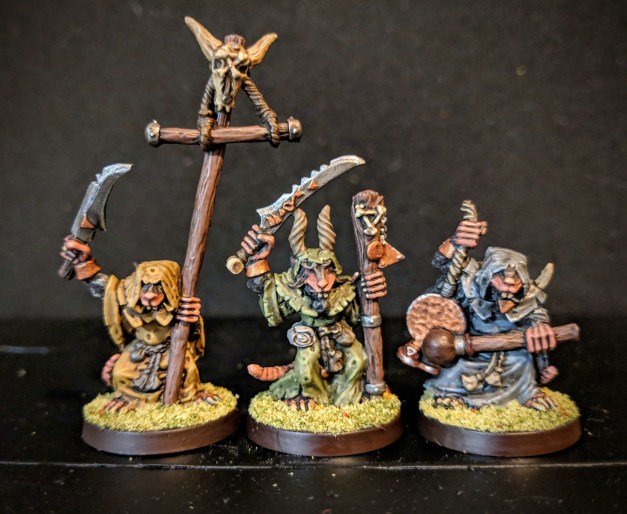
Hive Fleet Tiamat – Paul’s Tyranids

42nd Auxiliary Relief Battalion – Jim’s Imperial Guard (plus Bif’s Juventius Free Regiment, not pictured)

The Crusade of Fire – Alex’s Salamanders

The Maggot Magnates – Pat’s Death Guard

Paul’s battlefield was intended to represent the battle after it had been raging for several straight days. As a result, the deployment zones were immediately adjacent to each other, literally touching, which meant all of the armies began the game toe-to-toe with their enemies. The Death Guard were knocking on the Salamanders’ front door on turn 1… IMG_6658.jpg IMG_6662.jpg IMG_6661.jpg And likewise, on turn 1 the massed infantry and armor of the Imperial Guard were facing a purple horde of Tyranids charging out of the cave entrance directly into their ranks! IMG_6678.jpg IMG_6667.jpg This really added to the playability of our game … armies didn’t have to waste hours of time crossing empty fields to engage. The meatgrinder got underway almost immediately! Each side of the battlefield featured 3 minor objectives and 1 major objective. Each was scored at the end of each turn. We used a whiteboard to keep a running tally of the score as each faction racked up the points. Having lots of objectives that scored often created a very dynamic battlefield where individual maneuvers and key command decisions carried a lot of weight. Just like last year, we used a timer to keep our turns short and sweet. Turn 1 was limited to 30 minutes each. Each subsequent turn was limited to 20 minutes! We learned to pre-plan our moves, play fast, and prioritize unit selection to make sure we got the most out of our time “on the clock.” With such brief turns, everybody was bound to forget or overlook something. It just added to the overall chaos of the battle! IMG_6686.jpg With such a massive battle, I wasn’t able to capture the turn-by-turn action, but I got the overall narrative flow. As such, I’ll divide up this report into “early turns” and “later turns” for both sides of the battle.

Tyranids vs. Imperial Guard – Early Turns

On the left flank of the Imperials’ deployment area, the Imperium’s greatest asset — its endless waves of human soldiers and sturdy armored vehicles —  were deployed at the cave entrance. Success for both the Tyranids and the Imperials was dependent on pushing into the opposing deployment zones. Jim’s 42nd Auxiliary Armored Fist battalion staged three Chimeras right at the front line, each packed with infantry squads. Buoying them at the front line was Jim’s newly painted Knight Warden — a truly monumental “miniature” (if the term could even be applied to such a behemoth) that Jim had completed just a few days prior to the game. Behind the front line was a “wall of steel” — Leman Russ tanks, more Chimeras, two Basilisks, and a mighty Baneblade, supported by Imperial Guard heavy weapon squads emplaced behind barricades and sandbags. IMG_6677.jpg 
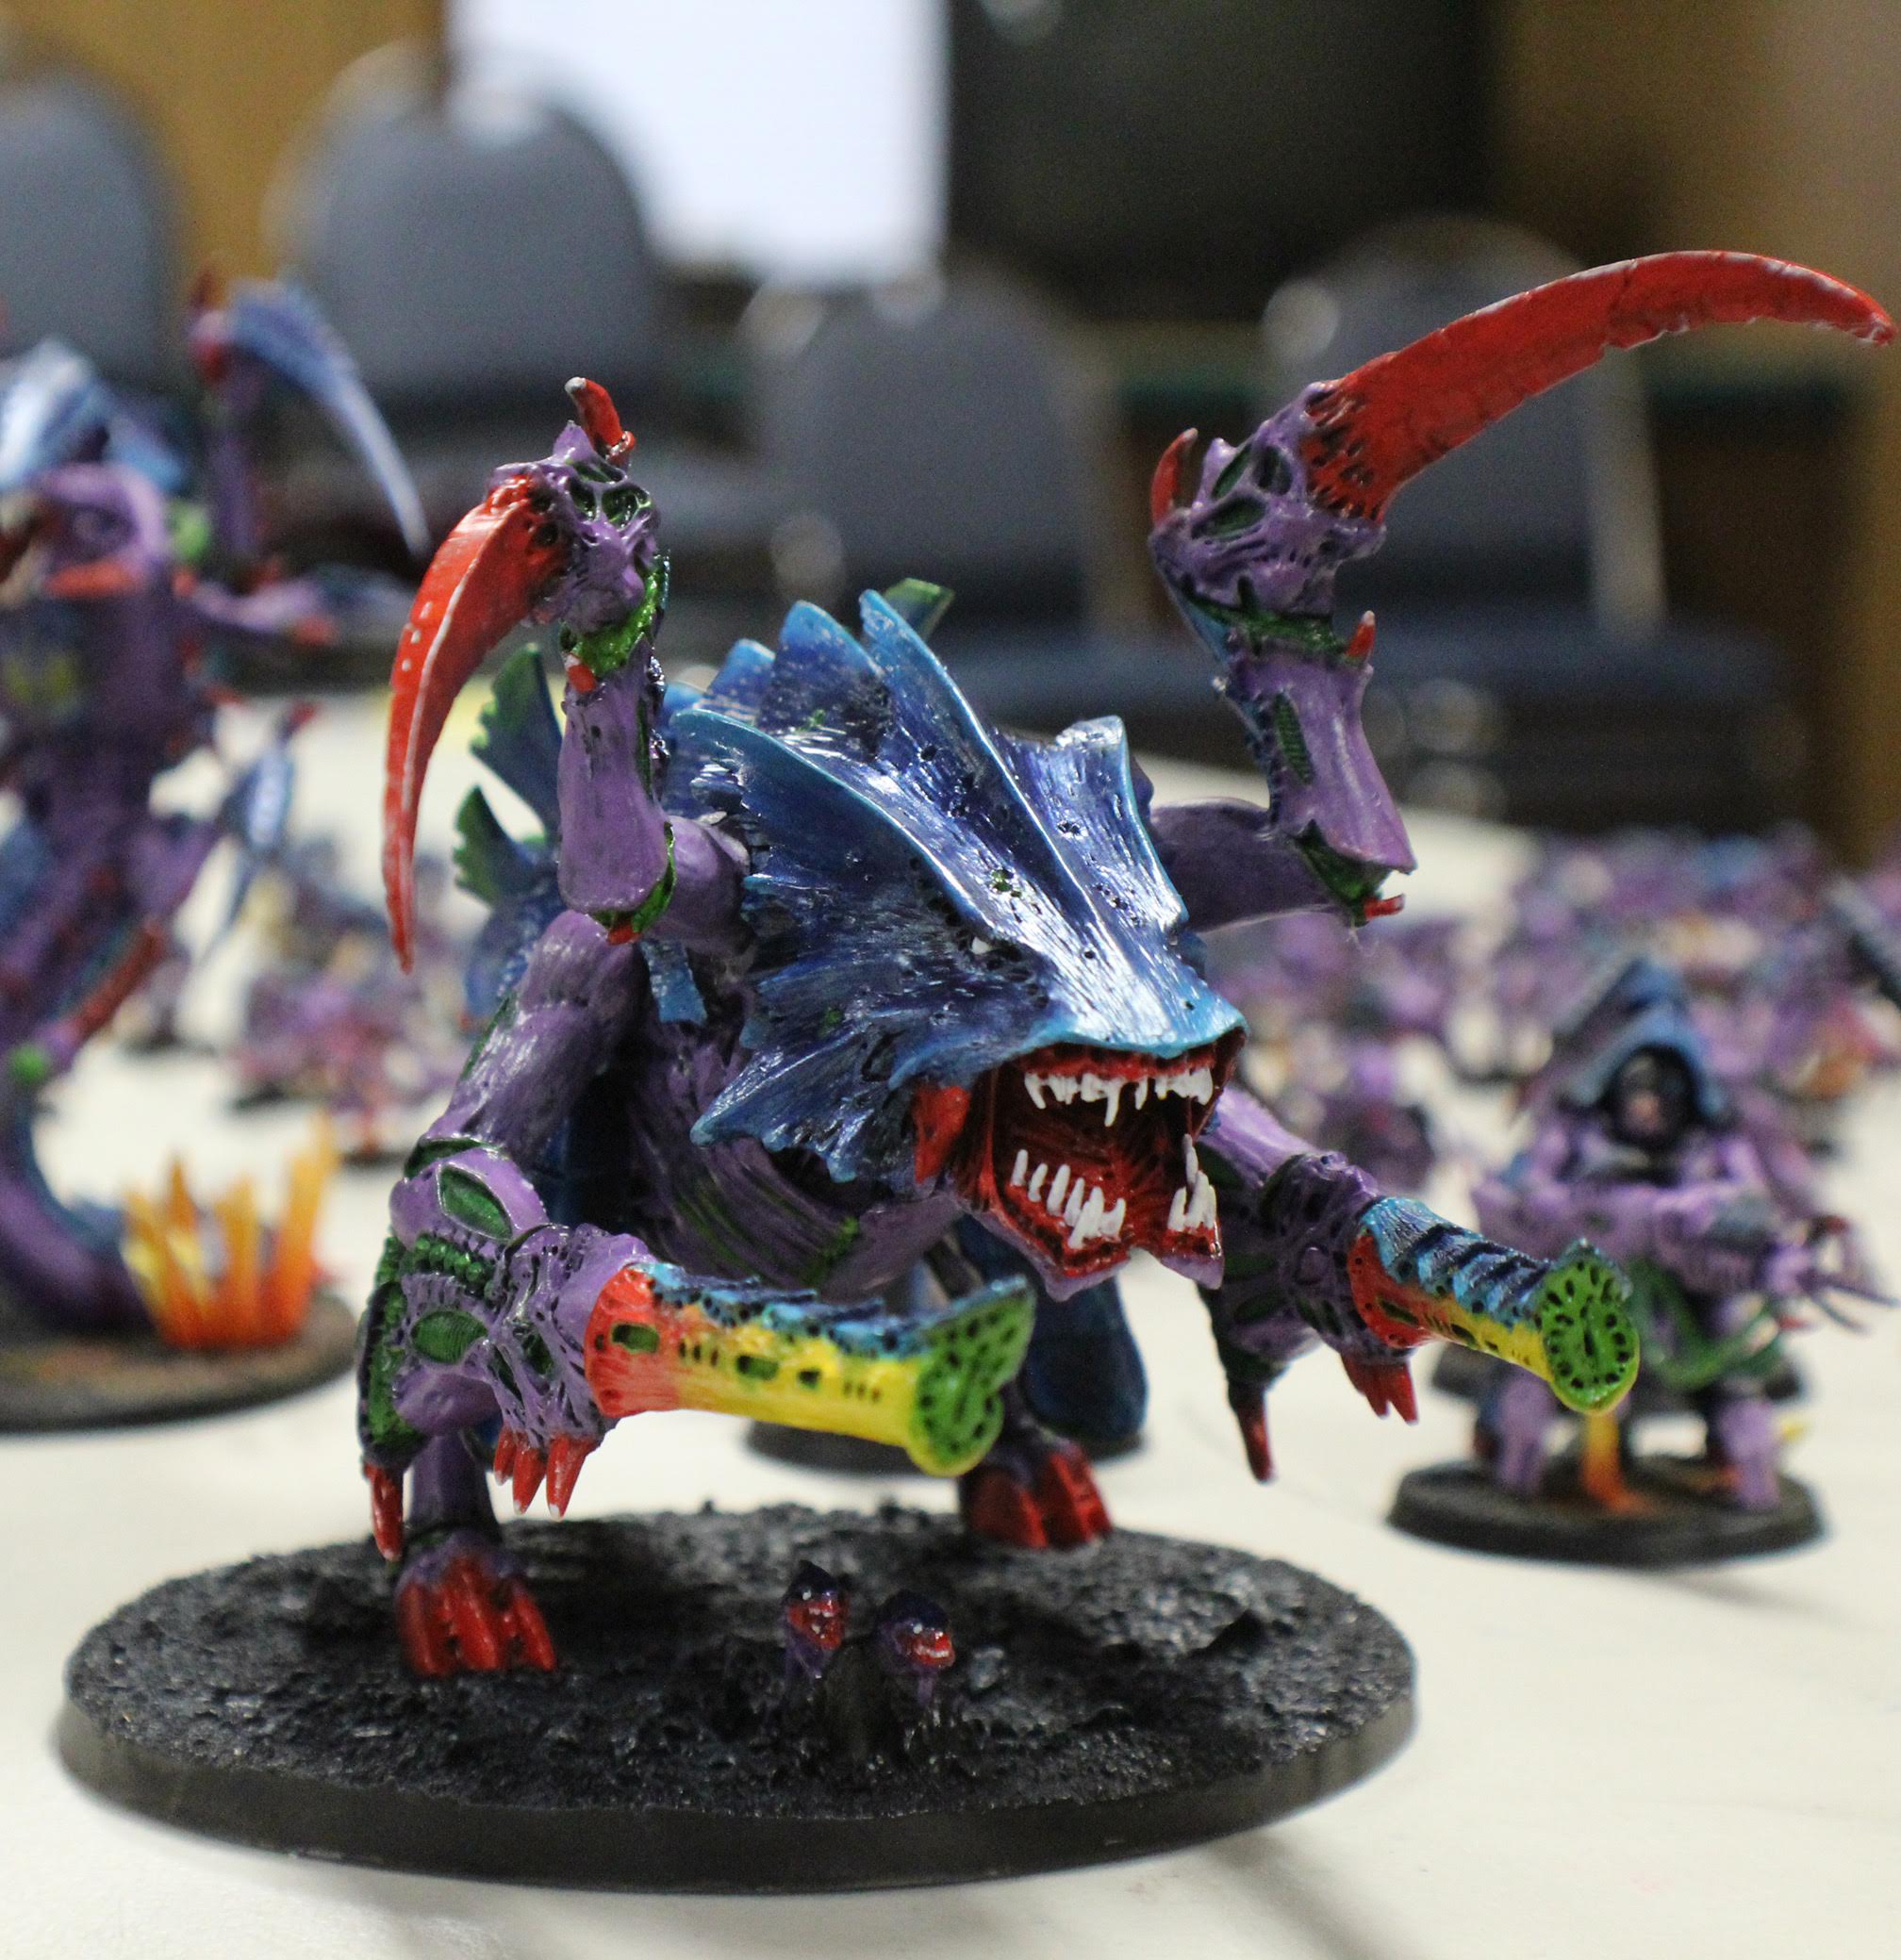
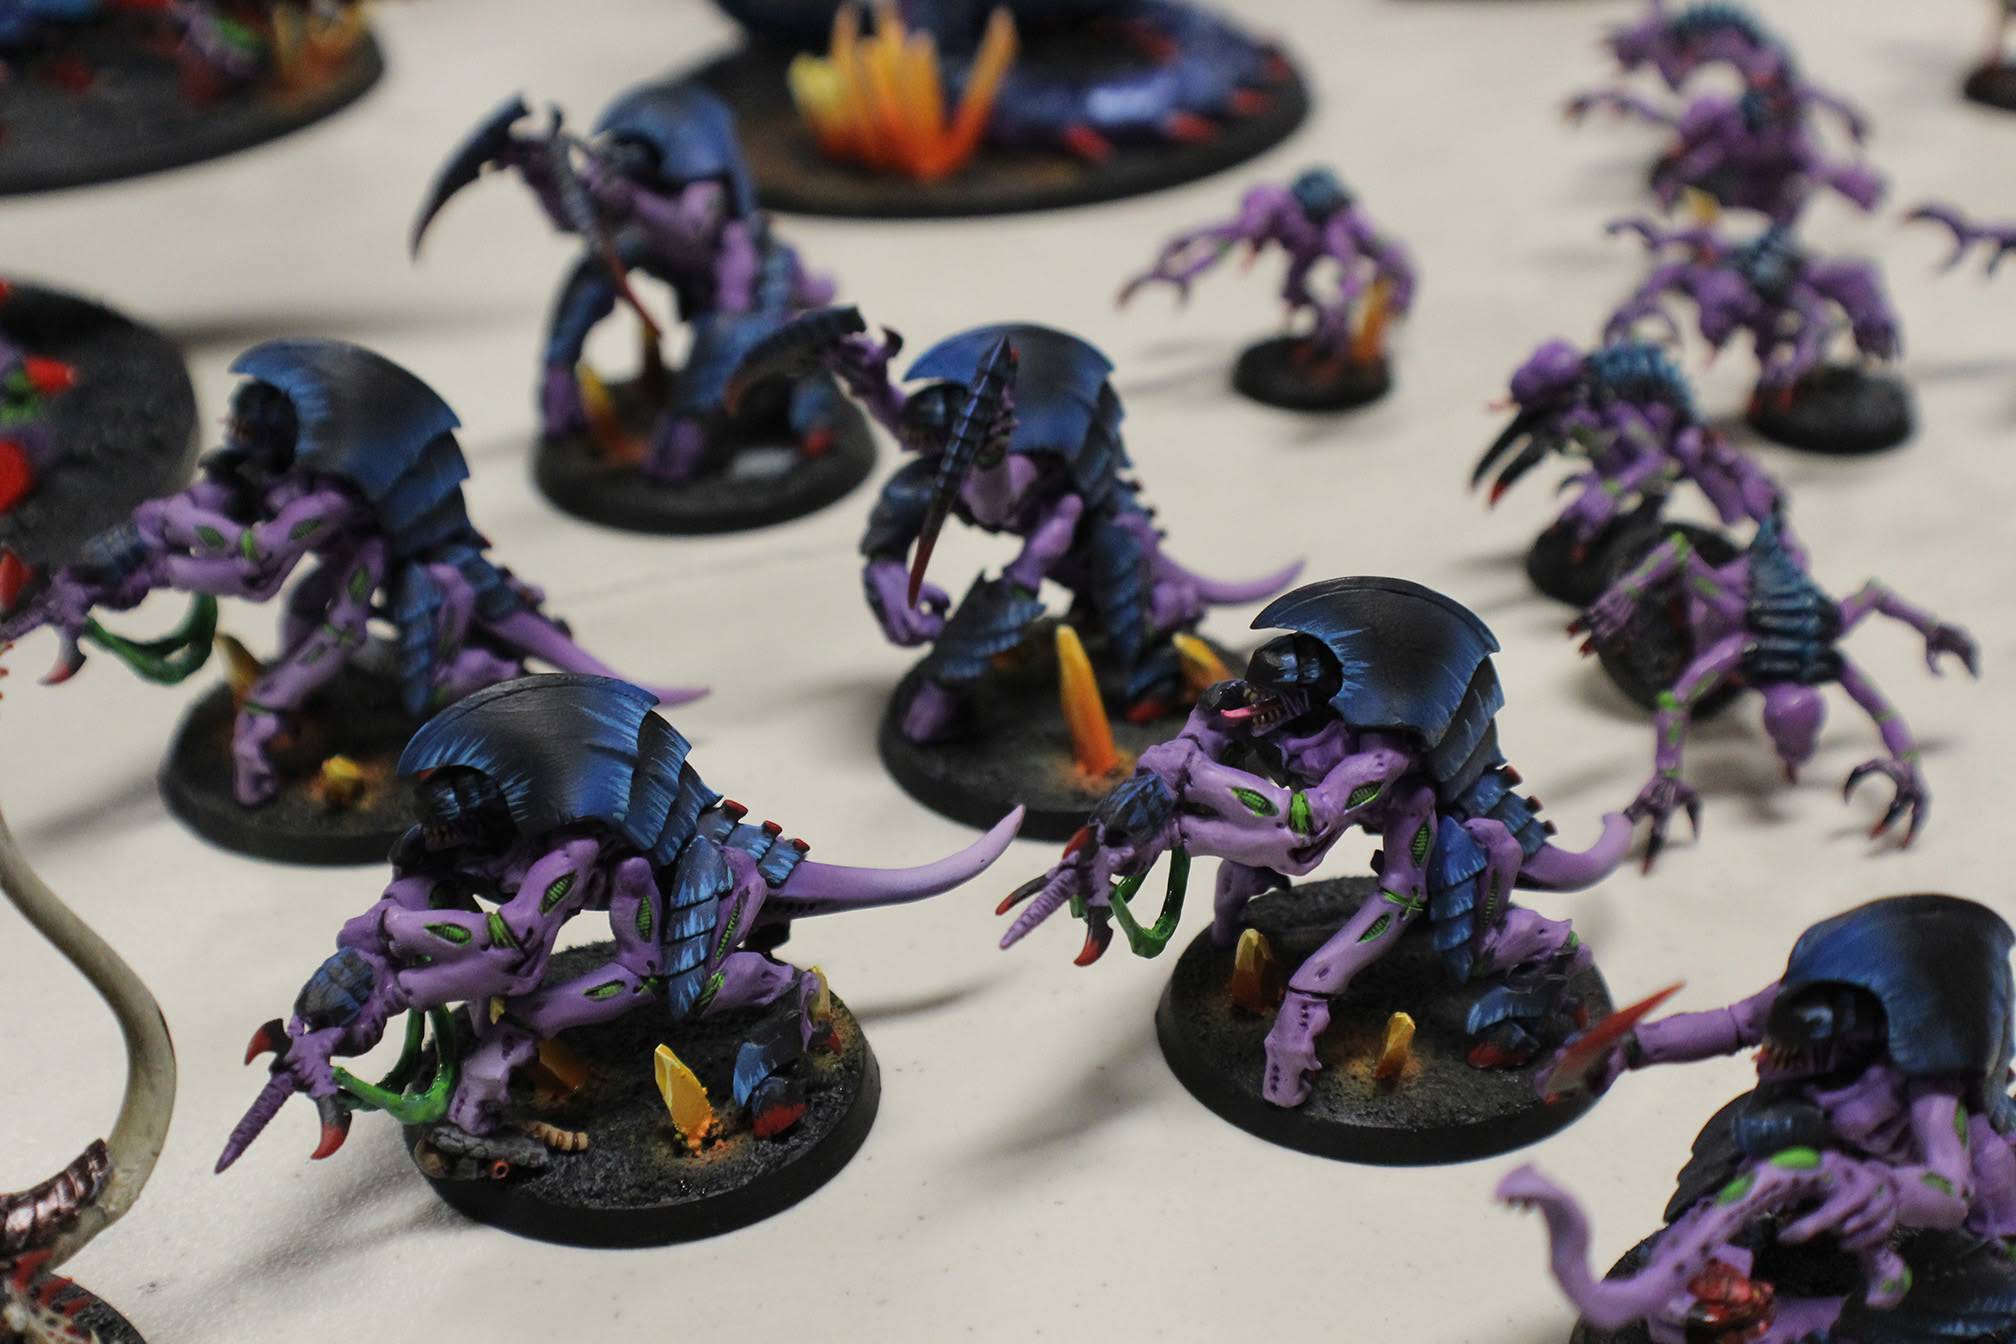
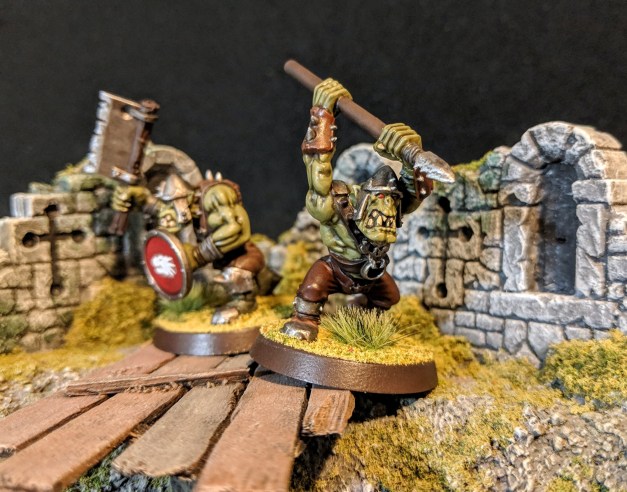
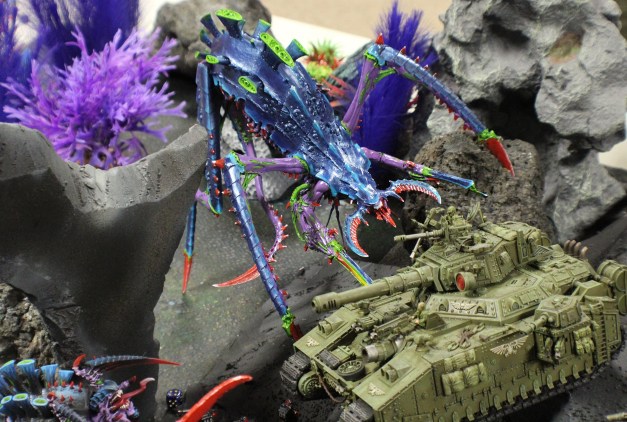
Facing the defenders of the Imperium was the boiling horde of xenos from Hive Fleet Tiamat. Paul put two units of 15 Genestealers all along the front line to soak up wounds. But behind them were the monsters — two Carnifexes, a Tervigon birthing Termagaunts, and a massive Barbed Hierodule with twin barbed strangler guns and massive scything talons. What force could stand against such inhuman savagery?! IMG_6682.jpg The Imperials took the initiative in the first round, firing salvo after salvo from their emplaced tanks and guns into the swarm of Genestealers. The massive onslaught had predictable results, wiping out entire squads and leaving a hole in the Tyranid front line. However, these losses were inconsequential to the Hive Mind. Paul’s genestealers fell back, then he moved up his big monsters and fired their gruesome bioweapons directly into the Chimeras that were guarding the central objective. The Chimeras withstood the long range venom cannons of the Tyranid warriors, but withered under the crackling energy of the Hierodule’s guns. IMG_6689.jpg 
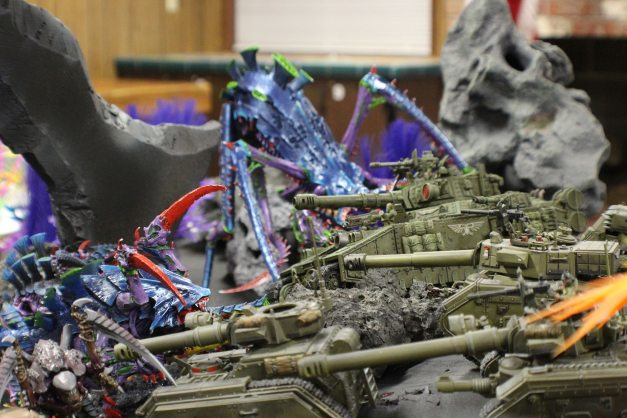
With a hole now blasted in the Guard’s flank, Paul sent his Tyranids charging in. The remaining Chimeras were cut down by the Carnifexes (Carnifices?) and at the bottom of the round the Tyranids had successfully exited the caverns and were beginning to rampage into the Imperials’ landing zone. IMG_6687.jpg As the xenos approached, the Guard held firm. Jim’s Knight and Baneblade focused their attention on the Carnifex holding the center objective and their combined fire brought it down, chittering its rage as it fell apart.  The two remaining frontline Chimeras continued a grinding melee against the Termagaunts and the remaining Genestealers. But there were simply too many bioforms for the vehicles to overcome. For every Tyranid crushed under tire tread and track, two more emerged from the caverns to throw themselves against the tanks. IMG_6694.jpg When the Tyranids counterattacked, the next wave of vehicles exploded under the crackling energy of the biofire. Jim’s Knight fell apart, kneecapped and billowing smoke.  A Leman Russ melted into the earth and a third Chimera was sliced open. Jim desperately hoped for one of his vehicles to explode and take down Tyranids with a death-blast of fire, but roll after roll gave him no relief. All the vehicles went down in defeat with no explosion. So, too, the mighty Knight.

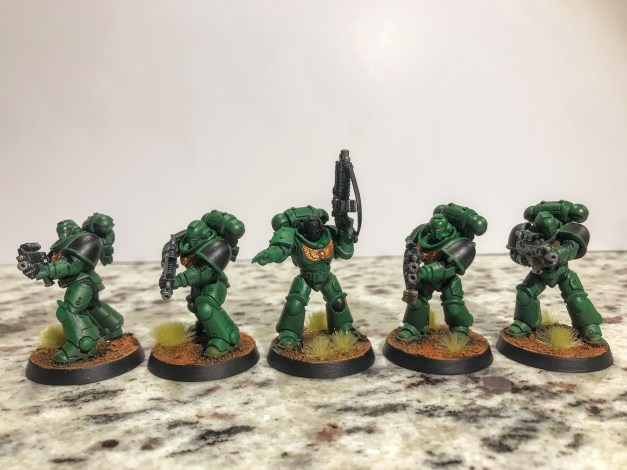
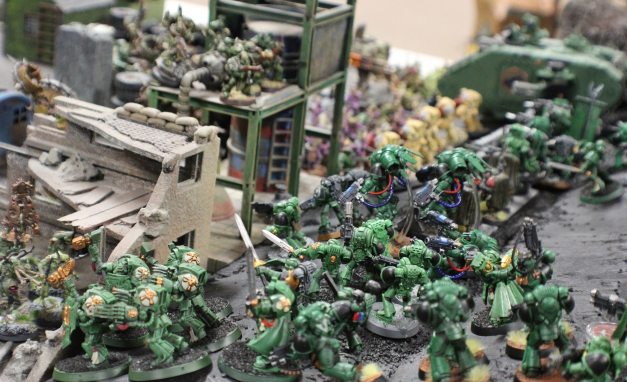
Death Guard vs. Salamanders – Early Turns

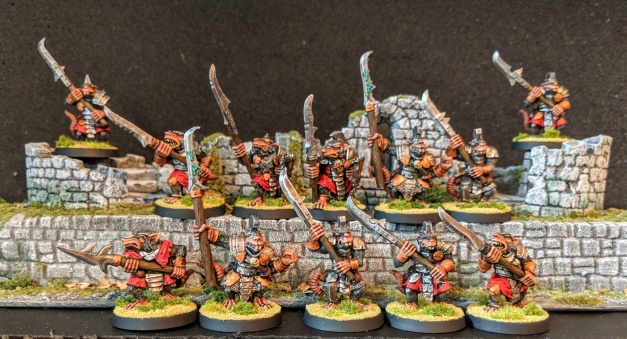
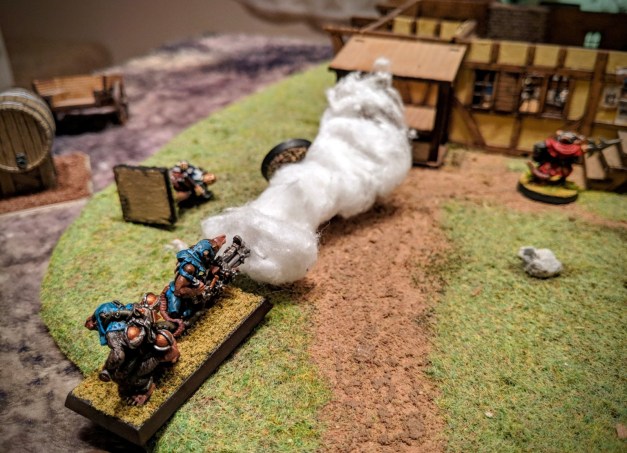
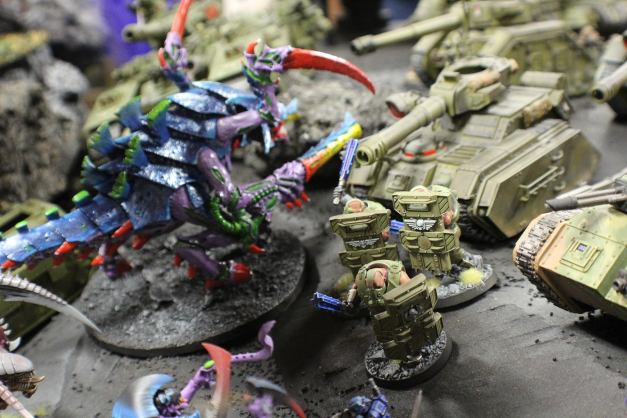
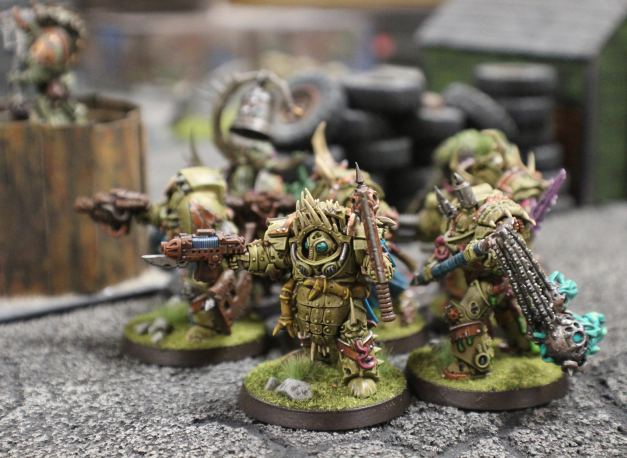
Across table, in the ruined streets of Outpost Omicron, the other sector of the battle began with a sustained barrage of firepower from the Salamanders Space Marines. The Maggot Magnates absolutely choked the street, giving the Astartes an embarrassment of targets to choose from — moaning hordes of Poxwalkers, trudging squads of Plague Marines, ghastly biomechanical daemon engines, and even a few tanks. The salvos fell among the Death Guard and immediately began doing damage. But the front lines pushed relentlessly forward, engaging with the advance squads of Salamanders even as fast-moving assault units fell among the Astartes’ backfield support. IMG_6659.jpg At this point, I began a series of rather spectacular dice rolls related to the Death Guard’s Disgustingly Resilient keyword trait. Time and time again in this game, Disgustingly Resilient would save my bacon in the face of almost certain annihilation. And so the Maggot Magnates mobilized, trudging forward in the face of deadly fire from the Astartes. On the front lines, Typhus hefted his manreaper scythe and urged on the hordes of poxwalkers. Spewing smoke and trailing a stream of foul ichor, a Helbrute stomped to the head of the pack and paused to unleash the full force of its lascannons into an Astartes Land Raider that was mere meters away, such was the devastating proximity of the two armies. IMG_6657.jpg IMG_6673.jpg Even as I advanced, I tried to mess with Alex’s backfield as much as I could. He had several concentric lines of Salamanders behind defensive formations; these I targeted with my flying daemon prince and with my hovering bloat-drone. After a couple turns of combat, we agreed that Alex’s Salamanders were incredibly resilient! They benefited from re-rolls and special rules that made it possible to resurrect slain characters! Plus, Alex had lots and lots of guns pointed at my Death Guard, which is basically where you want to be in a game like this. IMG_6691.jpg IMG_6706.jpg 
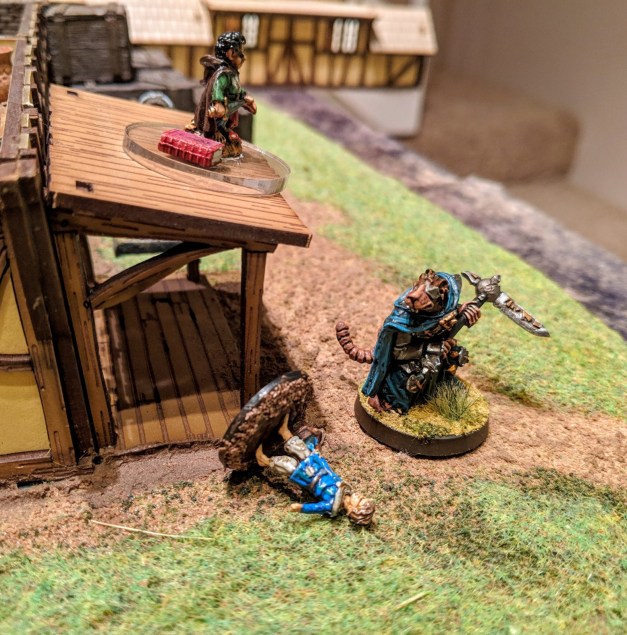
Elsewhere, my bloat-drone armed with a fleshmower plowed into a squad of terminators, beginning an epic melee that would last for most of the game (though the bloat-drone fleshmower would fall early on in the clash). IMG_6690.jpg As the first two turns drew to a close, it became clear that, in my haste to advance out of Outpost Omicron and crush the Salamanders, I had left my three backfield objectives dangerously unprotected. Oops! It was just sheer luck that Alex hadn’t been able to capitalize on my goof. The next two turns would show just how important these objectives would become…

Tyranids vs. Imperial Guard – Later Turns

As turn 3 began, the battle in the skies above took a desperate turn. Tentacled Tyranid hive ships began to grapple with the battleships and cruisers of the Bareaga 402nd, and debris began raining down on the battlefield below. In the chaos, a mortally wounded bio-vessel plummeted out of the sky, roaring over the battlefield to crash into the mountain across from Omicron Outpost, earth and rock fountaining up into the sky. From the smoking crater came an unholy roar, and the defenders of the Imperium were utterly stricken to see a massive Hierophant Bio-Titan lurch to its feet and emerge from the crater. This was Paul’s big reveal — he had acquired and painted up a Heirophant model especially for this game. He had played his cards close, not telling anyone about the big twist until the moment when he unpacked his brand new toy from its foam carrying case. IMG_6696.jpg There was much chuckling from Jim and Bif, as they had both discussed — and summarily discarded — the possibility of Paul bringing a Bio-Titan. Hah, the joke’s on them! Paul wasted no time in putting his shiny new toy to work. The Heirophant instantly became Public Enemy #1 as it pulped squads of Guardsmen and ripped into the Baneblade. IMG_6698.jpg Of course, Paul was a benevolent GM for this campaign finale. He wasn’t just going to spring a surprise like that on the Imperial players without giving them something in return. That “something” was a heavy lifter blasting down from orbit to deliver another Knight to face off against the gargantuan titan rising from the earth. Huzzah! I don’t have a picture of the moment the knight arrived, so how about another pic of the Heirophant looming over a battlefield full of soon-to-be scrap metal? IMG_6705.jpg The arrival of the Bio-Titan seemed to signal a turning point in the battle versus the Tyranids. Jim’s Baneblade and Knight lashed their combined firepower at the Heirophant, while his last Guardsmen and Sentinels held the final positions at the summit of the landing field. However, the Bio-Titan seems to just shrug off their fire and in one turn hollowed out both the Baneblade and Knight. Jim returned fire on the next turn killing the two Carnifex’s and the birthing machine Tervigon. From their furious death cries, the earth rose up and a burrowing Trygon took their place on the slopes leading up to the landing pad. IMG_6712.jpg At this point, the battle on the west front had decisively turned in the Tyranids favor.  The remaining guardsmen and their vehicles staged a retreat, falling back to their landing zone and turning their guns to the east in support of the Salamanders trying to stem the push from the Death Guard…

Death Guard vs. Salamanders – Later Turns

Alex surprised everyone by resurrecting his slain company commander with his veteran apothecary’s nifty ability, returning the potent leader to the battlefield as the game entered its critical final turns. At this point, most of my best units had been shot to pieces, leaving just a core of infantry — namely, those nigh-unkillable poxwalkers! We took a look at the points tally on our side of the board and found that this was going to be a very, very close game. It would almost certainly come down to one or two victory points. With that in mind, Alex and I both made our final moves to seize the objectives scattered around Outpost Omicron. For this task, I had my ace in the hole — the Hideous Bloom, my squad of Blightlord Terminators that arrived via deep strike and began an implacable advance directly into the heart of the Imperial lines, shrugging off small arms fire as they went. IMG_6708.jpg IMG_6707.jpg 
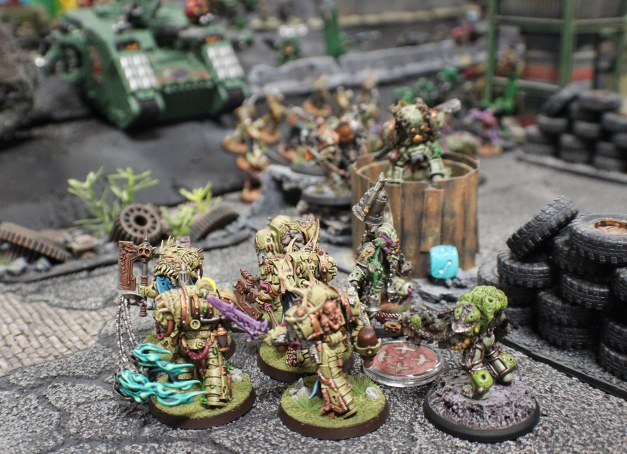
These guys were the newest miniatures I had completed for my Death Guard army, and we made many jokes about how their fate was sealed — like all newly painted minis, they would certainly be killed before they had a chance to do anything of note on the battlefield. It is known. But! The gods had a sense of humor this day, and it came to pass that my Blightlords were able to play a pivotal role in the final endgame. In one extraordinarily brutal round of combat, they brought the Land Raider to the brink of destruction. It was summarily destroyed by a piece of flaming debris that crashed down from orbit. (We were using the “Orbital Debris” twist from the Open War deck to model the massive naval battle raging overhead, and I got a lucky dice roll in the final turn of the game to finish off the Land Raider. Great stuff!) IMG_6710.jpg After that, they swept up the hill and into an Imperial Guard heavy weapon squad, killing as they went. Blood, pus, and ichor flowed like water as the Hideous Bloom marched onward. At the end of the game, one Blightlord remained alive to contest a crucial minor objective. Defiant to the last. IMG_6717.jpg But the battle would be decided elsewhere, by none other than the Herald of the Plague God himself. Typhus, who had been leading more or less from the back for the entirety of the game, finally strode forth on the final turn to slaughter the remnants of a squad of Terminators and (with the help of some Poxwalkers) seize the major objective. IMG_6716.jpg We all agreed that it was incredibly fitting that a final, pivotal play of the game came down to Typhus. It’s always nice when your awesome named characters get to steer the narrative outcome. Anyway, that sealed the deal for the battle in Outpost Omicron. And with the Heirophant Bio-Titan rampaging virtually unchecked on the other side of the table, it seemed that doom had come for the forces of the Imperium. In one of final actions of the game, the Bio-Titan directed its full firepower at the Alex’s Knight standing in the middle of Outpost Omicron. Paul rolled dice for what felt like 10 straight minutes as the beast unleashed stupendous punishment on the gallant Knight. Incredibly, the Knight made its saves — withstanding the firepower that had killed everything else in its path! But it was a pyrrhic victory, as the Imperial lines were collapsing and utter annihilation was imminent. With that, the game came to an end.

Conclusion

At battle’s end, the combined victory points of the Tyranids and Death Guard clinched a Total Victory over the forces of the Imperium. Paul had mapped out a variety of scenarios for each possible combination of outcomes for the game. This outcome was certainly the most dire — the Death Guard were able to detonate the control mechanism and release the Chaos God Malice from his prison where he had slumbered for untold millennia. So violent was his reentry into the material plane that the planet Caluphel literally cracked into pieces, atmosphere aflame and millions of inhabitant dying in the emptiness of space. Here’s Paul graphically describing what happened to the planet as Malice roared to life. IMG_6722.jpg In addition, the Total Victory outcome meant that Hive Fleet Tiamat crashed headlong into the Caluphel Sector, sending three tendrils of its army snaking through the various sub-sectors that we had mapped out earlier. The three tendrils represented the Tyranids’ overwhelming momentum coming off the victory on Caluphel Prime, and they also spelled certain doom for the beleaguered Imperial defenders elsewhere in the sector. Here’s a look at the map showing the Tyranids’ gains. Caluphel Sector Campaign End Map.jpg 
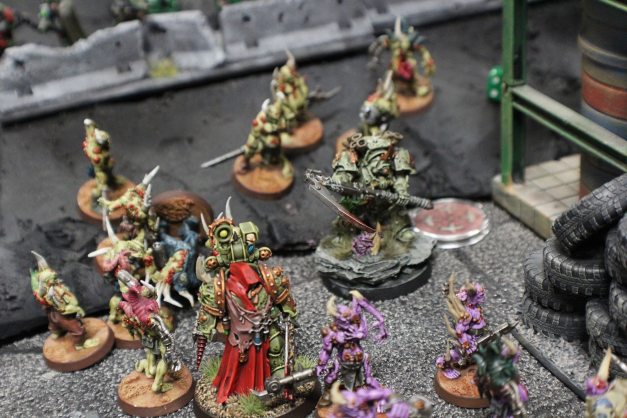
Amid the chaos and confusion, another terrifying creature made itself known. From the bio-pools of Caluphel’s caverns, the deadly Hive Queen of Tiamat rose up and then transcended to the Fleet above, annihilating hundreds of unfortunate Guardsmen in the psychic scream that accompanied her birth. This marked the arrival of Paul’s Hive Queen, a new model he had commissioned by Colin Ward to lead his Tyranid army. Here she is in all her sensual glory. received_352516738815267.jpeg But wait! There’s more. Paul had drawn up an entire postgame show for us to commemorate the Caluphel Awakenings campaign. Each of us got a special award for our contributions to the campaign, and Paul surprised us by unveiling a custom plaque for the campaign winner. As you can see, it’s got blank spots so it can be used repeatedly for future campaigns. The idea is that each year’s winner gets to hold onto the plaque until the next campaign, kind of like a Warhammer 40k Stanley Cup. IMG_6724.jpg Now is the part where I tell you that this year’s campaign winner was actually yours truly! All of the monthly contributions — painting, writing lore, making maps — had points attached to them, and I managed to sneak out a win for the overall five-month campaign. So the plaque goes home with me! IMG_6726.jpg Actually, it’s already on display in my workshop. Doubtless I’ll have some stiff competition next year — these guys will be coming for my title! IMG_6737.jpg Thus ends another incredible satisfying Warhammer 40k campaign. This one really pushed our small game group to new heights of painting, modeling, and narrative gaming. Paul masterminded this thing from start to finish, and we all gave him a hearty round of applause at the end. Follow along on Comrade’s Wargames to see where we’ll go from here!

Open Combat: Mayhem at the Stoic Arms

Posted by Comrade on December 3, 2018
Posted in: Posts. Tagged: club, fantasy, game night, narrative, open combat, skirmish. 8 Comments

IMG_20181110_191348.jpg

Three days’ ride from Madge’s Crossing, on the lonely road that winds through the Grey Mountains, past the turn-off that leads to the more civilized lands of the Empire, stands the Stoic Arms — an outpost of civilization amid the encroaching wilderness. The massive, solidly built inn, located at a strategic crossroads in the very shadow of the Grey Mountains, has for centuries played host to travelers, adventurers, and rapscallions of every caliber.

IMG_20181110_211810.jpg

As blustery winds heralded the arrival of autumn, the Stoic Arms prepared to receive its latest guest — Argus Nul, a halfling wizard of considerable reputation, accompanied by a cadre of capable bodyguards. Argus carried with him a tome of magic, wrought of the finest material and festooned with many precious jewels…including a curious green stone that radiated mysterious power.

In truth, the green gem was in fact a polished piece of raw warpstone, and its mere presence was enough to draw the attention of Snik Soot-Fang, a Skaven warlock engineer who had spent three fruitless weeks with his motley warband prowling the mountain passes for unwary travelers. Summoning his best warriors, Snik Soot-Fang descended from the mountain heights and set about developing an elaborate, multi-pronged attack on the Stoic Arms. Poor Argus Nul wouldn’t know what was happening until it was too late…

IMG_20181110_191348.jpg

Vincent and I got together last month for another game of Open Combat — this time using his gorgeous inn from 4Ground. We’d been itching for an excuse to get it onto the table after our first game of Open Combat back in September. The amount of work that Vincent put into assembling and finishing this terrain piece was considerable. It’s a truly impressive terrain piece.

IMG_20181110_192844.jpg

With 4 stories of detailed, playable interior space, the Stoic Arms was an entire battlefield unto itself. But just for good measure, we decided to deploy Vince’s medieval marketplace terrain in the area surrounding the inn. We also dropped out a dozen or so civilians (speed bumps for the Skaven raiders, more like) to add some local flavor. All in all I think you’ll agree it was a visually stunning battlefield.

IMG_20181110_194813.jpg

For the scenario, Vincent deployed Argus and his bodyguards to a few specific locations within the inn. They were scattered and initially unable to support each other. My invading Skaven would have a turn or two to gain entrance before the guards could raise the alarm.

IMG_20181110_195335.jpg

I had about twice as many figures as Vincent, but that also meant that his guys were about twice as good as mine — I had a horde army, poor fighters on their own, but dangerous in groups. By contrast, his guys were much more effective at fighting alone. This would prove to be a critical edge as the game unfolded.

IMG_20181110_192006.jpg

At the start of the game, I sent a few of my more capable warriors into the inn to engage with the bodyguards, hoping to pin them down, while Snik Soot-Fang the warlock engineer made a beeline for the front door in an attempt to catch Argus Nul unaware.

IMG_20181110_194825.jpg

Outside the inn, my giant rats and rat swarms began to wreak havoc among the defenseless peasants. I had ostensibly planned to keep my ratling gun and some other units outside in a support role, but I ended up sending them into the marketplace because it was just so damn fun slaughtering peasants!

IMG_20181110_204025.jpg

Inside the inn, I quickly realized how potent Vincent’s bodyguards were in single combat. The cramped quarters inside the inn meant that I couldn’t easily outnumber his figures, which allowed him to engage and destroy my Skaven raiders one at a time. Argh! Things were not going according to plan.

Here’s a look at Tyroth Lowbrow emerging from a basement trapdoor in the floor to engage Vincent’s dwarven bodyguard while a buxom lass looks on in terror.

IMG_20181110_194954.jpg

In desperation, I forced another entrance by sending a squad of stormvermin up to a second story window. They piled in and encountered yet another bodyguard with frightening stats and abilities. The rat body count continued to increase…

IMG_20181110_195116.jpg

IMG_20181110_195141.jpg

Open Combat is a particularly brutal system for close quarters fighting. We quickly learned the value of shields as we battled through the narrow hallways of the Stoic Arms. In Open Combat, a typical fight results in loss of Fortitude (think hit points) or being pushed back — sometimes both once! But if you get pushed back into another object, like a wall or even a friendly model, you’ll suffer even more Fortitude loss — really speeding up your warrior’s eventual demise! In short, the Stoic Arms was a real meatgrinder for Skaven and human alike.

IMG_20181110_205401.jpg

By this point, Snik Soot-Fang had reached his objective, confronting Argus Nul as the halfling wizard was studying his tome of magic in the Stoic Arms’ well-appointed library. The halfling tried to flee in terror, smashing a stained glass window and tumbling onto a canopied overhang.

Elsewhere, the inn was crawling with warriors as the Skaven fighters clashed with the wizard’s bodyguards scattered throughout the four-story structure.

IMG_20181110_202606.jpg

Seeing that Argus was on the move, I made the crucial decision to withdraw Tyroth Lowbrow, the Skaven warrior who had burst out of the basement hatch and into the kitchen. He wisely retreated from the fury of Vincent’s dwarven bodyguard, who had been battering him in the intervening turns. Using his speedy Skaven movement, Tyroth exited the inn and emerged in the rear to await Argus’s arrival.

But first, there were yet more civilians to slay. Upon exiting the inn, Tyroth saw a poor stable boy and was offended by his innocence and purity. With a stroke of his savage axe-hammer-thing, Tyroth slew the youth and ransacked his pockets for a few copper coins. Such brutality! Never take your eye off the Skaven, boy.

IMG_20181110_203542.jpg

IMG_20181110_203552.jpg

At this point, Argus Nul tumbled off the edge of the overhang, pursued by the slashing claws and sputtering flintlock of Snik Soot-Fang. Both landed in an untidy heap at Tyroth’s feet, where it was a simple matter to bonk the halfling over his head, toss him in a burlap sack, and vanish into the autumnal gloom.

IMG_20181110_203732.jpg

And so Soot-Fang’s Skaven withdrew to the trackless caverns beneath the Grey Mountains, even as Argus’s bodyguards mustered a search party and set off in hot pursuit. Our next game will take place in the damp tunnels beneath the mountains as the Skaven prepare to unspeakable rituals to pry arcane secrets from Argus’s round little head.

This game was an absolute joy to play. The tabletop setup and the scenario gave us everything we could have wanted in a game of Open Combat. And we learned quite a bit about the game itself, proving yet again that OC has quite a bit of depth in its slim rulebook. Stay tuned for the next chapter!

Catching Up on Orktober

Posted by Comrade on November 19, 2018
Posted in: Posts. Tagged: fantasy, skirmish, warhammer. 2 Comments

Here it is. I hope you’re sitting down. Because you’re about to see the sum total of my output for Orktober.

Don’t say you weren’t warned.

IMG_20181103_201001.jpg

Ha! Actually, I did a little bit more, but not much. I realized on October 25 that I still hadn’t contributed anything to Orktober, despite wanting to really badly. So I rummaged around in my bits box, and the first thing I saw was this little guy.

He’s got an interesting history. Many years ago I bought a big box of random fantasy miniatures, mostly old metal Middlehammer and Oldhammer stuff. As was my wont during those glorious child-free days, I scavenged the figures I wanted to keep and then sold the rest on various forums. I think I doubled my money, which was really nice. I did this a few times per year during the height of my hobbying, pre-kids.

Anyway, as I recall, the bottom of the box was full of broken sprues, snapped off weapons and bits of metal flash (and plenty of dirt and dust). I had planned to just throw it all away, but I decided to give it one last look, just to make sure I didn’t miss anything. Well, this little guy was tucked away in the very bottom, underneath the dirt and detritus. He was so tiny I almost didn’t even notice him. I tossed him in my bits box, and there he sat, for 15 years. Until this month!

He’s cute and he’ll certainly fulfill the role of “scheming goblin” whenever the narrative scenario or RPG session calls for it. Anybody know exactly where he came from?

But anyway, I digress. After painting up this little goblin, I took a look at my box o’ random fantasy miniatures (the figures I keep handy for RPG sessions, or to introduce players to generic, non-game-specific fantasy skirmish) and realized I didn’t have any stereotypical orc models. You know — savage greenskins with brutal weapons, basic fighters to serve as foils for adventuring parties. Such figures are absolutely essential for a fantasy gaming kit like mine!

Thankfully, that was easy to remedy — I had a few mixed sprues of 40k and WHFB greenskins laying around, waiting for just such an opportunity. The two kits share a lot of pieces and are generally great fun to play around with.

So I knocked together 4 basic orc warrior type guys, then proceeded with a very fast and dirty speedpaint. I actually completed the figures on October 31, so they still count for Orktober.

IMG_20181103_210800.jpg

These guys got a very fast speedpaint. I’m sure I could go back and tidy up the details, but honestly — they’re orcs. They’re perfectly happy to be a little rough around the edges.

IMG_20181103_210834.jpg

I’m pleased that I was able to sneak in a teeny tiny contribution to Orktober (particularly that little goblin, who’d been needing some paint for decades). And the best part is that I’ve got another dozen or so orcs ready to join these guys … the next time Orktober rolls around, that is.

IMG_20181103_210547.jpg

Dispatches from the Crusade of Fire

Posted by Comrade on November 15, 2018
Posted in: Posts. Tagged: 40k, caluphel, campaign, club, narrative, warhammer. Leave a comment

Alex sent in these snippets of lore to accompany the Crusade of Fire, his Salamanders army, which is operating in the Occulta Manticora Sub-Sector. They’re interspersed with some photos of his newly completed Primaris Salamanders, too!

Lost and Found

Throughout the Caluphel system, an ancient and desperate call could be heard. Few could discern it from the background noise and fewer still could understand it. Destined to be lost to time and rot into eternity, the call was finally heard emanating from a deep space graveyard and a long forgotten citadel bearing the traitor’s mark.

Around this once mighty station lay a field of broken and shattered vessels. Black, silver, and green shone from the pocked and rent hulls of the ancient craft. A battlefield fought not only in the void but also upon the massive decks of the fortress. An engagement that was a reminder of a time lost and a schism that mankind could never forget.

The signal originated in the belly of an emerald and gold battle barge. In its hold, hastily constructed and hidden in desperation, was a secret compartment bearing precious cargo. Once the last line of defense for the vessel, but now the last survivors of an ancient cadre. Stranded in the void by the epic battle, on the outer reaches of man’s empire. Left with no other choice than to lie in slumber and to await their brothers. Ten thousand years later, their brothers would heed their call, and would find their battle barge.

Arrayed within the vast chamber were row upon row of legionnaires of the great schism. Clad in the same heraldry of the ship they were found upon, and who undoubtedly would speak the same language as the one the message was transmitted in. In a rough semicircle they lay, held in place by stasis that sustained them at the very brink of death. And in the center of the room knelt a warrior clad in black; eternally facing a truly ancient sarcophagus and its mount. After ten thousand years, the sons of the XVIIIth would be reunited in a time of dire struggle for the Imperium of Man. The Salamanders of the Horus Heresy had been reborn.

Chaplain Kryten

Chaplain Kryten was one of the few Terran-born warriors of the XVIIIth left after the battle of the Caldera and the unification if the Salamanders. Known for his cool demeanor and aggressive battle tactics even before his ascension into the chaplaincy, Kryten would go on to become one of the most effective and well respected chaplains in the Salamanders legion. He would accompany his legion to Istvaan V and survive the drop site massacre, leading a small battle group of survivors to regroup in the Eastern Fringe.

However unbeknownst to him, the location he chose for his retreat was embroiled in its own part of the Horus Heresy. Upon arrival into the Cantoc (later renamed Occulta Manticora) Sub-Sector, his forces were immediately engaged by traitor forces as they attempted to dock at an orbiting starfort. Kryten’s intervention allowed the loyalists on the starfort to overload its primary plasma reactor and sabotage the station.

Left crippled and drifting, the starfort proved to be a prison for Kryten and his men. The chaplain decided to put his surviving legionaries into stasis and broadcast a distress call only a Salamander could follow. Now awakened from his slumber ten thousand years later, he is ready to finish the crusade that he was never allowed to complete.

Ancient Nerus

Mortally wounded during a battle for an ork war moon during the unification of the Salamanders, Brother Nerus now interned inside a dreadnought sarcophagus to save his life. Clad in massive slabs of ceramite and adamantium, he would once again stride alongside his brothers into battle. With a temper unbound by his injuries, he would now hurl plasma bolts and missile barrages into the foes of the imperium once more.

After his internment, he fought with his chapter until the massacre at Istvaan, where he would follow Chaplain Kryten to the Eastern Fringe. There he survived the engagement with the starfort and was put into hibernation to await the arrival of his late brethren.

Once recovered, Ancient Nerus required many long hours of repair by by the Tech Adepts of Ryza and the few remaining Techmarines of the chapter to awaken the ancient pattern of sarcophagus. When he was finally coaxed out of his slumber, he awoke with the same wrath that he had possessed ten thousand years ago. Ready once again to fight the foul xenos and traitorous pigs that plague the Imperium.

The XIIth and the XVIIIth

Bolter fire echoed through the outer wastes of Hive Eshtus. Whole buildings and men alike were vaporized by superheated plasma. The soil of Talnus was churned under foot by two clashing armies. Mechanicus and Salamander forces held their ground against an ancient foe, fresh from the Heresy.

The great rift had split apart the Occulta Manticora system cluster had, due to the peculiarities of the warp, spat out a contingent of Heresy-era World Eaters several days prior. It was not long before the traitors would bypass the world’s defences and make planetfall. Hungry for blood in this strange yet familiar land, the sons of Angron would brutally assault the world only to be met by the Legion of Fire and its Mechanicus allies.

At the center of it all was a small plateau in the center of the wastes. Resting upon it was was a decrepit Astra Militarum base where the majority of the Astartes forces would become concentrated. An ancient Spartan Assault Tank bore down upon a Land Raider five thousand years its junior; a Fire Raptor Gunship screamed overhead.

The Space Marines clashed with a hatred old and bitter for some and yet new and ferocious for the others. Green met white and blue on that plateau with the detonation of mass reactive shells and the scorching of laser bolts. A wall of Terminators clashed, and gunships fell from the sky. Legionaries were mowed down by marines while a Leviathan Dreadnought would go supernova.

In the end, the Crusade of Fire would emerge victorious over their traitorous kin, being forced to slay them to the last man, for their bloodthirst would not allow them to retreat.

The Salamanders; however, were not unbloodied. In their struggle for victory, entire squads of battle brothers were lost and already scarce armour was destroyed. While the Mechanicus lost almost half a maniple to the World Eaters.

But the day was won, and there was now one less threat for the Crusade of Fire to deal with as they prepared to march to Caluphel.

New Issue Field Manual Section C.2-3

  • Traitor Protocols

Guardsman! Do not be fooled! Not every clean and non-spikey Space Marine is your friend. As you have been notified by you Commanding Officer, heretic Space Marines have made planetfall wearing armor similar to that worn by our very own holy protectors. To ease confusion and ensure better target acquisition rates, we have provided a simple checklist to help you determine friend from foe on the battlefield. If the subject checks any of these boxes, open fire on sight.

  • Armor with Bronze, Blue, and White markings
  • Excessive gore splattered on armor
  • Shouts “blood for the blood god”
  • Is running aggressively towards you wielding some form of chain weaponry
  • Remember: a bloodthirsty, seven-and-a-half-foot tall killing machine will not wait for you to pull your manual out during combat, so memorize this list.

The Hideous Bloom: My Blightlord Terminators

Posted by Comrade on November 2, 2018
Posted in: Posts. Tagged: 40k, army, caluphel, campaign, cool minis, death guard, miniatures, nurgle, painting, project, sci-fi, warhammer. 3 Comments

IMG_20181029_200343.jpg

Our nearly completed summer campaign (Caluphel Awakenings) has proven to be a motivating factor for me to complete the last few units for my Death Guard vectorium: the Maggot Magnates. For October, I selected a unit I’ve had on my painting table for many, many months: a 5-man unit of the truly awesome Blightlord Terminators.

I had acquired these guys quite a while ago — fully assembled and magnetized, actually — and had been intending to paint them up as one of the centerpiece units for the Maggot Magnates. By completing the unit in October, I was also able to count them towards Azazel’s Unit-ed Community Painting Challenge, which is just icing on the cake!

This kit is a stunning example of the new toys that Games Workshop is producing these days. The kit includes five totally unique, armor-clad behemoths — not terribly poseable, I’ll admit, but the level of detail more than makes up for that shortfall.

In my head, these guys will  be known collectively as the Hideous Bloom — a cadre of battle-hardened veterans, each one a brutal warrior in his own right, who have served dozens of Nurgle-blessed chaos lords over the long centuries. The Hideous Bloom is based in the Tower of Rust, a forbidding redoubt located in the trackless forests of Hundvolst (a doomed planet within Warzone Endymion). When not on the battlefield, the Hideous Bloom can be found cloistered away in their foul tower, engaging in unspeakable acts of devotion to Nurgle.

For the basing, I wanted to do something other than my typical sci-fi urban rubble scheme. Nurgle is all about life, death, and decay, so I went for a somewhat verdant basing approach, with lots of green turf flock and some tufts of grass. After all, not every 40k battle takes place in a blasted cityscape…these guys would look perfectly at home marching out of the gloom on a pastoral agri-world, or teleporting into battle on the slopes of a boreal mountain forest.

Each figure includes a set of details and features that are unique to that particular sculpt. I’ll go through each one and point out the nifty parts.

IMG_20181029_195508.jpg

This guy has maggots spilling out of cracks in his armor — dozens, hundreds of slimy white grubs, as though his armor is jam-packed with foulness. Here’s a close-up of his ruptured ankle joint.

IMG_20181029_195533.jpg

Up next we have a corrupted warrior who is slowly turning into an insect. Check this out!

IMG_20181029_195734.jpg

Insectile iconography is one of the original hallmarks of Nurgle, dating way back to the glory days of Rogue Trader, so it’s nice to see it represented in the Blightlords.

Here’s my heavy weapon guy, sporting a magnetized plague spewer. I have all the other weapon options, too, but I haven’t painted them up yet. The plague spewer will have to suffice for now!

IMG_20181029_195934.jpg

And on his back, he has a gnarly fuel tank comprised of three interlinked corpse heads! Presumably they’re supplying the bile and sputum that comes spraying out of the plague spewer’s nozzle.

IMG_20181029_200059.jpg

This next guy is a favorite of mine. He has a fairly standard outfit when viewed from the front — basic armor, unadorned helmet, sweet chainmail, etc…

IMG_20181029_195244.jpg

But from behind, you can see that he’s got mounds of gray, flabby elephant man flesh spilling out of his cracked armor! It’s unbelievably gross and I had a lot of fun painting it with successive layers of washes.

IMG_20181029_195355.jpg

And finally we have the real centerpiece of this unit: the champion armed with a massive flail of corruption! I’ll admit that I was totally intimidated to paint this sucker when I first looked at the figure. I ended up snipping the flail off the handle and painting it separately, then re-attaching it with a pin to the handle after both sections were complete.

IMG_20181029_200253.jpg

I particularly love the mass of guts and tubing that’s hanging out of his ruptured tummy, leaking green pus. What a mess.

I took my time on the smoke coming out of the plague censers and I’m really pleased with the result. Could I have spent even more time on this particular detail? Yes I could have. But I’m very focused on output (rather than perfection) and we’ve got an apocalypse game coming up in early December, so it made sense to stop at “good enough” on this guy.

IMG_20181029_200314.jpg

I’m coming perilously close to actually being finished with my Death Guard army. For me at least, no army is truly finished — there’s always another character conversion or special unit to paint up, and my bits box is full to the brim with potential projects. But with the Maggot Magnates, I’ve completed basically everything that got me excited about playing Death Guard in the first place: vintage metal Plague Marines, exciting new special characters, and wacky daemon engines.

I’ll be pivoting to fantasy over the next few months, as I work on my all-metal Skaven army for Dragon Rampant. I may paint up a few undead figures, too, just to remind myself how awesome they are. And I’ve got a fun little goblin warband on my kan ban board getting lonely. Stay tuned!

Posts navigation

← Older Entries
Newer Entries →
  • Recent Posts

    • Building a Grimdark Battle Board
    • Hobgoblin: More Thoughts and Musings
    • Grimdark Future: The Scouring of Hundvolst
    • Shadow War: Armageddon Battle Report & Review
    • The Expedition Soldiers On
  • Follow Comrade's Wargames on WordPress.com
  • Tags

    28mm 40k army battle report caluphel campaign chaos club death guard dragon rampant dwarves fantasy game night grimdark hobby miniatures narrative nurgle painting post-apoc project saga sci-fi skaven skirmish terrain warbands wargames warhammer workshop
  • Archives

    • January 2026 (1)
    • November 2025 (1)
    • October 2025 (2)
    • September 2025 (1)
    • October 2023 (2)
    • September 2023 (1)
    • August 2023 (2)
    • July 2023 (3)
    • June 2023 (3)
    • May 2023 (4)
    • April 2023 (2)
    • March 2023 (5)
    • February 2023 (2)
    • January 2023 (2)
    • December 2022 (1)
    • November 2022 (1)
    • October 2022 (4)
    • August 2022 (2)
    • July 2022 (1)
    • June 2022 (2)
    • May 2022 (5)
    • March 2022 (1)
    • February 2022 (1)
    • January 2022 (3)
    • December 2021 (1)
    • November 2021 (2)
    • October 2021 (1)
    • September 2021 (2)
    • July 2021 (1)
    • June 2021 (1)
    • May 2021 (2)
    • March 2021 (3)
    • February 2021 (1)
    • January 2021 (3)
    • December 2020 (1)
    • October 2020 (1)
    • September 2020 (2)
    • August 2020 (1)
    • July 2020 (1)
    • June 2020 (1)
    • May 2020 (1)
    • April 2020 (1)
    • March 2020 (1)
    • February 2020 (2)
    • January 2020 (3)
    • December 2019 (5)
    • November 2019 (1)
    • October 2019 (1)
    • September 2019 (2)
    • August 2019 (2)
    • July 2019 (4)
    • June 2019 (3)
    • May 2019 (3)
    • April 2019 (1)
    • March 2019 (1)
    • February 2019 (2)
    • December 2018 (3)
    • November 2018 (3)
    • October 2018 (5)
    • September 2018 (5)
    • August 2018 (5)
    • July 2018 (5)
    • June 2018 (2)
    • May 2018 (1)
    • April 2018 (3)
    • March 2018 (1)
    • February 2018 (1)
    • January 2018 (1)
    • December 2017 (1)
    • November 2017 (5)
    • October 2017 (1)
    • September 2017 (2)
    • August 2017 (4)
    • July 2017 (4)
    • June 2017 (3)
    • May 2017 (4)
    • April 2017 (3)
    • March 2017 (7)
    • February 2017 (6)
    • January 2017 (2)
    • December 2016 (5)
    • November 2016 (2)
    • October 2016 (3)
    • September 2016 (4)
    • August 2016 (5)
    • July 2016 (6)
    • June 2016 (8)
    • May 2016 (2)
Create a website or blog at WordPress.com
Comrade's Wargames
Create a website or blog at WordPress.com
  • Subscribe Subscribed
    • Comrade's Wargames
    • Join 154 other subscribers
    • Already have a WordPress.com account? Log in now.
    • Comrade's Wargames
    • Subscribe Subscribed
    • Sign up
    • Log in
    • Report this content
    • View site in Reader
    • Manage subscriptions
    • Collapse this bar
 

Loading Comments...