Comrade's Wargames

Painting toy soldiers in Oregon

  • Home
  • Narrative Campaigns
    • The Cauldron: A Grimdark Sci-Fi Campaign
    • The Chronicles of Üthdyn: A Fantasy Tabletop Campaign Setting
    • Nightwatch: Beyond the Borderlands
    • Frostgrave: Mystery of the Night-Haunted City
  • About Comrade’s Wargames

Caluphel Awakenings: Juventius Free Regiment

Posted by Comrade on August 1, 2018
Posted in: Posts. Tagged: 40k, army, caluphel, campaign, club, miniatures, narrative, sci-fi. Leave a comment

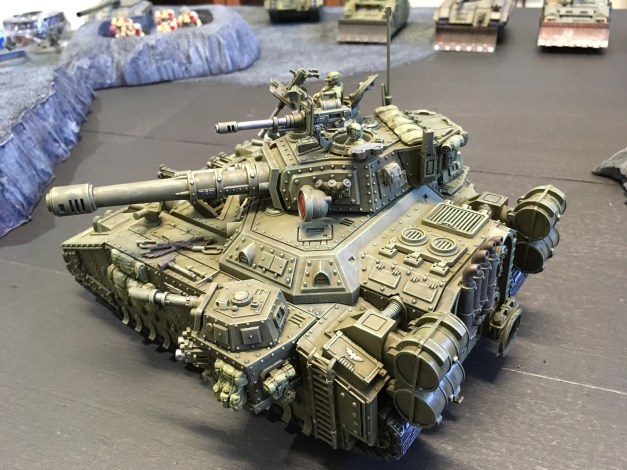
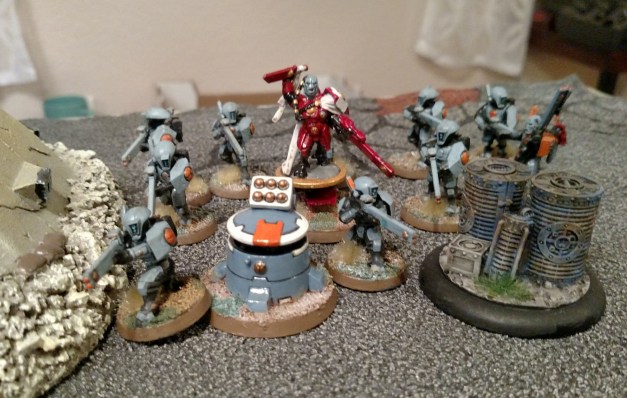
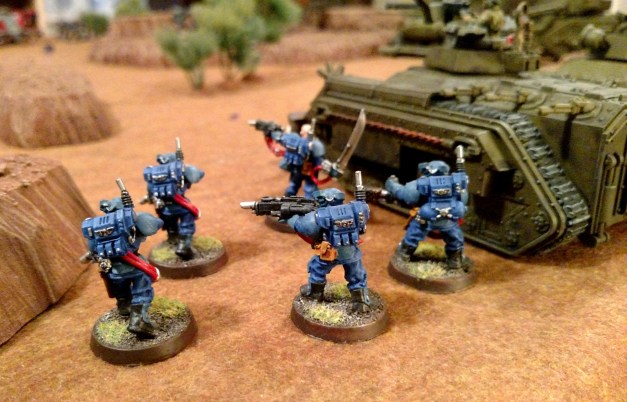
Here’s a peek at John’s faction in our Caluphel Awakenings campaign: the Juventius Free Regiment.

Rather than go with a “typical” 40k army, John has sketched out a fighting force firmly ensconced in the moral gray area of the Warhammer 40,000 universe. And we all know there’s plenty of that! After all, you can’t have grimdark without some grimgray lurking on the periphery.

IMG_20170824_073154


When the Great Rift opened and the Emperer’s grace fled sub-sector Juventius, Imperial Command ordered a mass exodus toward Holy Terra. The faithful obeyed, taking to their ships and entering the warp on an ill-fated retreat. No one has seen or heard from them since.

Those who declined such folly invited war from the Imperium’s zealots who remained in the Juventius sub-sector. The survivors thwarted an exterminatus attempt, and fended off rearguard attacks from the retreating faithful. Within weeks, they were alone in the sub-sector. The war galvanized those who survived into a well-organized provisional government backed by a capable fighting force of former Imperial Guardsmen. The Independent Systems of Juventius was born.

IMG_20170506_233554

Knowing their tenuous position in the galaxy, Juventius Independent Command dispatched the Free Regiment to Caluphel sub-sector, with orders to contain and divert threats away from Juventius. Failing that, the regiment will provide early warning home, and fight delaying actions against potential invaders.

Free Regiment Command enjoys broad latitude in executing its mission, and will likely fight alongside anyone who prevents one single faction from consolidating power in the Caluphel system.

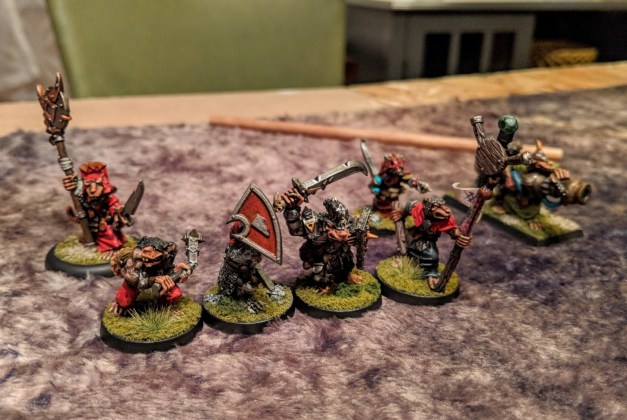
As if those problems weren’t enough, Juventius security forces must also contend with a rising counter-culture of pleasure cults that threatens to weaken the sub-sector against her enemies and further antagonize the dreaded Ordo Hereticus.

20180731_160530~2.jpg

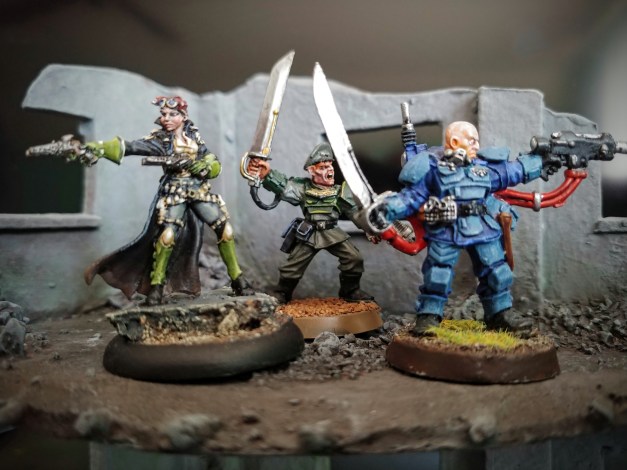
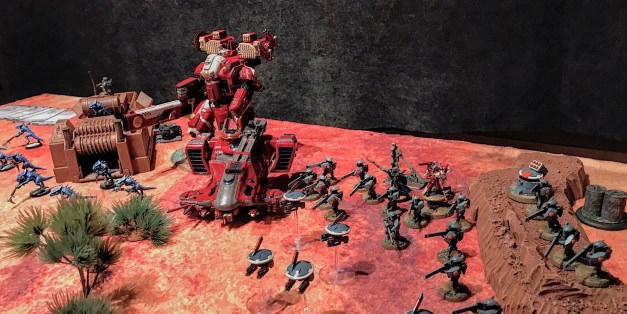
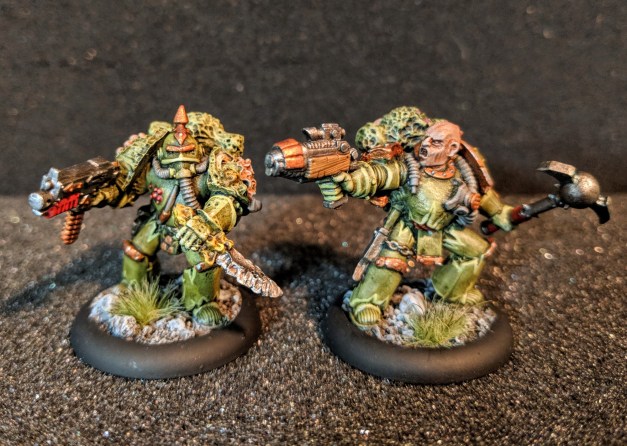
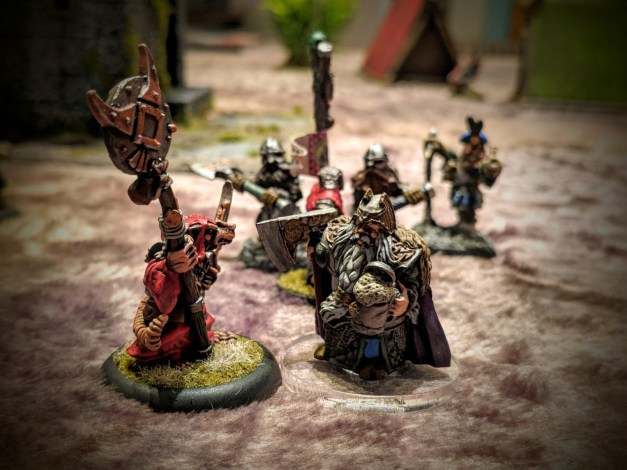
Free Regiment Leadership (from left): Admiral Naria Helles, Security Chief Narcus Grine, and Colonel Adric Boden

Admiral Helles commanded the battleship Indomitable, responsible for carrying out the exterminatus order when it came. Instead, she murdered the Lord Commissar aboard the Indomitable and ordered a full attack on faithful war vessels. Despite provoking a bloodbath, her decision forced the faithful to cut losses and flee the sub-sector. Helles is now an esteemed voice on the ruling council of Juventius, highly regarded with a spotless reputation. She thrives in chaos, and secretly supports the pleasure cults blossoming throughout the sub-sector. In a different universe, she would have been a dancer.

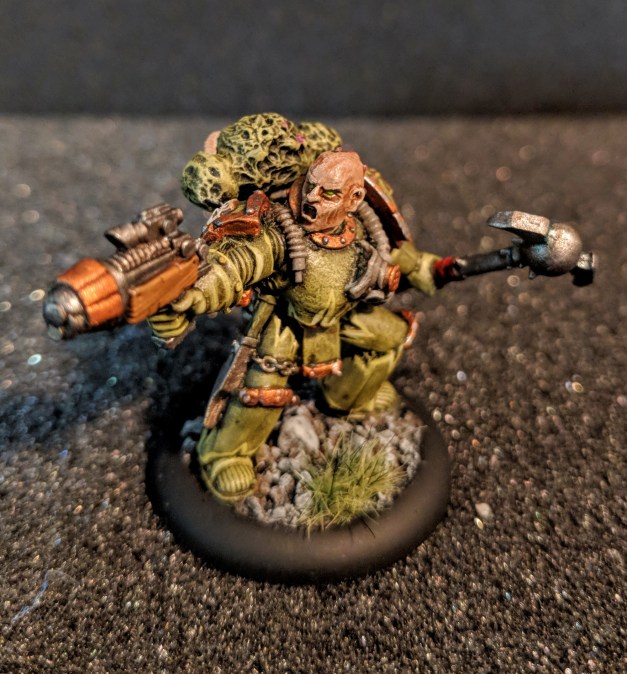
Chief Narcus Grine still considers himself faithful to the Emperor, believing that the panicked idiocy of his brethren who fled displayed the true lapse of faith. He fills his little free time with fervent study, secure in the knowledge that the path to happiness lies in the Emperor’s teachings. He suspects the influence of demons upon the wicked pleasure cults. As security chief, with access to once forbidden tracts on demonology, he has begun to learn and understand the true nature of humanity’s greatest foes. Grines will tend to take personal command of security teams dispatched to respond to any violent consequences of pleasure cultists’ debauchery.

To Colonel Adric Boden, knowledge is power. Before the faithful fled, the Emperor was the surest route to both, despite His servants’ sanctimonious hoarding of access. When the Emperor’s light darkened, Boden chose his new surest route to knowledge and power, the independent Juventius. So far, he is pleased with his decision. He commands the best fighting force available to the sub-sector, and the fate all Juventius depends on his success. Most of all, he knows that Caluphel is rife with secrets, and aches for the chance uncover and control them.


Caluphel Awakenings: 42nd Auxiliary Relief Battalion

Posted by Comrade on July 31, 2018
Posted in: Posts. Tagged: 40k, army, caluphel, campaign, club, miniatures, sci-fi, warhammer. Leave a comment

Here’s another look at one of the factions taking part in the Caluphel Awakenings campaign: the 42nd Auxiliary Armored Fist Relief Battlation, better known as Jim’s glorious armored Imperial Guard tank army!

Buckle up, because Jim has provided an absolute treasure trove of photos of his amazing figures and vehicles. We’re a family-friendly site here at Comrade’s Wargames, but I think the term “tank porn” probably applies here.

Let’s lead off with this stunning and atmospheric photo of a lone Leman Russ, silhouetted against the darkening sky.

42nd Auxiliary Relief Battalion and allies-17.jpg

Chills, man.

Oh, you want more? Jim’s got you covered. Check this out.

42nd Auxiliary Relief Battalion and allies-13.jpg

Not good enough? Maybe you want to see a superheavy? Feast your eyes on Big Papa.

42nd Auxiliary Relief Battalion and allies-08.jpg

42nd Auxiliary Relief Battalion and allies-09.jpg

42nd Auxiliary Relief Battalion and allies-10.jpg

Just amazing work from Jim. And so much of it — he’s been working on this army off and on since 1997!

42nd Auxiliary Relief Battalion and allies-05.jpg


42nd Auxiliary Relief Battalion and allies-03.jpg
42nd Auxiliary Relief Battalion and allies-04.jpg
42nd Auxiliary Relief Battalion and allies-11.jpg

Anyway, here’s the lore he came up with.

The 42nd Auxiliary Armored Fist Relief Battalion is an ad hoc fighting force made up from survivors of Imperial battle fleets forced out of the warp after the catastrophic advent of the Cicatrix Maledictum — the great warp storm that rent the galaxy asunder and ushered in a new dark age for the Imperium of Man.

In the chaos that followed the warp storm, fragmented Imperial Guard units on the Eastern Fringe found their way to Caluphel Prime, where a motley collection of strike cruisers and troop transports anchored in high orbit and considered their options. Virtually no senior officers survived the journey, leaving this ad hoc battalion mostly leaderless, even as it faces the gathering storm on Caluphel.

A temporary leader arose — a Knight Commander named Argos. He was chosen from among his peers to lead a reactionary armored force to the planet’s surface. Of Argos, not much is known — either of the man himself, nor the legend that he may become.

42nd Auxiliary Relief Battalion and allies-02.jpg

42nd Auxiliary Relief Battalion and allies-04.jpg

Caluphel Awakenings: The L’Ranna Regiment

Posted by Comrade on July 31, 2018
Posted in: Posts. Tagged: 40k, army, caluphel, campaign, club, miniatures, narrative, sci-fi. Leave a comment

L'Ranna Army~2.jpg

We’re back with another faction writeup for our Caluphel Awakenings campaign. This time we turn the reins over to Paul for a glimpse at the backstory and motivations of the L’Ranna Regiment, his long-running Tau army.

The L’Ranna Regiment is relatively new compared to some of the storied units of the Tau Empire. Following the Emperor’s abortive Damocles Crusade (742.M41), Shas’o Shovah Commander Farsight set up his Farsight Enclaves on the far side of the Damocles Gulf. The Ethereal Leadership found it appropriate to guard against the rebel Commander and thus set up a defensive presence on the nearest Septs, particularly Viorla and Sa’cea, on the western rim of the Tau Empire. The Company was originally founded as part of the Fire Contingent garrisoning Sa’cea against a possible rebel incursion.

In 889 – 903.M41 the hive Fleet Gorgon invaded Tau space. Gorgon was exceptional for its ability to quickly adapt on a biological level to new circumstances of battle, such as evolving immunities to Tau weaponry. The initial push by Gorgon was so devastating that the garrison forces on Viorla and Sa’cea were pulled off and sent into combat.

It was on the manufacturing world of Davos, Bork’an Sept, that the Company was birthed in its crucible of fire. The larger regiment was ordered to defend a munitions manufacturing city while the fleet redeployed.

Just after the fleet moved off, a rift opened in the Warp and Tyrant Hive Mother Medusa with her full brood manifested and began their assault on the city. Most of the regiment were lost within the first few hours of the Tyrant’s assault. Night fell when the last distress transmission from the regiment made it off-world.

IMG_20170604_083402

The fleet returned at daybreak the next day and landed reinforcements expecting to find Tyranids in control. The city was deserted and adrift with smoke.  All was silence on the battlefield when landing party found, still at their posts, the victorious Company, exhausted but alive. The rescuers set up a clamor, banging their guns against their shields crying aloud “L’Ranna!  L’Ranna!  L’Ranna!” L’Ranna is a Tau word that describes the stillness of a battlefield when all that is left is smoke and the last quiet whimpers of the dying enemy. From that day forward, company colors would be that of blood and smoke – red and gray.

Shas’o Shaserra, Commander Shadowsun herself anointed the Company L’Ranna and promoted their remaining lieutenant Nyessa to Shas’el Captain Goldmoon. The Gorgon offensive was eventually destroyed in 903.M41 due to the combined efforts of the Tau and the Imperial Guard 903. Shaserra took Nyessa on as pupil and began to train her in the sacred Code of Fire and the all-important law of the Tau’va.

Over the next 90 years the Company saw repeated action against the enemies of the Tau, capturing banners of the White Scars Necrons and multiple Ork Waaghs! during the Great War of Confederation (975.M41) just prior to the Third Expansion (current year 975.M41).


IMG_1959

975 was a year that changed the destiny for the Company. Under the orders of Shadowsun herself, Shas’el Goldmoon led the Company on the assault of the tundra mining world of Aggoroleth. There, the Company battled the forces of the Adeptus Mechanicus for the resources of the planet and its rich promethium reserves.

During one particular explosive assault by Legio Valorian Titans, the Company found themselves pinned and suffering mortal losses. It was at this point that the sky filled with the descent flares of an entire contingent of Crimson Crisis Suits. Shas’O Farsight had arrived. Under the withering fire of ten thousand fusion blades, the Legio was turned back and then (over the next month) expelled from Aggoroleth entirely.

Goldmoon was somewhat at a loss for how to respond to the new affairs. On the one hand, she was presented with the great traitor to the empire —  Farsight himself.   Honor and the Greater Good itself would call for her to immediately assassinate the commander. However, she owed her life and perhaps the lives of the Tau within the entire Sept to him. What did the Greater Good demand of her? Before departing the world, the two of them walked long hours together talking, and when they departed, they made the bow of respect to each other.

As the Company returned to Tau Sept itself for orders, dark times engulfed the Empire. Utilizing archeotech and eldritch science, the Tech Priests of the Adeptus Mechanicus had their revenge for the loss of Aggoroleth. An eruption of power engulfed the vast swathe of the Damocles Gulf space in flames, cutting off the Tau from their destined coreward path.

The Farsight enclaves were marooned on the far side of the fiery Gulf. To the East lay an expanse of dead space, barren worlds left in the wake of Hive Fleet Gorgon’s ravenous invasion, and to the South lay the mighty Ultramar and the sons of Guilliman. The Tau found their space lanes cut off on all sides with no obvious route towards new conquests. Add to this the disastrous Tragedy at Numenar Point where the entire Fourth Expansion was lost and the galaxy itself was split asunder.

IMG_20171022_084214.jpg

A Stain and a Light
Over the next few years a malaise set upon the empire. It was during this period of drift that Shas’O Nyessa Goldmoon was put on trial for treason, given her failure to kill Farsight when given the opportunity. The trial consumed the media channels of the empire for months. Witnesses from both sides spent days petitioning the Ethereal Council and throughout it Goldmoon made her defense. When the very colors of her Company were raised as proof of her false allegience, she uttered only one word: “Davos”.

In the end, it was the testimony of Shadowsun who swayed the Council and Goldmoon was released back to service and the Company was expanded to a full Regiment. But the Council was not entirely certain, and when the L’Ranna Expeditionary Fleet set out once more, the Ethereal Aun Ja’xa accompanied them.

As the Regiment battled Ork Waaghs to the South, the Galaxy torn assunder by the Great Rift. But then a light in the darkness. A stable womhole in the Zone of Silence was discovered – the Nem’yar Atoll – leading a trio of lost Septs far far to the Galactic North of the Empire. Furthermore as the Empire fortified the space around the Atoll, the lost world of Caluphel was discovered at the far east of the Zone. The Empire decided that perhaps expansion to the East could be countenanced. Or at worst, her enemies would be denied that territory.

Caluphel Campaign
The Regiment battered by Warp Storms upon arriving in the Caluphel system and immediately found themselves without Beacon contact and besieged by competing factions for control of the Death World. However, the Regiment has won more than it has lost on Caluphel and has recently reestablished contact with the Empire. Goldmoon will need all her skill and ingenuity to fortify the Tau beachhead in the sector . . . and to survive.

Goldmoon~2.jpg

L’Ranna Regiment
Updated:  525.997.M42

Organization

  • Command
    • HQ
    • Company Colors (Red, White)
  • Nova Company:
    • Troops, Elites
    • Sa’cea Colors (Blue, Orange)
  • Davos Company:
    • Heavy Support, Fliers, Vehicles
    • Company Colors (Red, Gray)

 Named Characters

  • Shas’O Commander Nyessa Goldmoon: Goldmoon is the Regimental Commander.   She pilots a Coldstar Commander Battlesuit with Glory colors.
  • Shas’el Fireblade Huma.  Huma is First Captain of the Damocles Company.   He transferred to L’Ranna during the formation of the Regiment.   He wears Farsight colors due to his HQ Command status.
  • Shas’el Darkstrider.  The legendary Darkstrider has joined the L’Ranna regiment where he leads his own Breacher Team.   He wears Farsight colors due to his HQ status.  He is 2nd Captain of the Damocles Company.
  • Shas’el Longstrike.  Longstrike is the Captain of the Nova Company.   He pilots a Hammerhead painted in Farsight colors.
  • Shas’vre Alhanna. Alhanna leads the Crisis Suits of Damocles Company.   She has painted her Crisis Suit in Sa’cea colors.
  • Ethereal Aun Ja’xa. A student of Aun Shi and a Master of the Blade.   Ja’xa is a good match for the martial tradition of L’Ranna.   He is watchful of his new Commander.

More Old-School Plague Marines with Spellcrow Bits

Posted by Comrade on July 19, 2018
Posted in: Posts. Tagged: 40k, chaos, death guard, miniatures, nurgle, painting, sci-fi. 4 Comments


IMG_20180619_201150.jpg

I’m back with my second batch of vintage metal Plague Marines augmented with snazzy resin bits from Spellcrow. These were a lot of fun to build and paint, and they look surprisingly OK next to some of the newer Death Guard figures that have come out recently. These guys will hit the table later this month in a game in our Caluphel Awakenings narrative campaign.

I’m a big fan of the Middlehammer-era Plague Marine aesthetic, particularly the WWI Prussian-inspired gas mask helmets with spikes on top. I also like how the Nurgle details on these older figures are subtle and understated: cracked armor, a few boils and buboes, but nothing too zany. The gnarly upgrade bits from Spellcrow let me really push things over the top, which is nice.

These guys have a few notable conversions. Here’s a mace of contagion on this champion armed with a plasma pistol.

IMG_20180619_201308.jpg

IMG_20180619_201528.jpg

On a whim, I attached a missile launcher from the old metal Chaos Havocs kit to one of my Plague Marine torsos. I think I’ll run this weapon as a plague launcher in my games.

IMG_20180619_201106.jpg

I also tried my hand at a flail of corruption conversion (another potent close combat weapon available to the Death Guard). I don’t have a particularly large bits box, so I was pleased that I was able to cobble together something halfway useful.

IMG_20180619_193903.jpg
IMG_20180619_193917.jpg

I had a lot of fun playing around with GW’s technical paints — namely Typhus Corrosion and Ryza Rust — to finish off the rusted censers at the end of the flail.

And lastly, I used a bit of green stuff to obscure an Imperial eagle on this plasma gun conversion. It was a simple trick that looks perfectly serviceable with a little paint.

IMG_20180619_193954.jpg

I’ve got another 10 or so vintage Plague Marines waiting to receive a similar treatment (Spellcrow bits + quick paint job). After that, the basic footslogging infantry in my Death Guard warband will be complete!

Two Games of Song of Blades & Heroes

Posted by Comrade on July 15, 2018
Posted in: Posts. Tagged: fantasy, hobby, miniatures, painting, skirmish, song of blades, wargames. 6 Comments

Earlier this month I had a chance to sneak in a couple games of Advanced Song of Blades & Heroes, my go-to ruleset for fast-play fantasy skirmish gaming. I’ve been hopelessly in love with SOBH since I first stumbled across it back in 2010. The wide-open nature of warband creation (use any miniature in your collection!) really encourages the sort of hobby purusuits that appeal to me — namely, acquiring and painting up a vast array of miniatures from dozens of different manufacturers and game lines, while being beholden to no particular company or artificial army-building constraints.

So, as you can imagine, I try to get in a few games of SOBH every few months, just to keep my gaming palette in sync. For this month, I was joined by Vince, a fellow gamer who shares a passion for skirmish-sized fantasy gaming and hadn’t yet had an opportunity to try out Advanced Song of Blades & Heroes.

I set up two simple scenarios using the excellent tome of converted Warhammer Fantasy and Mordheim scenarios published a few years ago on the Hour11Gaming blog. (As an aside — I was talking with my friend Karl about this truly epic fan-made gaming resource, and we agreed that it might just be the best free fan supplement we’ve ever encountered. There are literally hundreds of hours of gaming to be had in this publication. Check it out and see for yourself!

The first game was a breakthrough scenario, where my ratmen (composed of Oldhammer and Middlehammer Skaven models) were attempting to push past a stout, armored line of dwarves guarding the approach to their mine.

IMG_20180708_204028-1.jpg

Vince’s dwarves were drawn from a handful of different sources, but the only one I can remember is this beefy lord from Scibor Monstrous Miniatures.

IMG_20180708_201338.jpg

Vince opted for a flavorful deployment, placing two crossbow men high up in a fortified tower while the rest of his guys milled around their campsite, oblivious to the danger from the approaching ratmen. Click the photos to embiggen.


IMG_20180708_194215.jpg
IMG_20180708_194406-1.jpg

It was a great introductory game, replete with everything you’d expect from Advanced Song of Blades & Heroes: flubbed activations, strategic reactions, desperate charges, gruesome kills, and cascading morale failures. That last one took place on my side of the table, and spelled the demise of my sneaky ratmen.


IMG_20180708_194419.jpg
IMG_20180708_201214.jpg

After that, we shuffled up the terrain and started another game. This one had six supply caches scattered around the tabletop, and both warbands were competing to search through the barrels and chests to find a particular item of great value. We’re not sure what it was, but we’d know it when we saw it.

Vince swapped out his dwarves for a zany and colorful old-school Chaos warband. It was composed of just 4 models, which terrified me as I began to think of all the potent abilities that Vince had no doubt stacked up on his chaos knights, demon and beast.


IMG_20180708_203959.jpg
IMG_20180708_204008_1-1.jpg

We traded blows for a few turns until one of my Skaven scouts managed to uncover the what’s-it at the bottom of a rotting barrel. The game then turned into a mad dash to get to secure the artifact! Vince won the race when his Slaaneshi chaos knight strolled up, bonked my ratman on the head, and claimed the doodad.

IMG_20180708_211918.jpg

From there, I expected him to rush off the board with his treasure behind comprehension, but he surprised me by sending his chaos knight wading into the chittering ratmen hordes. Clearly, he intended to do a proper slaughter before he retired for the day. The Skaven had their hands full dealing with a full-blown Fiend of Slaanesh, so we weren’t optimistic about the eminent arrival of the chaos knight.

IMG_20180708_211905-1.jpg

In the end we managed to snatch victory from the proboscis of defeat by slaying the chaos knight, scooping up the artifact, and high-tailing it off the board with a few less ratmen than we started with.

Here’s the final photo, showing a few Skaven engaged in a doomed rearguard action against a slavering Beast of Chaos.

IMG_20180708_211852-1.jpg

Afterward we discussed the game and agreed that Advanced Song of Blades & Heroes is really in a class by itself when it comes to bridging the gap between traditional tabletop RPGs and skirmish miniatures gaming. If you want to add in some narrative elements — things like interacting with town guards, building fortifications, bribing the troll to join your warband — the game includes a basic framework to make that happen. But if you just want to throw together some warbands using your favorite fantasy miniatures, it’s great for that too.

From an inspiration standpoint, SOBH delivers in a big way for me. I always spend a couple weeks after each game digging through my pile of fantasy miniatures and painting up a few favorites. There’s nothing like a game of SOBH to make you remember that you’ve got 8 or 10 goblins lurking in the bottom of a dusty bin, unpainted and overlooked for years but still just as charming as the day you bought them. Hmm, guess it’s time to sign off — my paintbrush is calling…

Posts navigation

← Older Entries
Newer Entries →
  • Recent Posts

    • Cold Data and Fiery Logic: The Dark Mechanicum
    • Building a Grimdark Battle Board
    • Hobgoblin: More Thoughts and Musings
    • Grimdark Future: The Scouring of Hundvolst
    • Shadow War: Armageddon Battle Report & Review
  • Follow Comrade's Wargames on WordPress.com
  • Tags

    28mm 40k army battle report caluphel campaign chaos club death guard dragon rampant dwarves fantasy game night grimdark hobby miniatures narrative nurgle painting post-apoc project saga sci-fi skaven skirmish terrain warbands wargames warhammer workshop
  • Archives

    • February 2026 (1)
    • January 2026 (1)
    • November 2025 (1)
    • October 2025 (2)
    • September 2025 (1)
    • October 2023 (2)
    • September 2023 (1)
    • August 2023 (2)
    • July 2023 (3)
    • June 2023 (3)
    • May 2023 (4)
    • April 2023 (2)
    • March 2023 (5)
    • February 2023 (2)
    • January 2023 (2)
    • December 2022 (1)
    • November 2022 (1)
    • October 2022 (4)
    • August 2022 (2)
    • July 2022 (1)
    • June 2022 (2)
    • May 2022 (5)
    • March 2022 (1)
    • February 2022 (1)
    • January 2022 (3)
    • December 2021 (1)
    • November 2021 (2)
    • October 2021 (1)
    • September 2021 (2)
    • July 2021 (1)
    • June 2021 (1)
    • May 2021 (2)
    • March 2021 (3)
    • February 2021 (1)
    • January 2021 (3)
    • December 2020 (1)
    • October 2020 (1)
    • September 2020 (2)
    • August 2020 (1)
    • July 2020 (1)
    • June 2020 (1)
    • May 2020 (1)
    • April 2020 (1)
    • March 2020 (1)
    • February 2020 (2)
    • January 2020 (3)
    • December 2019 (5)
    • November 2019 (1)
    • October 2019 (1)
    • September 2019 (2)
    • August 2019 (2)
    • July 2019 (4)
    • June 2019 (3)
    • May 2019 (3)
    • April 2019 (1)
    • March 2019 (1)
    • February 2019 (2)
    • December 2018 (3)
    • November 2018 (3)
    • October 2018 (5)
    • September 2018 (5)
    • August 2018 (5)
    • July 2018 (5)
    • June 2018 (2)
    • May 2018 (1)
    • April 2018 (3)
    • March 2018 (1)
    • February 2018 (1)
    • January 2018 (1)
    • December 2017 (1)
    • November 2017 (5)
    • October 2017 (1)
    • September 2017 (2)
    • August 2017 (4)
    • July 2017 (4)
    • June 2017 (3)
    • May 2017 (4)
    • April 2017 (3)
    • March 2017 (7)
    • February 2017 (6)
    • January 2017 (2)
    • December 2016 (5)
    • November 2016 (2)
    • October 2016 (3)
    • September 2016 (4)
    • August 2016 (5)
    • July 2016 (6)
    • June 2016 (8)
    • May 2016 (2)
Create a website or blog at WordPress.com
Comrade's Wargames
Create a website or blog at WordPress.com
  • Subscribe Subscribed
    • Comrade's Wargames
    • Join 153 other subscribers
    • Already have a WordPress.com account? Log in now.
    • Comrade's Wargames
    • Subscribe Subscribed
    • Sign up
    • Log in
    • Report this content
    • View site in Reader
    • Manage subscriptions
    • Collapse this bar
 

Loading Comments...