I’ve spent some time lately returning to my fantasy dwarf heartbreaker army — The Expedition to Hearthspire. This army has been in existence, either in concept or on the actual tabletop, since the late 2000s, when I scraped together a handful of dwarves to play A Song of Blades & Heroes with my old game club back in Chicago.
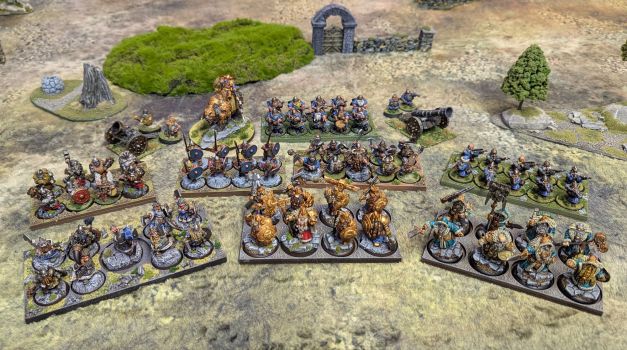
Since then, my collection of dwarves has increased consistently. Models became units. Units became a small army, then a larger army. Now I’ve got a fairly vast collection of painted dwarves, ready to undertake the quest for the ancient city of Hearthspire. Here’s the latest family photo, taken last month when I mustered the whole group for a game of Hobgoblin with John.
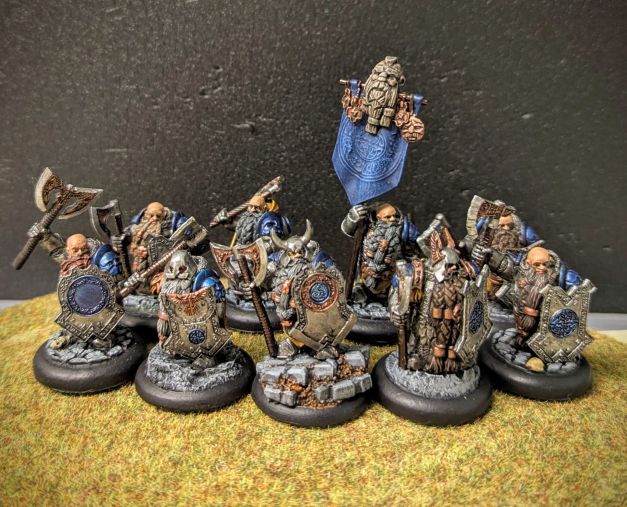
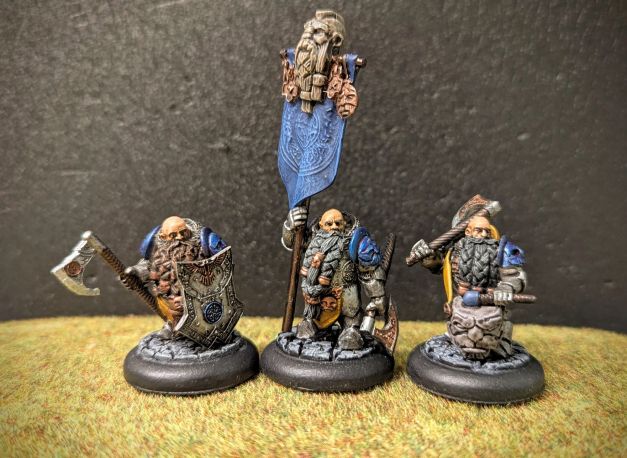
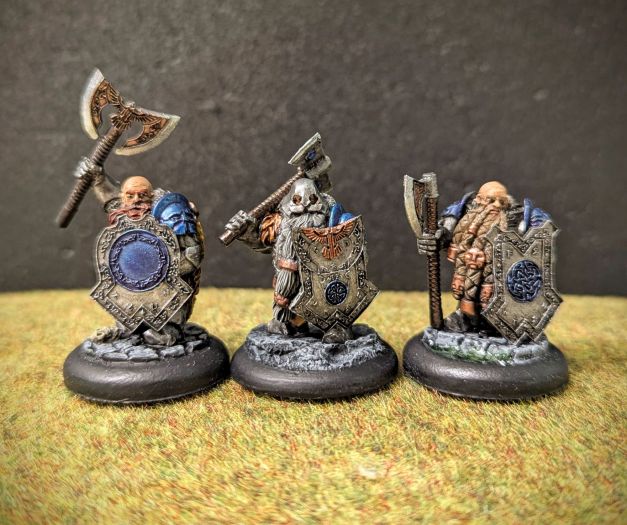
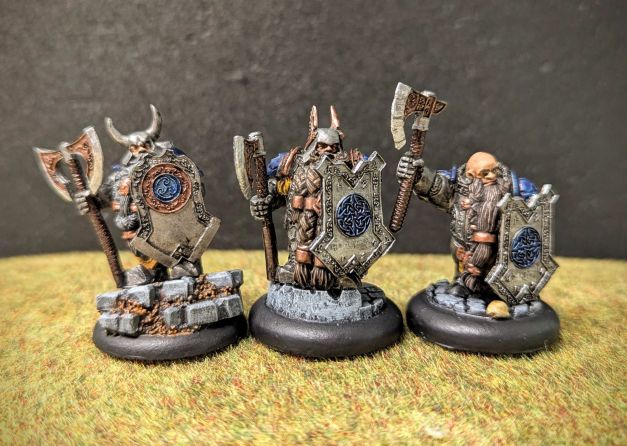
After that game, I felt inspired to paint up some reinforcements to further bolster the dwarven throng. Hobgoblin is an old school rank-and-flank type of game that encourages large armies. So I assessed the current state of my dwarf army and identified the distinct need for some elite, heavily armored dwarven infantry to anchor the center of my battle line.
I found what I was looking for in a big box full of various units and figures from Scibor Monstrous Miniatures – one of my all-time favorite makers of chunky, characterful dwarf models. (Yes, it’s true, I have so many Scibor kits in my dragon hoard that they have their own dedicated box.)
These guys were a lot of fun to paint up. I’m not always fond of bare heads (something about my lack of precision and patience when painting faces) but these guys weren’t too difficult.
I painted these guys up over the summer, and they’ve yet to see the battlefield. I’m sure they’ll eventually take to the field in a game of Hobgoblin – I played a session earlier this year with John and got my butt kicked. (And I convinced myself the reason I lost is because I didn’t have a sufficient critical mass of armored dwarvess. Problem solved!!)
Stay tuned for more content in general from Comrade’s Wargames. After a long drought, I’m easing back into the saddle to share more quality hobby content with my tens of readers.
We got together earlier in September for a game that could very well represent the grand finale of our Grimdark Future campaign.
Recall that we launched our campaign (The Cauldron) at the beginning of 2023 as an escalation league, wherein each player would start with a handful of models each and play smaller skirmish games of Grimdark Future Firefight, slowly adding more models as we went along through the spring and summer.
I’m happy to report that this approach proved to be a smashing success! We all stayed motivated to build new armies, one unit at a time. At our height, we had 8 players participating in monthly games. Now we’re approaching the end of 2023 and we all have decent sized armies that have gained some experience on the tabletop…mission accomplished, I’d say!
So, this game was a bit of a bookend for our highly successful campaign.
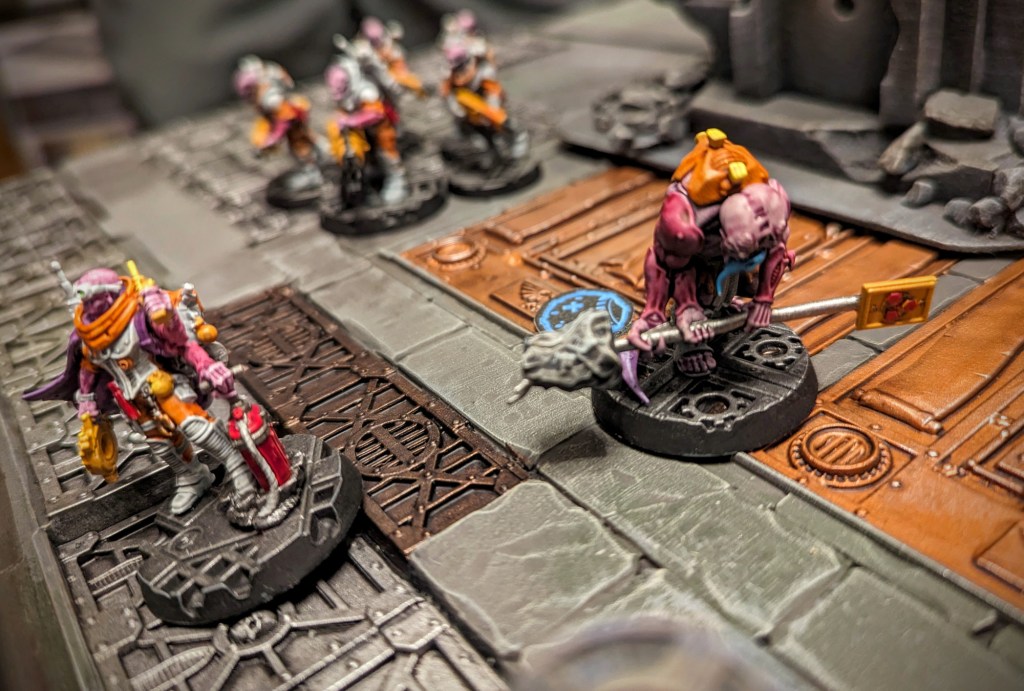
We had 4 players for this game, and everybody wanted to bring some of their larger, more expensive models (tanks, mostly), so we decided to go for a larger 2-vs-2 team game. We set the game in the upper reaches of Ardent Maxima, a hive city on the planet Gamma Euphorion Prime that was in the process of falling to the forces of darkness. Daniel’s newly painted Realm of Battle terrain tiles provided a stunning backdrop for this game.
Chaos Space Marines from the Death Guard legion had allied with Genestealer Cultists boiling up from the depths of the underhive to push the defenders of the Imperium back to the very highest levels of Ardent Maxima. After the destruction of the monument to St. Deneia in last month’s game, the Imperial defenders retreated to link up with their Eldar allies.
The forces of the Imperium and their Eldar allies made their stand in a vast plaza that had been defiled by thick, fibrous tendrils of fleshy matter. The origin of these throbbing purple members was unknown – were they some organic artifice of the Genestealer Cult made manifest, or perhaps a symptom of a planetwide plague delivered by the followers of Nurgle? No one dared ask.
John’s Imperial Guard took to the field alongside Josh’s Eldar – or Aeldari, if you prefer. They had some hard-hitting units, but they would be hard pressed to counter the advance of the forces of evil as the game got underway.
The game began with some long-range firepower as the armored vehicles opened up on each other. My Chaos Predator (a new addition to my army, nice!) dug in behind a makeshift barricade and unloaded its weaponry on the distant shapes of a couple Leman Russ battle tanks, barely visible behind the haze of dust and smoke.
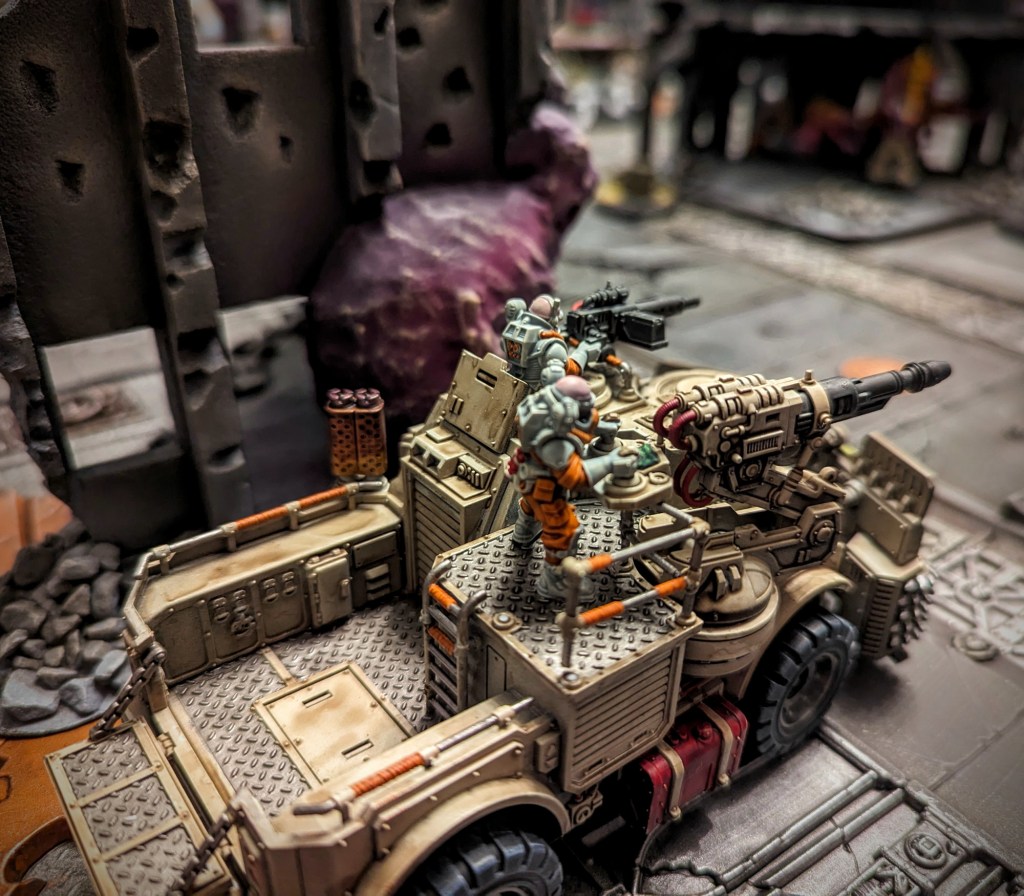
With a roar of combustion engines, Daniel mobilized his fleet of trucks and began advancing on the objectives. Cultists wielding a variety of improvised weaponry scaled the crumbling masonry of a shattered building and brought fearsome firepower to bear on the Imperial armor.
The cultists’ advance brought them crashing headlong into the Eldar vanguard. With a guttural howl, the cultists swept into the frail, spindly looking space elves, blasting the infantry apart with heavy caliber weaponry and rending their grav tank into utter wreckage.
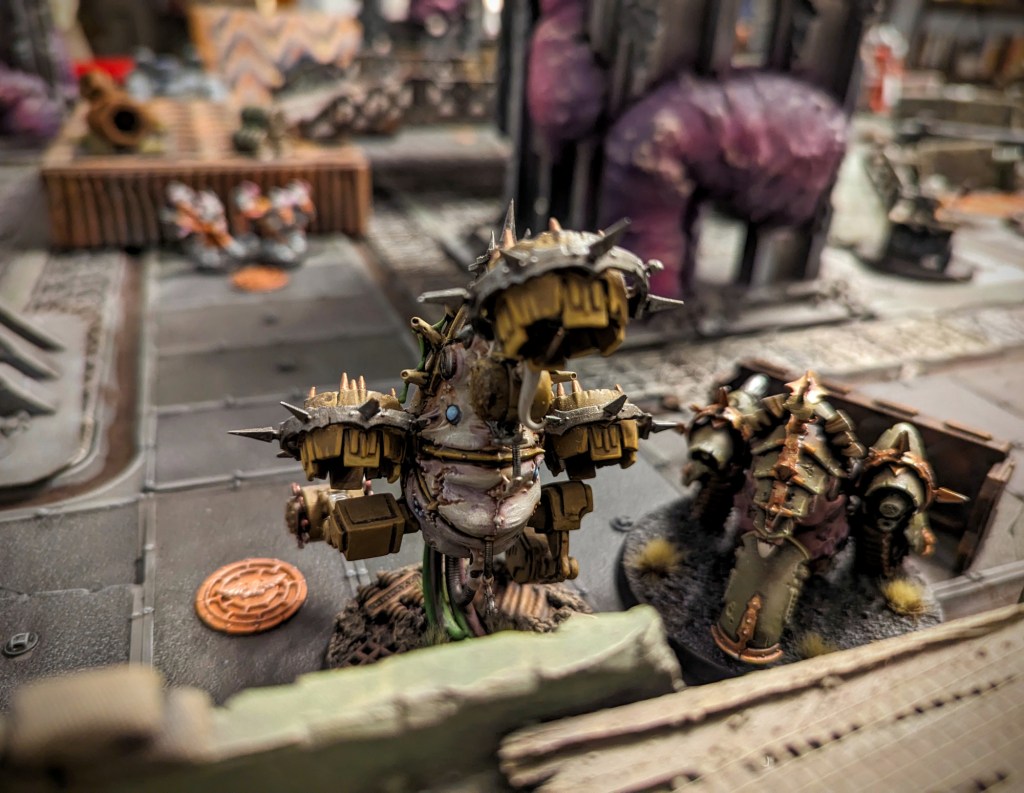
On the left flank, the foul daemon engines of Nurgle roared to life, following the cultists as they advanced to seize an objective located athwart the rusted TECHNOBRIDGE.
Even as the Death Guard daemon engines were pressing their advance on the right flank, realspace flickered and frost scabbed the pitted metal flooring as reinforcements arrived from the Warp: a foul Daemon Prince of Nurgle and a trio of battle-hardened Blightlord Terminators.
These lumbering behemoths arrived in the Imperials’ backfield and immediately commenced sowing havoc and despair. Terminators are jacks of all trades in Grimdark Future – OK at everything, great at nothing. Their mere presence had the desired effect of ratcheting up the tension. The defenders’ line appeared fragile – would it falter??
Ultimately, the TECHNOBRIDGE did not fall to the forces of Chaos. It was defended, at great cost I might add, by Eldar Dark Reapers led by Maugan Ra, backed up by the reliable firepower of the two Leman Russ tanks.
The defense of the TECHNOBRIDGE seemed to stiffen the spine for the Imperial and Eldar defenders, and they mounted a late surge against another objective located within a ruined multi-story building.
The timely arrival of some Imperial Guard Stormtroopers/Kasrkin/Tempestus Scions, backed up by the graceful shape of the Eldar Wraithlord, put the objective into serious jeopardy. There was only one solution – pulp those stormtroopers into a fine red paste by driving Daniel’s rockgrinder truck through the middle of the them! Yee-haw!
This action was followed up by a volley of fire from the Chaos Predator, which had been serving as effective fire support for most of the game.
With the endgame approaching, the Predator rumbled out of its fighting position and motored toward the central objective, located amid some puddles of toxic waste (dangerous terrain, in the parlance of Grimdark Future).
That bold advance was enough to seal the victory for the forces of Chaos. This was a very close fought game that definitely could have gone either way up until the final turn. Those are the best types of games – the ones where both sides are competitive until the very end.
So, this may prove to be the final game of The Cauldron, our grimdark/Inq28 campaign that has inspired a frenzy of painting and terrain building over the last 10 months. If you haven’t read through our past battle reports, do yourself a favor and take in the majesty of The Cauldron on Comrade’s Wargames. You’ll be glad you did.
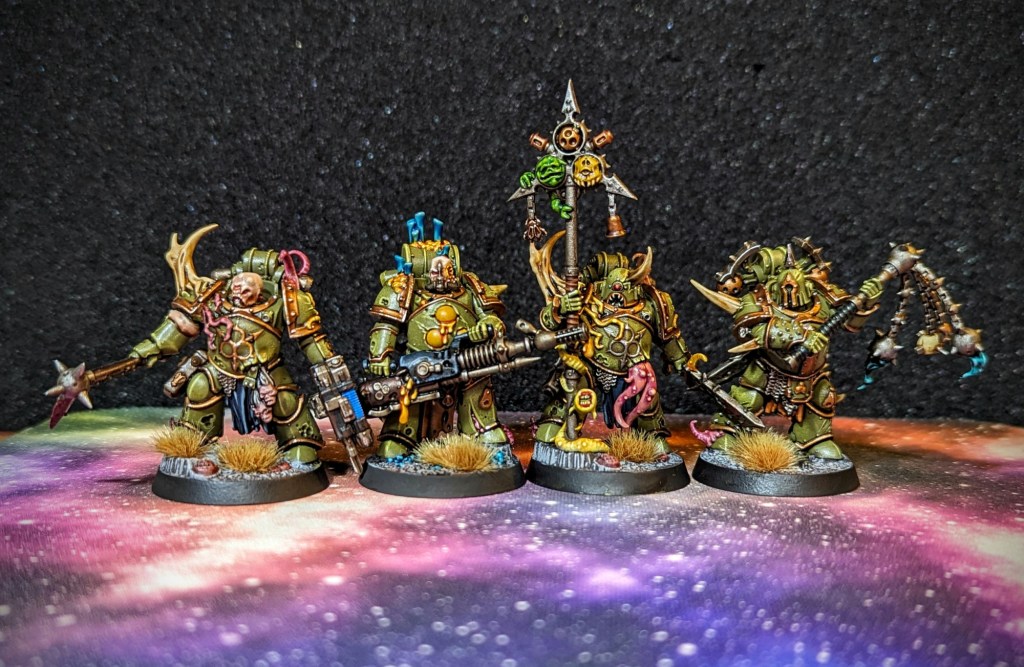
These models were originally released a number of years ago, primarily for the Japanese market, and they were only recently released earlier this year in the USA. They’re packaged and sold as individual blind boxes that contain 1 random miniature from the 8 models in the series.
I bought a couple of these guys and then traded for a few of the others. I ended up with a duplicate of the standard bearer guy, which gave me an opportunity to convert up the surplus model. He’s the guy on the left in the photo below.
But here’s the interesting (and slightly silly) backstory: I’ve actually owned these models before, back in 2020. When they were released for the Japanese market, they were commonly sold as a sealed case containing one of each of the models in the line, including the Malignant Plaguecaster that appeared less frequently and was sort of a chase rare. I bought my sealed case in December 2020 and then promptly lost interest in my Death Guard army for a while.
Over the next two years, the Death Guard Heroes set went out of print and started to command a premium price on the secondary market. I did a sober analysis of my still-sealed box – did I really need more Plague Marines? Would I truly get around to building and painting these guys? I wisely decided to “sell into the hype” and made a tidy little profit on my box.
I figured that was the end of the story, yet here we are – I’ve re-purchased those same models (for a much more reasonable, non-premium price, I must admit). BUT! I’ve also finished painting them, so I win in the end.
Anyway, it’s a silly little story that just goes to show how much I enjoy regular, run-of-the-mill Plague Marines as the backbone for my Death Guard army.
As a bonus, here’s one more Plague Marine that I painted up around the same time. He’s converted from one of the Chaos Space Marine Chosen from the Dark Vengeance boxed set, with some extra bits from my Putrid Blightkings leftovers.
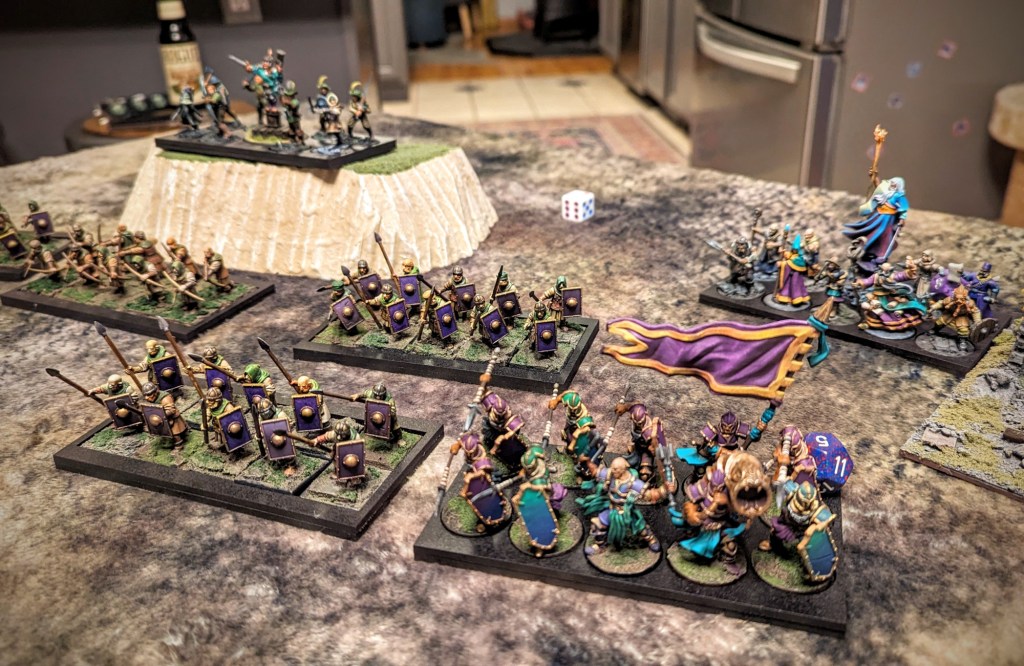
Last weekend John and I got together to try out Hobgoblin, the forthcoming miniatures wargame from Mike Hutchinson (creator of Gaslands). Hobgoblin aims to be a mass battle fantasy wargame that combines old school rank & flank maneuvering together with a handful of speedy, modern game concepts. The overall goal is a game that lets you use all of your cool fantasy miniatures, arranged in big blocks of troops reminiscent of classic Warhammer, but streamlined to the point where you can play a game to conclusion in a couple of hours.
It’s a tall order, for sure! “Rank & flank” is not at all synonymous with “fast playing,” in my humble opinion. So I was intrigued to see what Mike had in mind as I cracked open the early access PDF. Hobgoblin had a successful Kickstarter earlier this year to produce a nice hardcover version of the rules, and the early access rules have been distributed and updated for backers (such as me) to play around with until the final release comes along.
John’s House Begovic infantry marches to war!
From the outset, Hobgoblin has a lot of the signposts that appeal strongly to me as a non-commercial, primarily indie wargamer. Among them:
Use any miniatures you want.
No specialized army lists – both players build armies using the same list of common units, plus a couple dozen special keywords for flavor.
Your cool toy soldiers always get to fight back, even when they’re in the process of being wiped out.
Only complete units are removed as casualties, no individual model removal.
Only the overall size of the unit matters – the individual figures don’t matter, so you can go nuts creating unit fillers, mixing & matching figures from your collection, etc. A block of “heavy infantry” could be 10 spearmen in chainmail, or 3 steam golems, or 1 young dragon perched on a rocky outcropping on a scenic base.
Along those same lines, the overall sizes of the units are flexible enough to accommodate most bases and movement trays. A typical infantry unit, for example, can be 100mm – 200mm for its frontage, and anywhere from 40mm to 160mm deep. Anything that fits within that spectrum works.
Although there’s not a lot of lore present in the early access rules, it’s clear that there is a ton of lore lurking in the shadows, waiting to be foisted upon us whenever the complete rulebook is published. The tidbits that are present – a vast, subterranean world of endless caverns, bizarre ecosystems filling the sightless depths, bone-grinding magic that feels utterly alien – are absolutely delicious, and definitely leave you wanting more.
For our game, we decided to try a small game at 3,000 points per player. At that threshold, we were both able to bring 8 units. I pulled out my vintage all-metal Skaven army that I built a few years ago. (Well, almost all metal…I acknowledge that the plastic kits for the Doomwheel and Warp Lightning Cannon are fantastic and much easier to work with.)
John brought his ever-growing troop of sad sack humans led by a despised field commander and a cowardly wizard. (Yes, cowardly and despised are both keywords that you can select for your units. These are both negative keywords, so they actually give you more points back for your army when you select them!)
Rank upon rank of beautifully painted miniatures … tabletop wargaming at its finest!
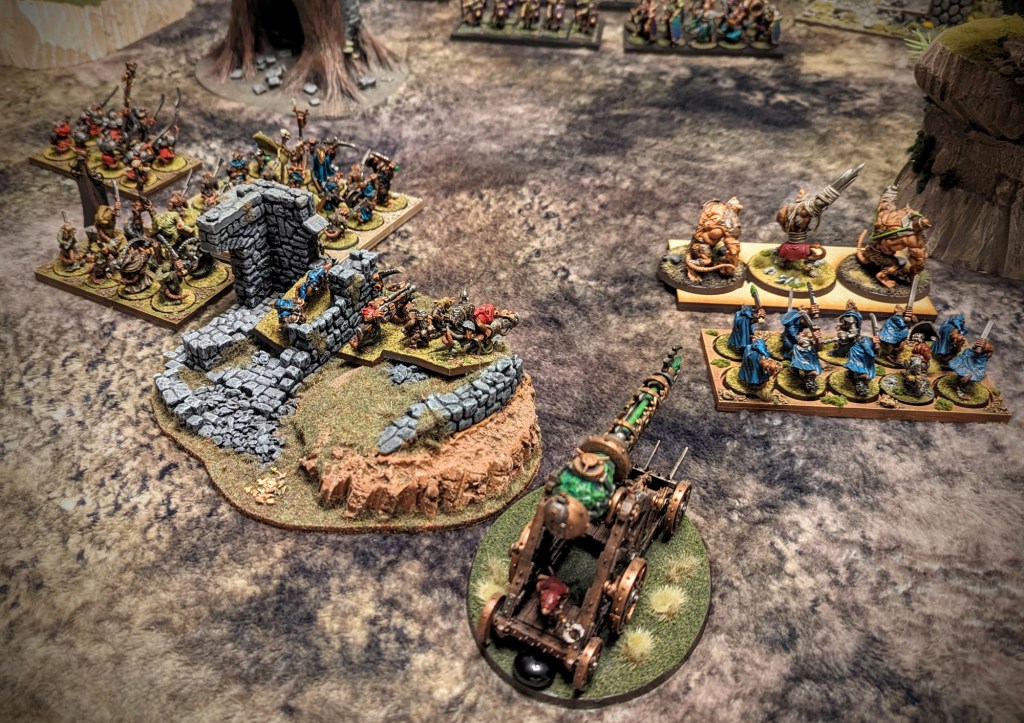
We rolled randomly to determine our scenario and overall terrain setup using the fun battle generator available online. We ended up with some ruins, a couple hills, and two large impassable towers in the center of the table. These two towers would serve to channel our forces into the central killing field. This definitely accelerated the carnage but also prompted some mind-numbing unit movement as we edged our gigantic rectangles of troops around these impassable obstructions.
An early clash led to some mismatched expectations: the heavy cavalry successfully charged the Doomwheel, but the Doomwheel hit back and wiped out the horsemen!
Hobgoblin uses a modified IGOUGO turn sequence, where players alternate casting spells, shooting, and then moving their units. In general, both players are active and engaged throughout the turn; you’re never more than a few minutes away from having a decision to make for one of your units.
Magic spells cost mercury, which is a resource that gets replenished at the start of each turn. You can hoard it between turns to save up for big spells, and you can also use a mercury token to re-roll a single combat dice. Spells always happen – there’s no rolling to see if it’s successfully cast. If you can pay the cost in mercury, your spell is going to kick off. It’s a fun, old-school effect that has the effect of keeping a sense of inevitability about magic for much of the game. Spells happen. Deal with it.
Fortune cards provide each player with a small number of one-off effects and save-your-ass resources that come in handy throughout the game. A typical fortune card might heal a unit, or grant a bonus in your next combat, or let you reposition a unit prior to fighting. You start with 4 Fortune cards and receive 1 additional each turn.
Ratmen shooters wielding clunky, hand-cranked weapons of doom!
Shooting is intentionally de-emphasized in Hobgoblin. Part of it is due to the lore – this game takes place in a sprawling underground grotto lit only by torches, watchfires, glowing runes, luminescent fungi, and other eldritch sources of illumination. In an environment like that, a unit of archers just isn’t going to make a big impact. From a mechanical standpoint, shooting can only ever inflict 50% casualties (measured in doom tokens) on a given unit. Shooting is very much designed to be a harassing mechanic that is employed from the flanks as the armies march toward each other for the massive, inevitable clash in the center.
And clash we did! There’s no innate benefit for charging into combat, so if you want to fight an opposing unit, it’s not essential that you be the first one to initiate the engagement.
My horde-sized block of light infantry attracted a lot of attention during the game. The large size made it difficult for me to maneuver additional units for support!
My horde-sized unit of light infantry was the single largest unit on the battlefield from a footprint standpoint, so it attracted a lot of attention as the game developed. As my Skaven horde began to get enveloped by enemy units, we encountered perhaps the most divisive aspect of Hobgoblin – the fussy wheeling and shuffling and repositioning that forms the heart of the rank & flank movement system.
Another look at the horde of light infantry. They’re being engaged by two of John’s units: a squad of heavy infantry (with the banner) and a squad of light infantry.
If you like rank & flank movement and lament its absence from many modern wargames, then you will appreciate when Hobgoblin is trying to recreate. For my part, I learned that I don’t miss rank & flank movement. LOL! I never played classic Warhammer and so I don’t have an innate affection for large squares of troops wheeling around the battlefield.
I particularly dislike the uber-awkward model placement that results from shuffling giant movement trays full of models in half-inch increments. I’m talking about trays of models perched on terrain with giant gaps underneath, or unit trays hanging off the edge of a sheer cliff because that’s how far you were able to move this turn, dammit! I very much subscribe to the “moving diorama” philosophy of wargaming, so aesthetics are important to me throughout a game. Hobgoblin lets this pendulum swing a bit too far in the direction of “gameplay over aesthetics” for my tastes. That’s really my one gripe about Hobgoblin.
Another example of engagement. The red-clad heavy infantry unit of ratmen is touching the opposing light infantry unit with just one corner, but that counts as engaged. No squaring up in Hobgoblin!
The combat resolution is extraordinarily satisfying – most units roll 10 dice and consult a chart to see their target number. Hits result in doom tokens, which accumulate throughout the turn but are only resolved at the end of the turn, after all units have had a chance to move and fight. Units that receive too much doom are defeated and remove from the battlefield – and their demise results in *more* doom for friendly units that witnessed the gruesome spectacle! Cascading doom situations really help push the game toward its inevitable, and gnarly, conclusion.
Fortune cards and mercury tokens provide a small measure of unpredictability – in our game, my giant Skaven horde had accumulated a whopping 26 doom tokens, more than enough to destroy it in the Doom Phase, but I had a Fortune card that allowed me to ignore the doom tokens for one crucial turn. As it turned out, this was enough to let the Skaven hold down the bulk of John’s units long enough to win the game.
John and I definitely miscalculated some of the rules interactions as we embarked on our inaugural game. And we learned a lot about the intended function of various units in the army lists. At the conclusion of our game, we both discussed ways we could have adjusted or fine-tuned our army lists to better reflect the sort of army that we wanted to bring to the battle.
All in all, Hobgoblin is a super solid addition to the pantheon of mass battle fantasy games. I’m not crazy about the rank & flank movement, for reasons that I’ve articulated a few paragraphs earlier. Frankly I’d love to see a skirmish sized game using the Hobgoblin game engine – limited list of units, doom tokens, fortune cards, all of it – and just eliminate the rank & flank stuff.
We’ll be playing this one again soon, so stay tuned for more!
Hark, gentle reader! Do you hear that? The grinding of massive gears hints at some foundational updates to Comrade’s Wargames. Specifically, I have created a new section on ye olde blog to collect the various narrative campaigns that I have taken part in recently. These campaign chapters have heretofore been sprinkled throughout my blog as individual posts, spanning months if not years. The new page attempts to list them all in rough chronological order for ease of reading.
The page itself is creatively named “Narrative Campaigns” and it is linked in the menu bar on the front page of this blog.
The page, in turn, displays links to three additional pages showcasing the backstory and a listing of battle reports from three recent narrative campaigns. They are:
In keeping with tradition here at Comrade’s Wargames, these narrative campaigns feature beautifully painted miniatures from me and my buddies, alongside visually stunning terrain and a compelling tabletop narrative. I’ll continue to update these pages as we play additional games for them. Grab a cup of your favorite beverage and dig in!